The Divine Mother’s Sādhana – a Kundalini Yoga Class with Bīja Nyāsa

The Divine Mother’s Sādhana – a Kundalini Yoga Class with Bīja Nyāsa

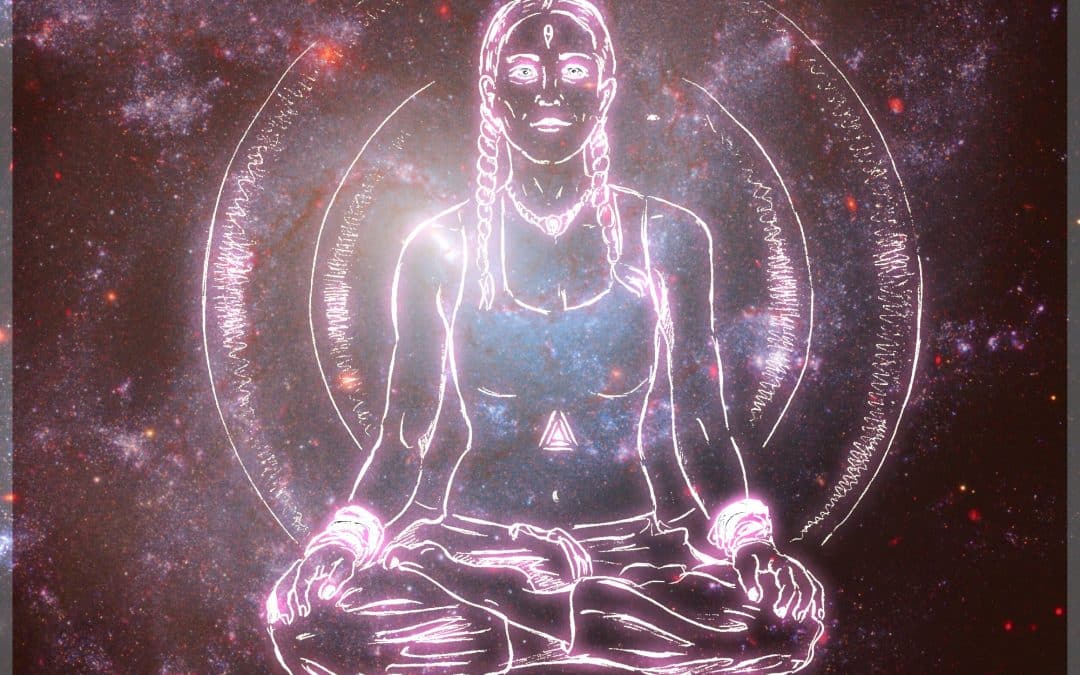
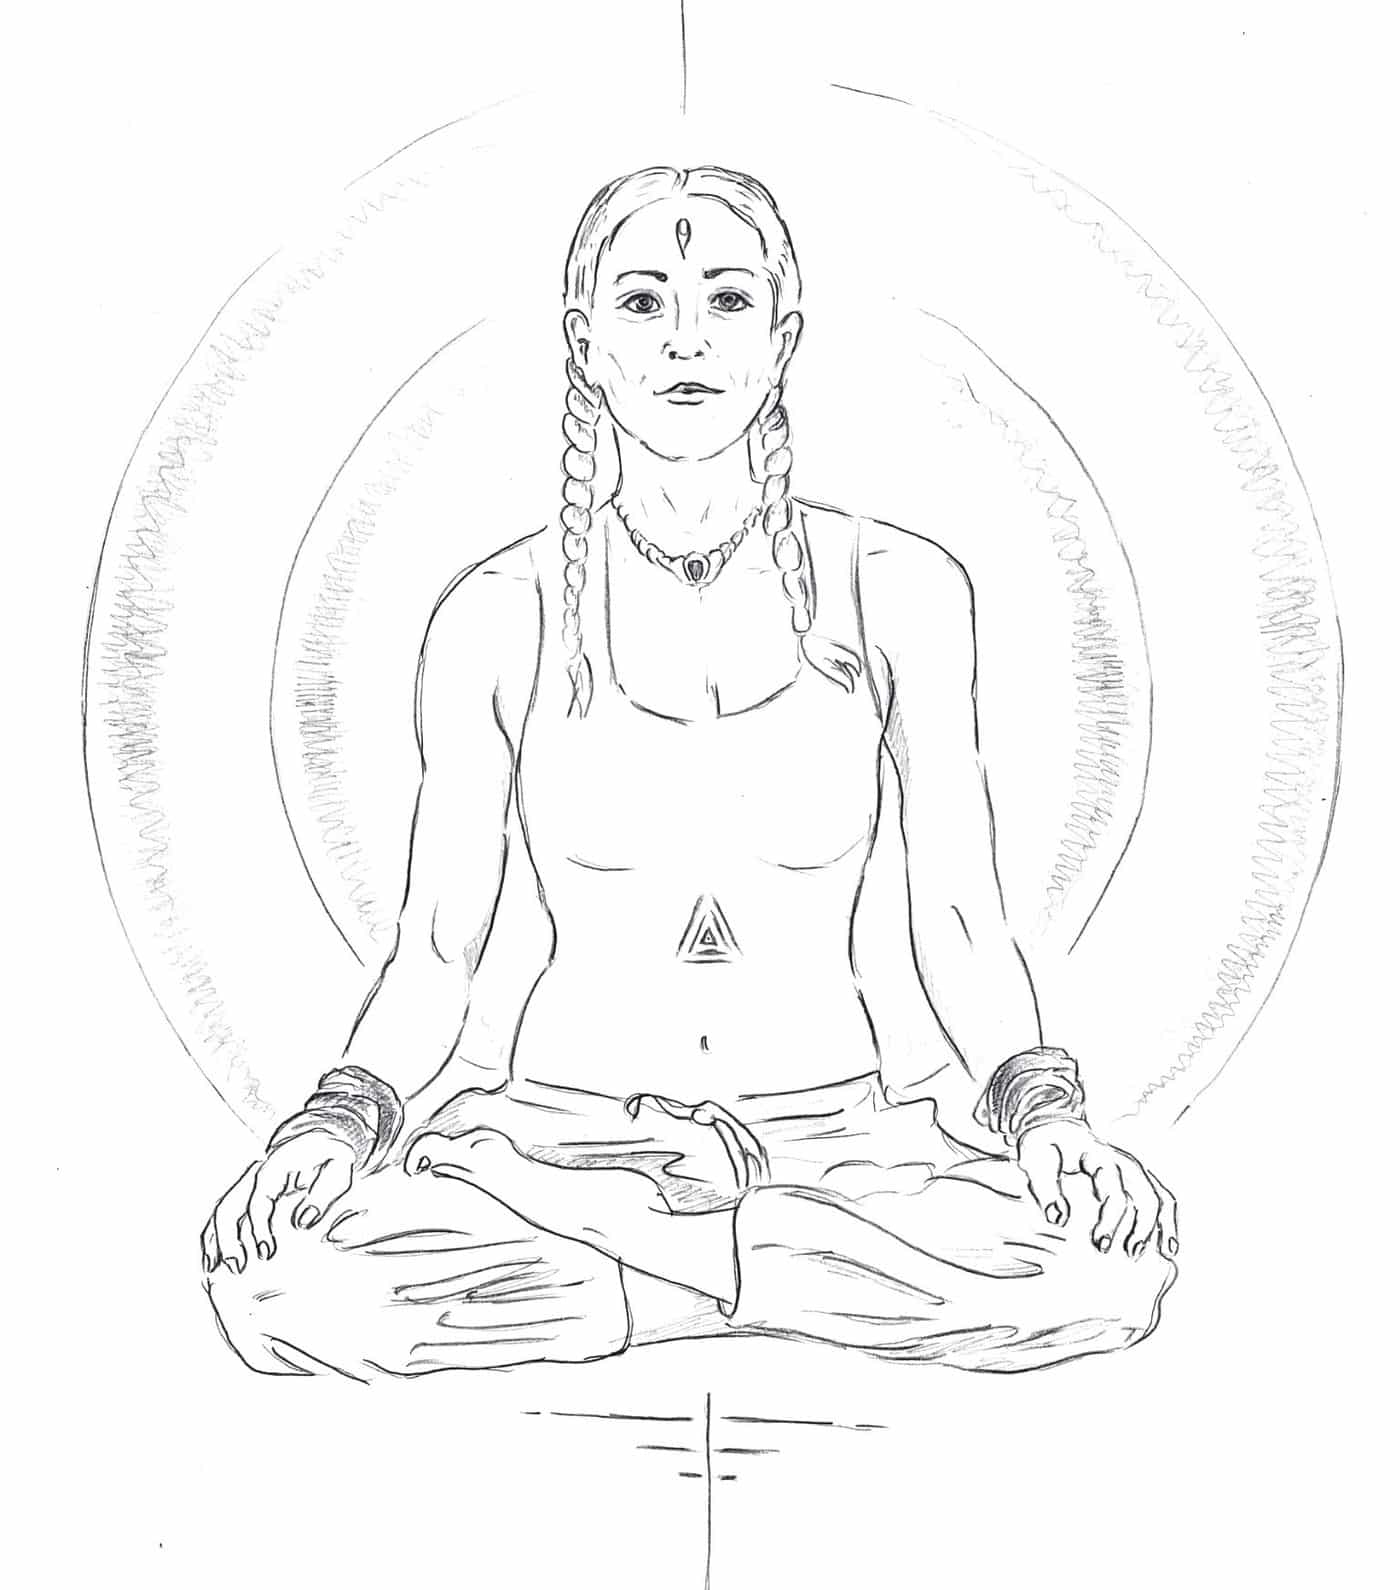
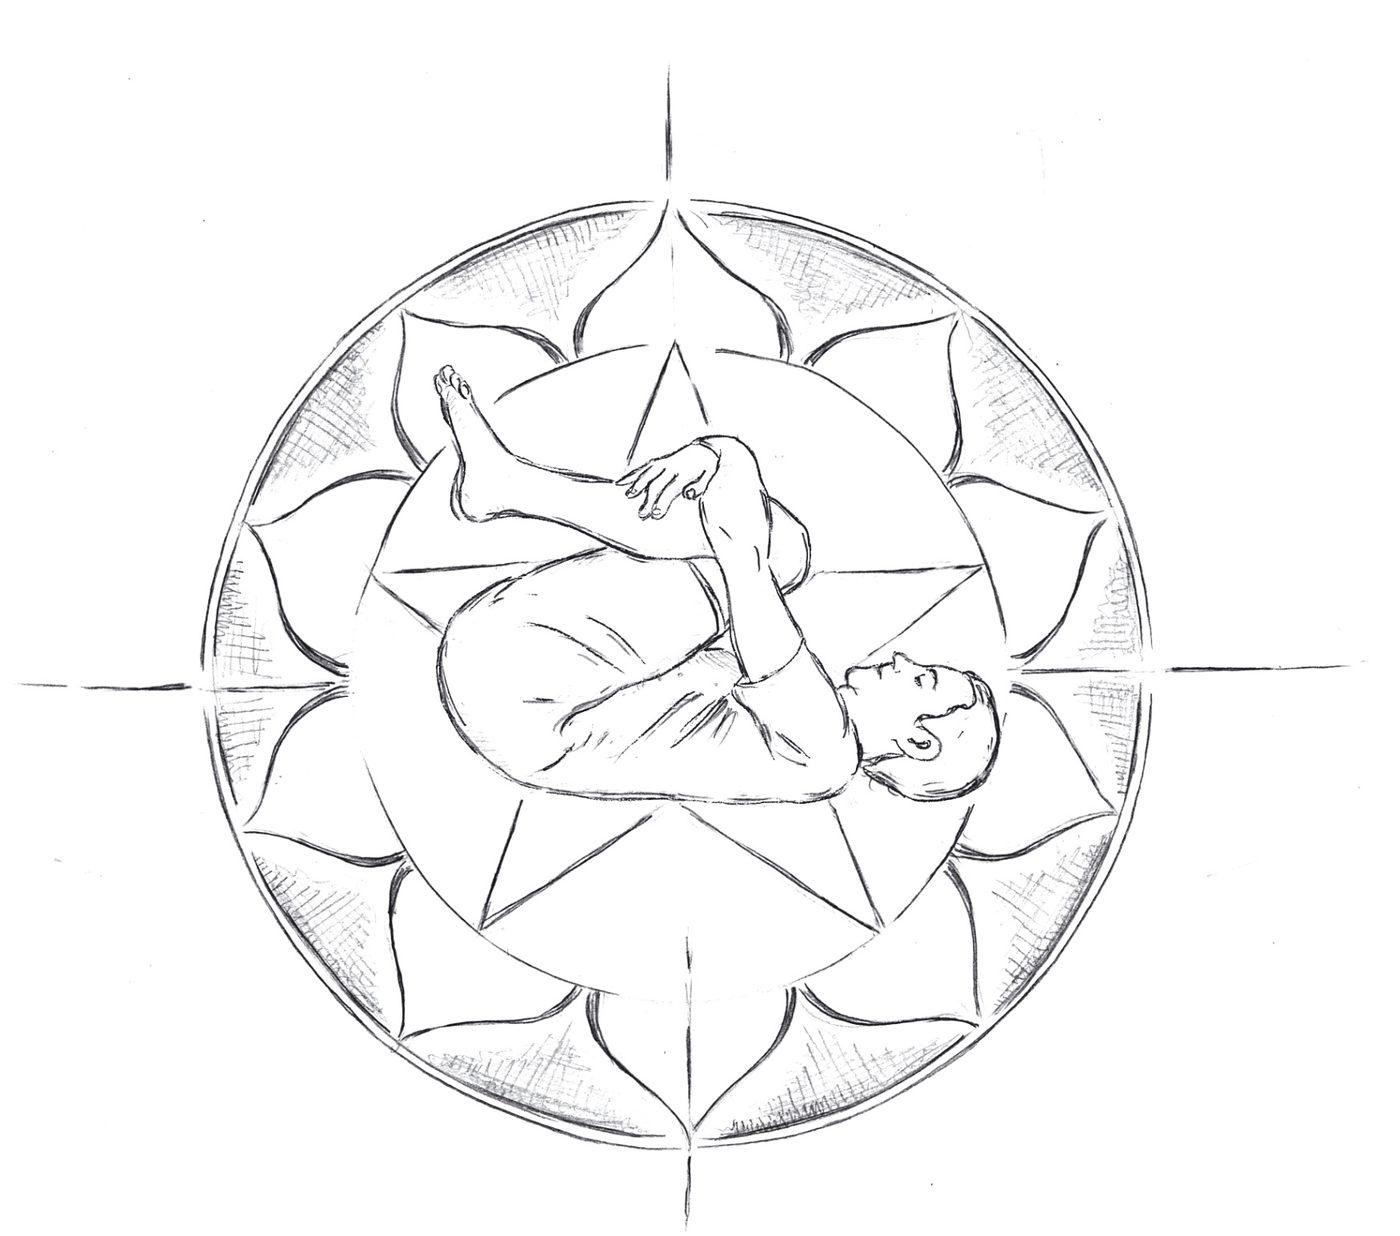
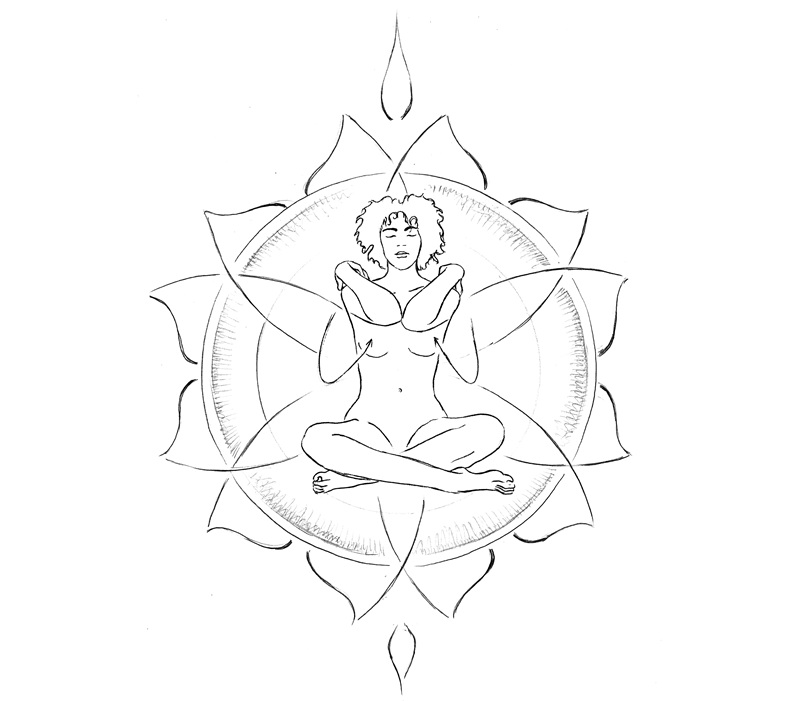
Divine Mothers Sadhana Kundalini Yoga, mandala with bird and sushumna axis, drawing Matsya Yoga Vienna

Note: All exercises are illustrated by hand with a pen and written by Clemens Biedrawa.

The Divine Mother’s Sādhana – a Kundalini Yoga Class for Transformation

Some classes open the body. Some train the breath. And some do something else entirely: they lay a warm hand on the heart and let it widen.

The Divine Mother’s Sādhana is one of those. It is a kriyā – a practice that unblocks the universal power of action, opens the heart and heals the mind. Twelve classical postures, four forms of breath in each of them, and at the end bīja nyāsa: the placing of the seed sounds within the body.

This sādhana was given to our teacher by his first teacher, Svāmī Vidjanand, a disciple of Svāmī Satyānanda, in order to awaken the energy of the Divine Mother. It is gentle and loving, and it is meant to cover you with the warm hand of your ever expanded being.

Below you will find the complete class with all its illustrations, the background to nāḍiśodhana, kapālabhāti and bhrāmarī – and at the end a detailed guide to bīja nyāsa, the heart of our Kundalini Yoga practice.

What is the Divine Mother’s Sādhana?

Sādhana means practice – the steady means by which something is realised. Kriyā means action. A kriyā in Kundalini Yoga is a self-contained sequence that awakens a particular force, moves it through the body and finally brings it to rest in the centre. You can read more in our overview of the kriyās and classes in Kundalini Yoga.

The force awakened here has a name: the Divine Mother. In tantric language she is śakti – the power that brings everything forth, carries it and takes it back into herself. She is not distant. She is the pulse in your own belly, the warmth in your hands, the sound that remains when every thought has fallen silent.

So this class is not a practice about the Mother. It is a way of feeling her in your own body. It is a purification sādhana: it dissolves whatever blocks the free flow of action.

The structure in one sentence

Two breathing techniques to prepare, a sun salutation to warm, ten seated and kneeling postures – each with deep breathing, kapālabhāti and bhrāmarī – then bīja nyāsa and śavāsana.

Duration: about 60 to 90 minutes. Level: suitable for beginners, endlessly deepenable for experienced practitioners.

The secret: four forms in every posture

There is one instruction in this class that is easy to skim past, and it changes everything. Our teacher passes it on exactly as he received it:

I have given the minimum times of 30 seconds kapālabhāti and 3 times bhrāmarī in each posture. Know that you can expand them as much as you want. My teacher told me that if one holds each position one minute with deep breathing, one minute with kapālabhāti, one minute with bhrāmarī and one minute with the mantra Oṃ Mā from the heart, then this kriyā becomes a powerful means of awakening Kuṇḍalinī.

Four forms. Four minutes per posture. Ten postures. That is the long version, and it is worth it.

  1. Deep breathing – the posture is inhabited, the body opens.
  2. Kapālabhāti – the fire at the navel is kindled, prāṇa begins to move.
  3. Bhrāmarī – the sound body expands, the mind falls quiet.
  4. Oṃ Mā – the mantra of the Mother, sung silently within, gathers everything in the heart.

If you are short of time, take the minimums: three deep breaths, 30 seconds of kapālabhāti, three rounds of bhrāmarī. That too is a complete class.

Why this is a class in Transformational and Kundalini Yoga

Transformational Yoga does not mean you are a different person when the class ends. It means the practice takes an energy that is bound in a lower, narrower form and carries it into a wider, freer one. That is the real movement of Kundalini Yoga: not adding something, but lifting what is already there into its higher shape.

The tantric tradition describes this transformation very concretely. Every element has a bound and a released form, and each chakra carries a dhāraṇā – a gathering of awareness that holds the transition:
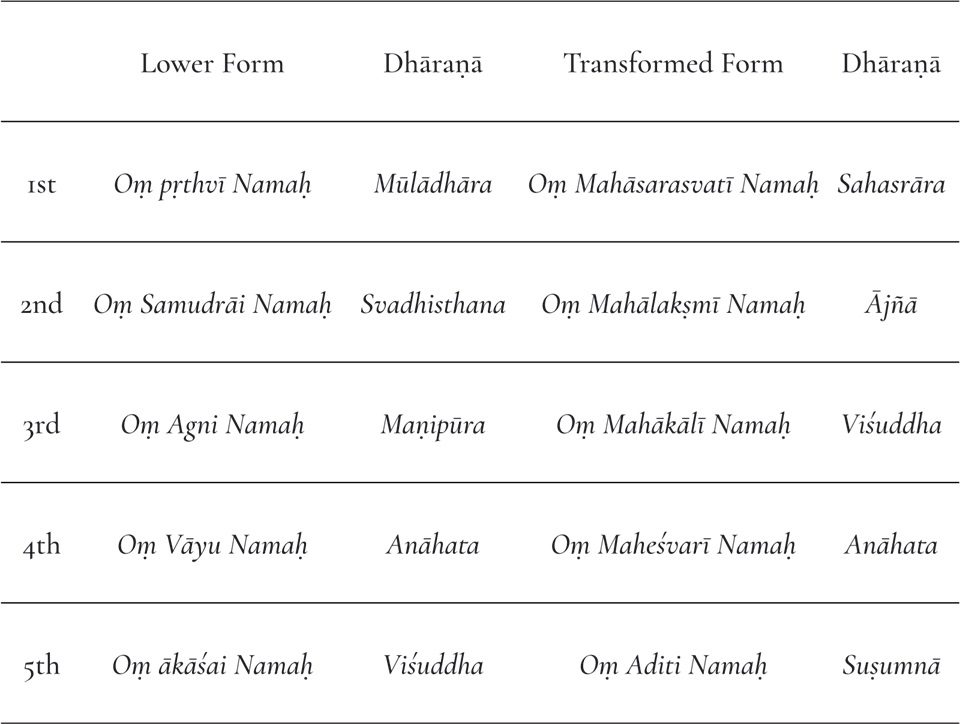
Chakra transformation table, lower and transformed form of the elements with dharana, Transformational Yoga Matsya Vienna

The Divine Mother’s Sādhana works exactly along this axis. Kapālabhāti awakens the fire, bhrāmarī dissolves it into sound, the mantra carries it upward, and at the end bīja nyāsa sets each element in its place. If you want to know the chakras not as a picture but as an experience, this is a very direct road.

You can go further in our YACEP Chakra Workshop and the YACEP Meditation Workshop. How Hatha and Kundalini Yoga relate to one another in our school is described separately.

The practice – step by step

Sit down before you begin. Fold your hands in front of your heart, take a few breaths and remember the teacher – the inner one as much as the outer. Then start.

1. Nāḍiśodhana – purification of the psychic network
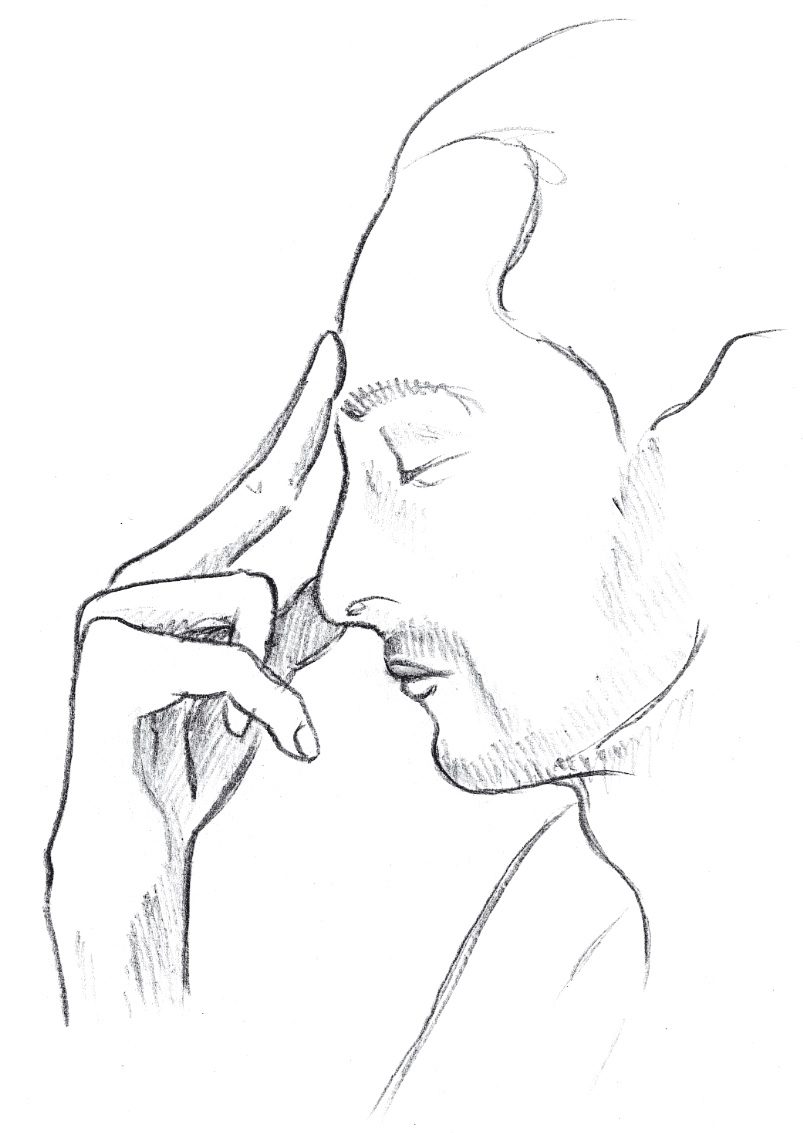
Nadishodhana alternate nostril breathing, hand at the nostril, Divine Mothers Sadhana Kundalini Yoga drawing

Nāḍiśodhana should be practised with full awareness, or not at all. There are many ways of creating breathing patterns, but in this context we use the simplest one to deepen the breath: keep the lengths of the in- and outbreaths equal in duration.

A mantra like Oṃ can help you count the time. The breath should be deep and strong. Pull mūlabandha whenever the breath turns and allow yourself a short kumbhaka – though no longer than two seconds. This stimulates the nāḍis and helps purification.

When you sit for your sādhana, you have nothing else to do, so do nothing else.

Practise 10–20 rounds.

2. Kapālabhāti – the breath of fire
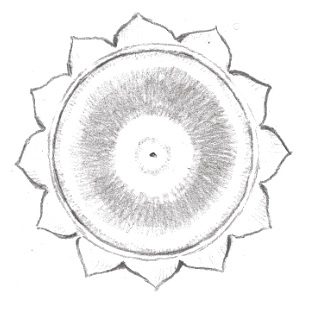
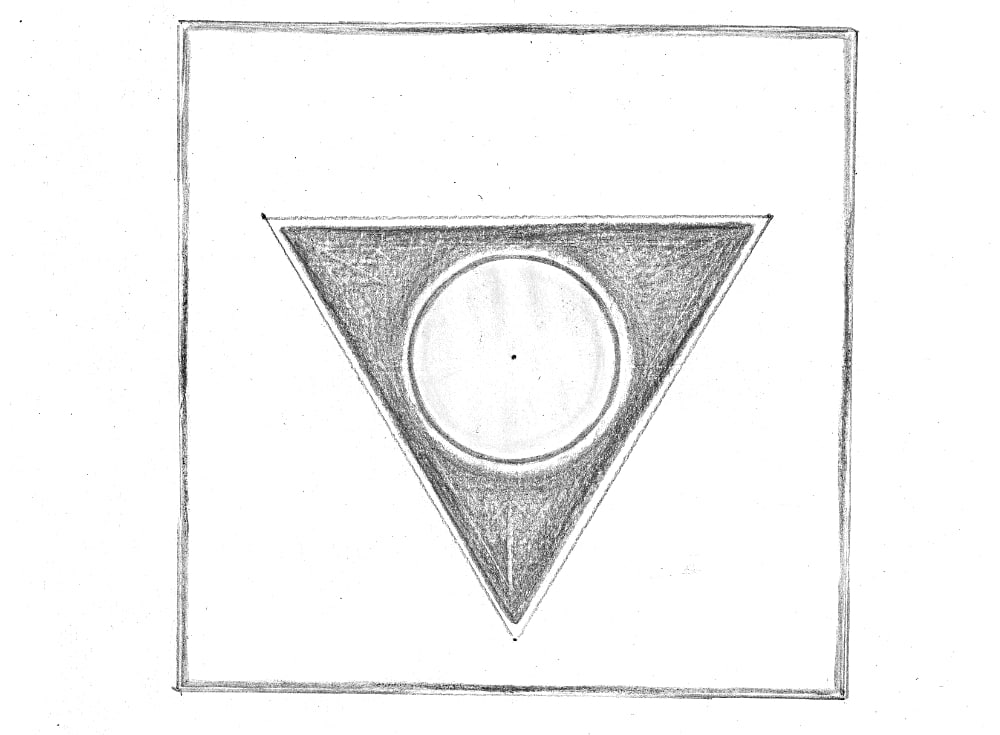
Kapalabhati sun, lotus mandala as image of the golden egg at the navel, Kundalini Yoga illustration Matsya Vienna

Gently pulse your navel on the exhalation and keep a steady rhythm. When you practise kapālabhāti, imagine a golden egg surrounded by subtle electric fibres. Imagine it moving up slightly when you push the air out, and down slightly when you breathe in.

When you feel the stimulation of the navel point, observe a fine stream of energy generated in the pelvis and expanding beyond the forehead. At the end, pull mūlabandha and retain the breath in the centre.

Practise for at least one minute.

3. Sūryanamaskāra – salutation to the sun

Sūryanamaskāra can be done with deep breathing, either with one breath in each position or as many as you need to find the right pace.

Purifying variation. If you are an advanced practitioner and wish to bask in the rays of the sun, practise this sun salutation with a gentle kapālabhāti pulse in the navel in every position. Let the sun’s hand only slightly touch each position, never forcefully. It is a gentle dynamic dance. Stay open.

Subtle variation. Each of the twelve positions is connected to a fundamental aspect of the sun. These aspects are mirrored in sonic form by twelve bījas.
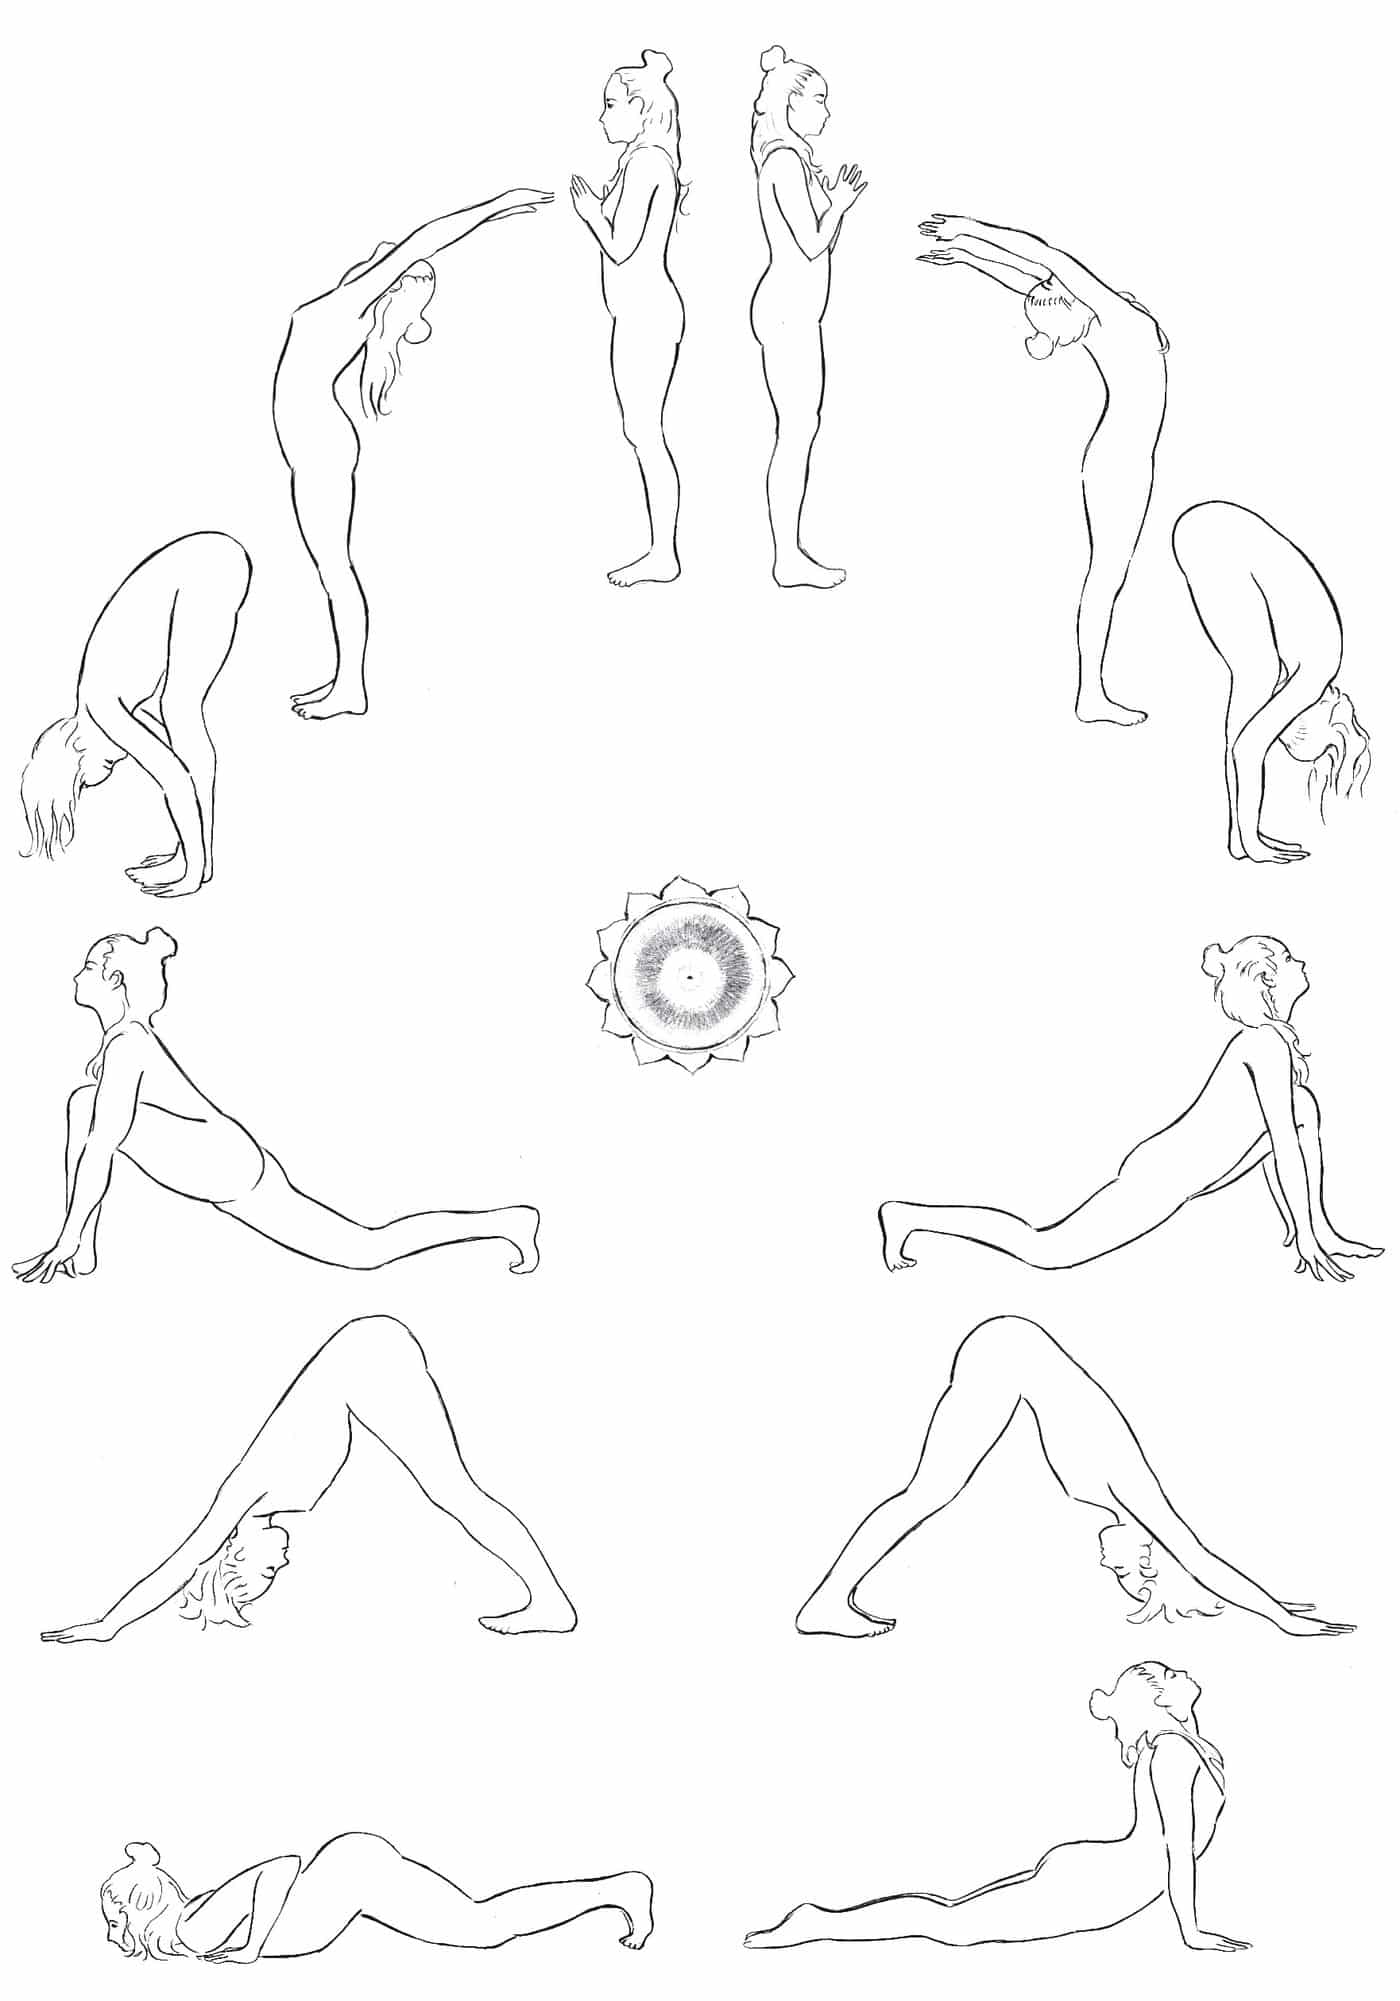
Suryanamaskara sun salutation, 12 positions in a circle with bija seed sounds, Divine Mothers Sadhana Kundalini Yoga
Hrāṁ Praṇāmāsana Prayer pose
Hrīṃ Hastottānāsana Raised arms pose
Hrūṁ Pādahastāsana Hands-to-feet pose
Hraiṁ Aśva Sañcalanāsana Horse-riding pose
Hrauṃ Parvatāsana Mountain pose
Hraḥ Aṣṭāṅga Namaskāra Eight-point salutation
Hrāṁ Bhujaṅgāsana Cobra pose
Hrīṃ Parvatāsana Mountain pose
Hrūṁ Aśva Sañcalanāsana Horse-riding pose
Hraiṁ Pādahastāsana Hands-to-feet pose
Hrauṃ Hastottānāsana Raised arms pose
Hraḥ Praṇāmāsana Prayer pose

Practise 12–36 rounds.

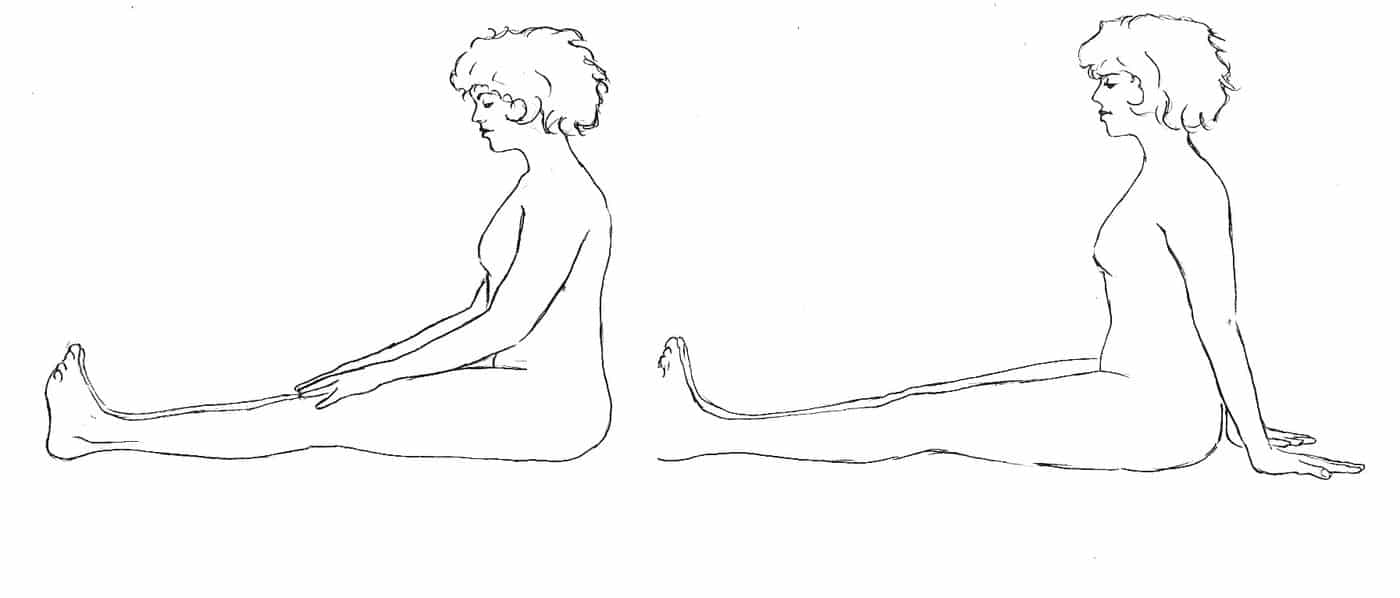
4. Jānuśirāsana – head to knee pose

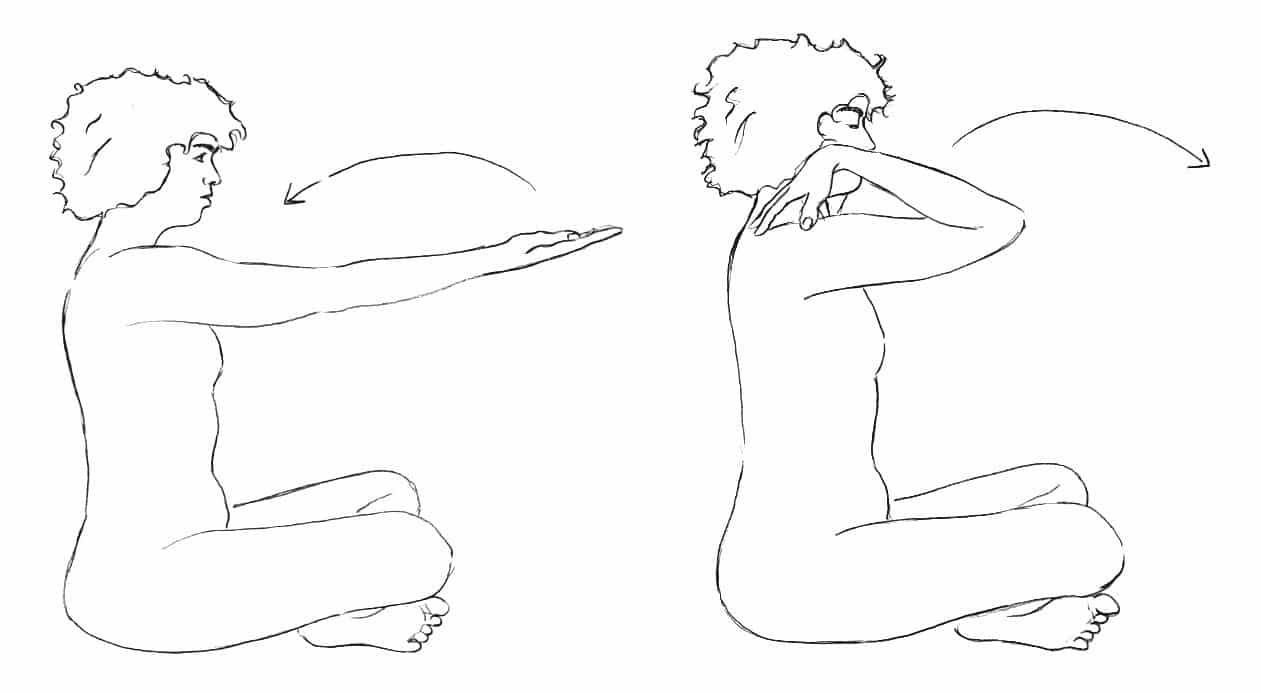
Janushirasana head to knee pose, forward bend over one extended leg, Divine Mothers Sadhana drawing

Practise three times with deep breathing. Stretch. Then at least 30 seconds of kapālabhāti and three rounds of bhrāmarī, on each side.

Remember that bhrāmarī is the expansion of your inner sound body. It resembles the sound of a swarm of love mad bees. It is the sound of pleasure; it silences the mind, expands you, relaxes you, guides you home. Fully surrender to it.

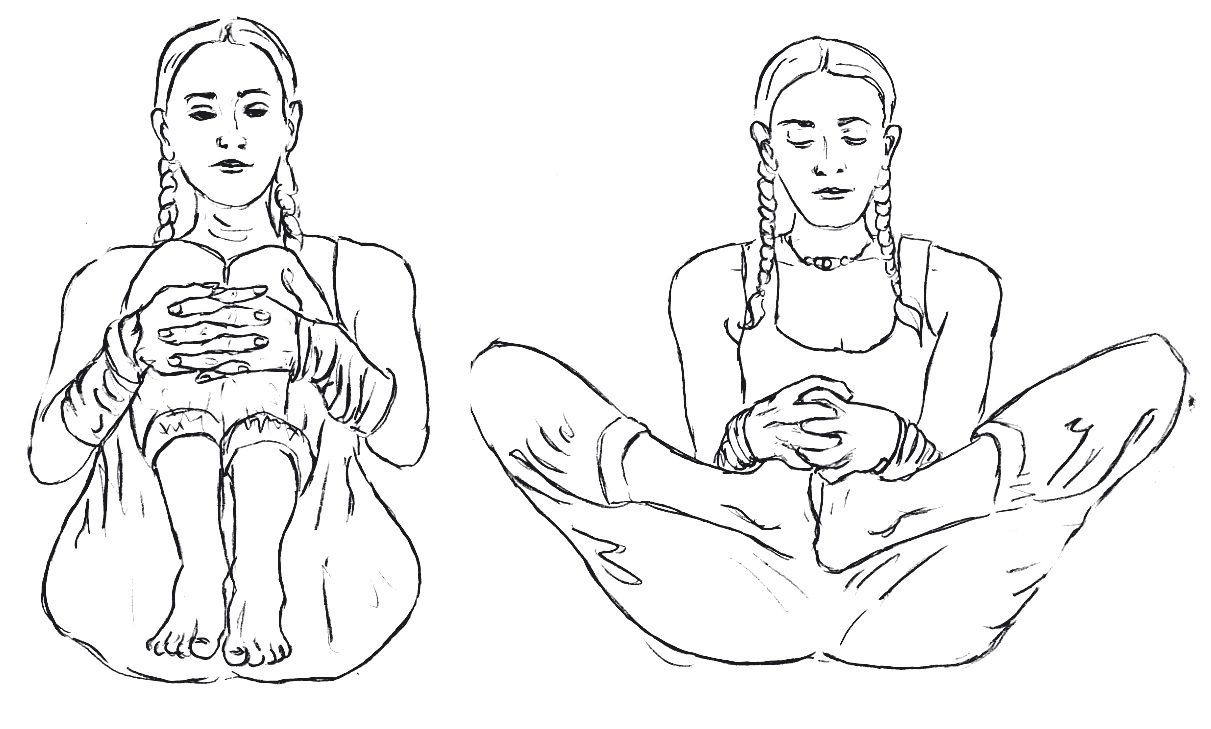
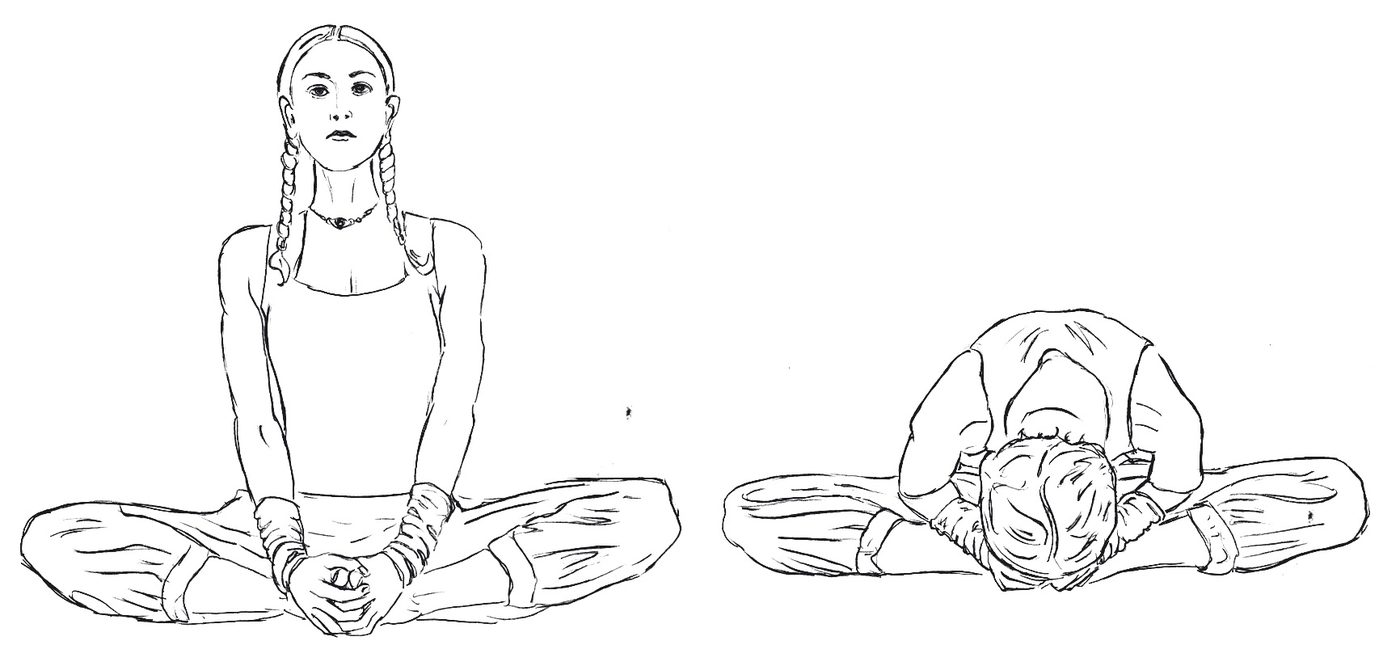
5. Titali Āsana – the butterfly pose

Titali asana butterfly pose seated with soles together, Divine Mothers Sadhana Kundalini Yoga drawing

Practise three times with deep breathing. Stretch. At least 30 seconds of kapālabhāti and three rounds of bhrāmarī.

The butterfly opens the hips and the pelvic floor – the seat of mūlādhāra. Give it time and the breath will change by itself. More about this centre in our article on the Mūlādhāra Chakra.

6. Paścimottānāsana – the back stretch pose

Pascimottanasana back stretch pose, seated forward bend, Divine Mothers Sadhana drawing

Practise three times with deep breathing. Stretch. At least 30 seconds of kapālabhāti and three rounds of bhrāmarī.

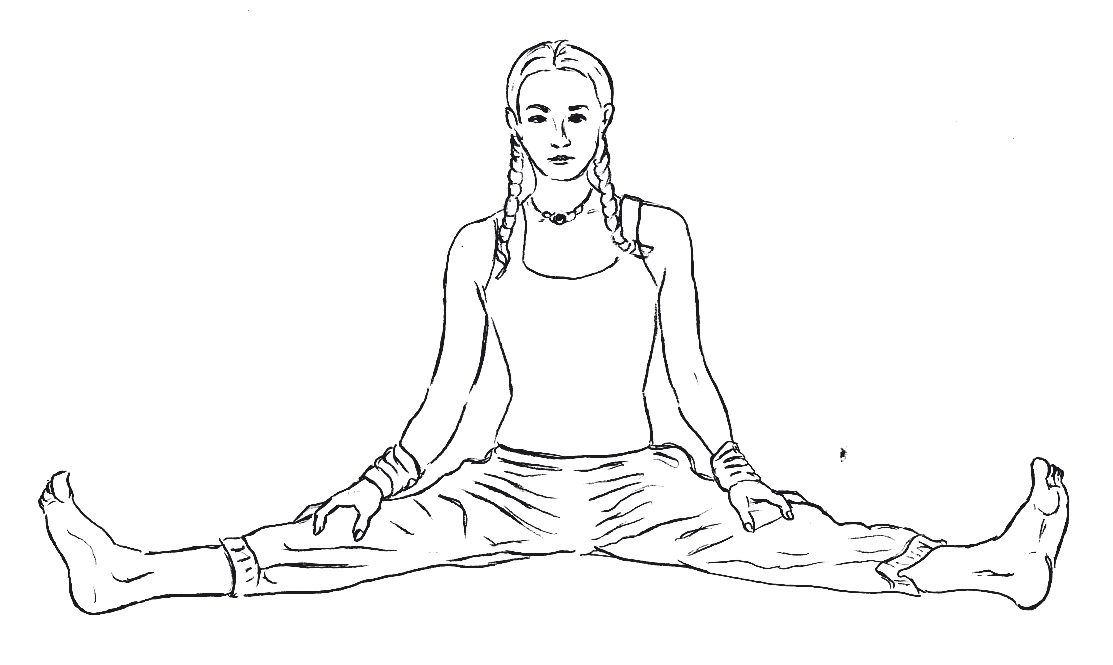
7. Pāda Prasara Paścimottānāsana – open legs back stretch
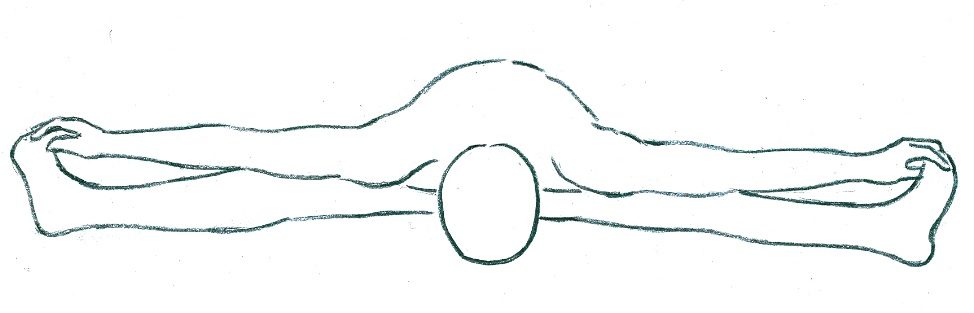
Pada Prasara Pascimottanasana forward bend with open legs, Divine Mothers Sadhana Kundalini Yoga drawing

Practise three times with deep breathing. Stretch. At least 30 seconds of kapālabhāti and three rounds of bhrāmarī, on each side.

The same force is at work here that carries the third Pavanmuktāsana series – apāna, the descending, releasing movement. You will meet it in Pavanmuktāsana 2 – the Abdominal Series.

8. Mārjārīāsana – the cat pose
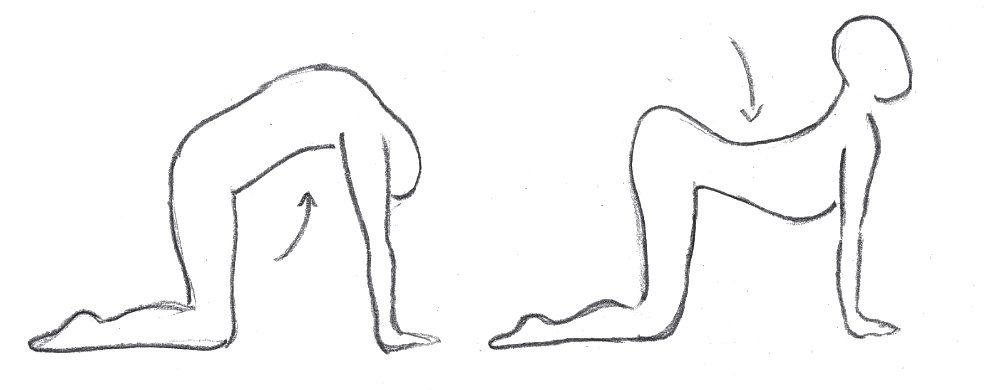
Marjariasana cat and cow pose on all fours, Divine Mothers Sadhana Kundalini Yoga drawing

First move in a dynamic cat–cow posture for about a minute. Inhalation – up, exhalation – down.

Then look up in the cat and start 30 seconds of kapālabhāti. After this go into cow and practise three rounds of bhrāmarī.

9. Parvatāsana – the mountain pose
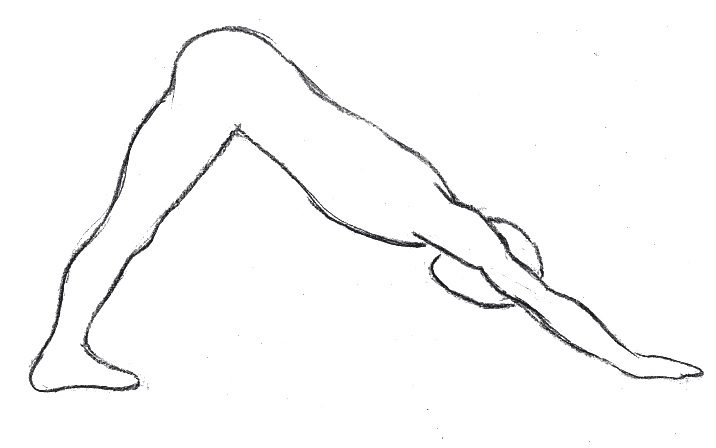
Parvatasana mountain pose, downward facing dog with straight legs, Divine Mothers Sadhana drawing

Move gently into parvatāsana and practise three times with deep breathing. At least 30 seconds of kapālabhāti and three rounds of bhrāmarī.

10. Vajrāsana – the thunderbolt pose
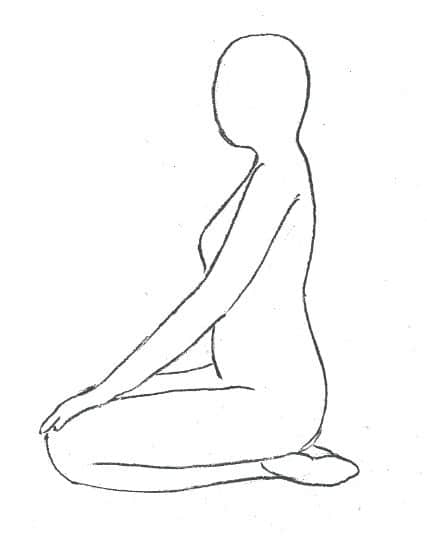
Vajrasana thunderbolt pose kneeling with open chest, Divine Mothers Sadhana Kundalini Yoga drawing

Sit and relax in vajrāsana. Open your chest. Stretch your arms. Practise three times with deep breathing. Pull mūlabandha. At least 30 seconds of kapālabhāti and three rounds of bhrāmarī.

11. Uṣṭrāsana – the camel pose
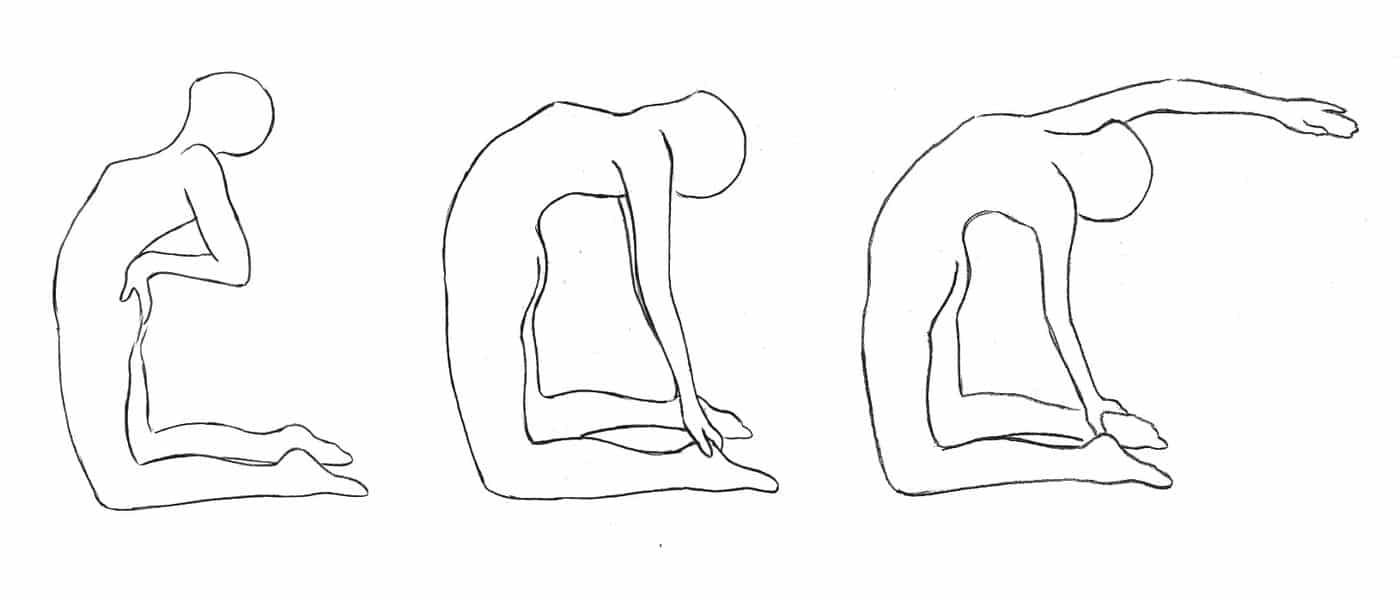
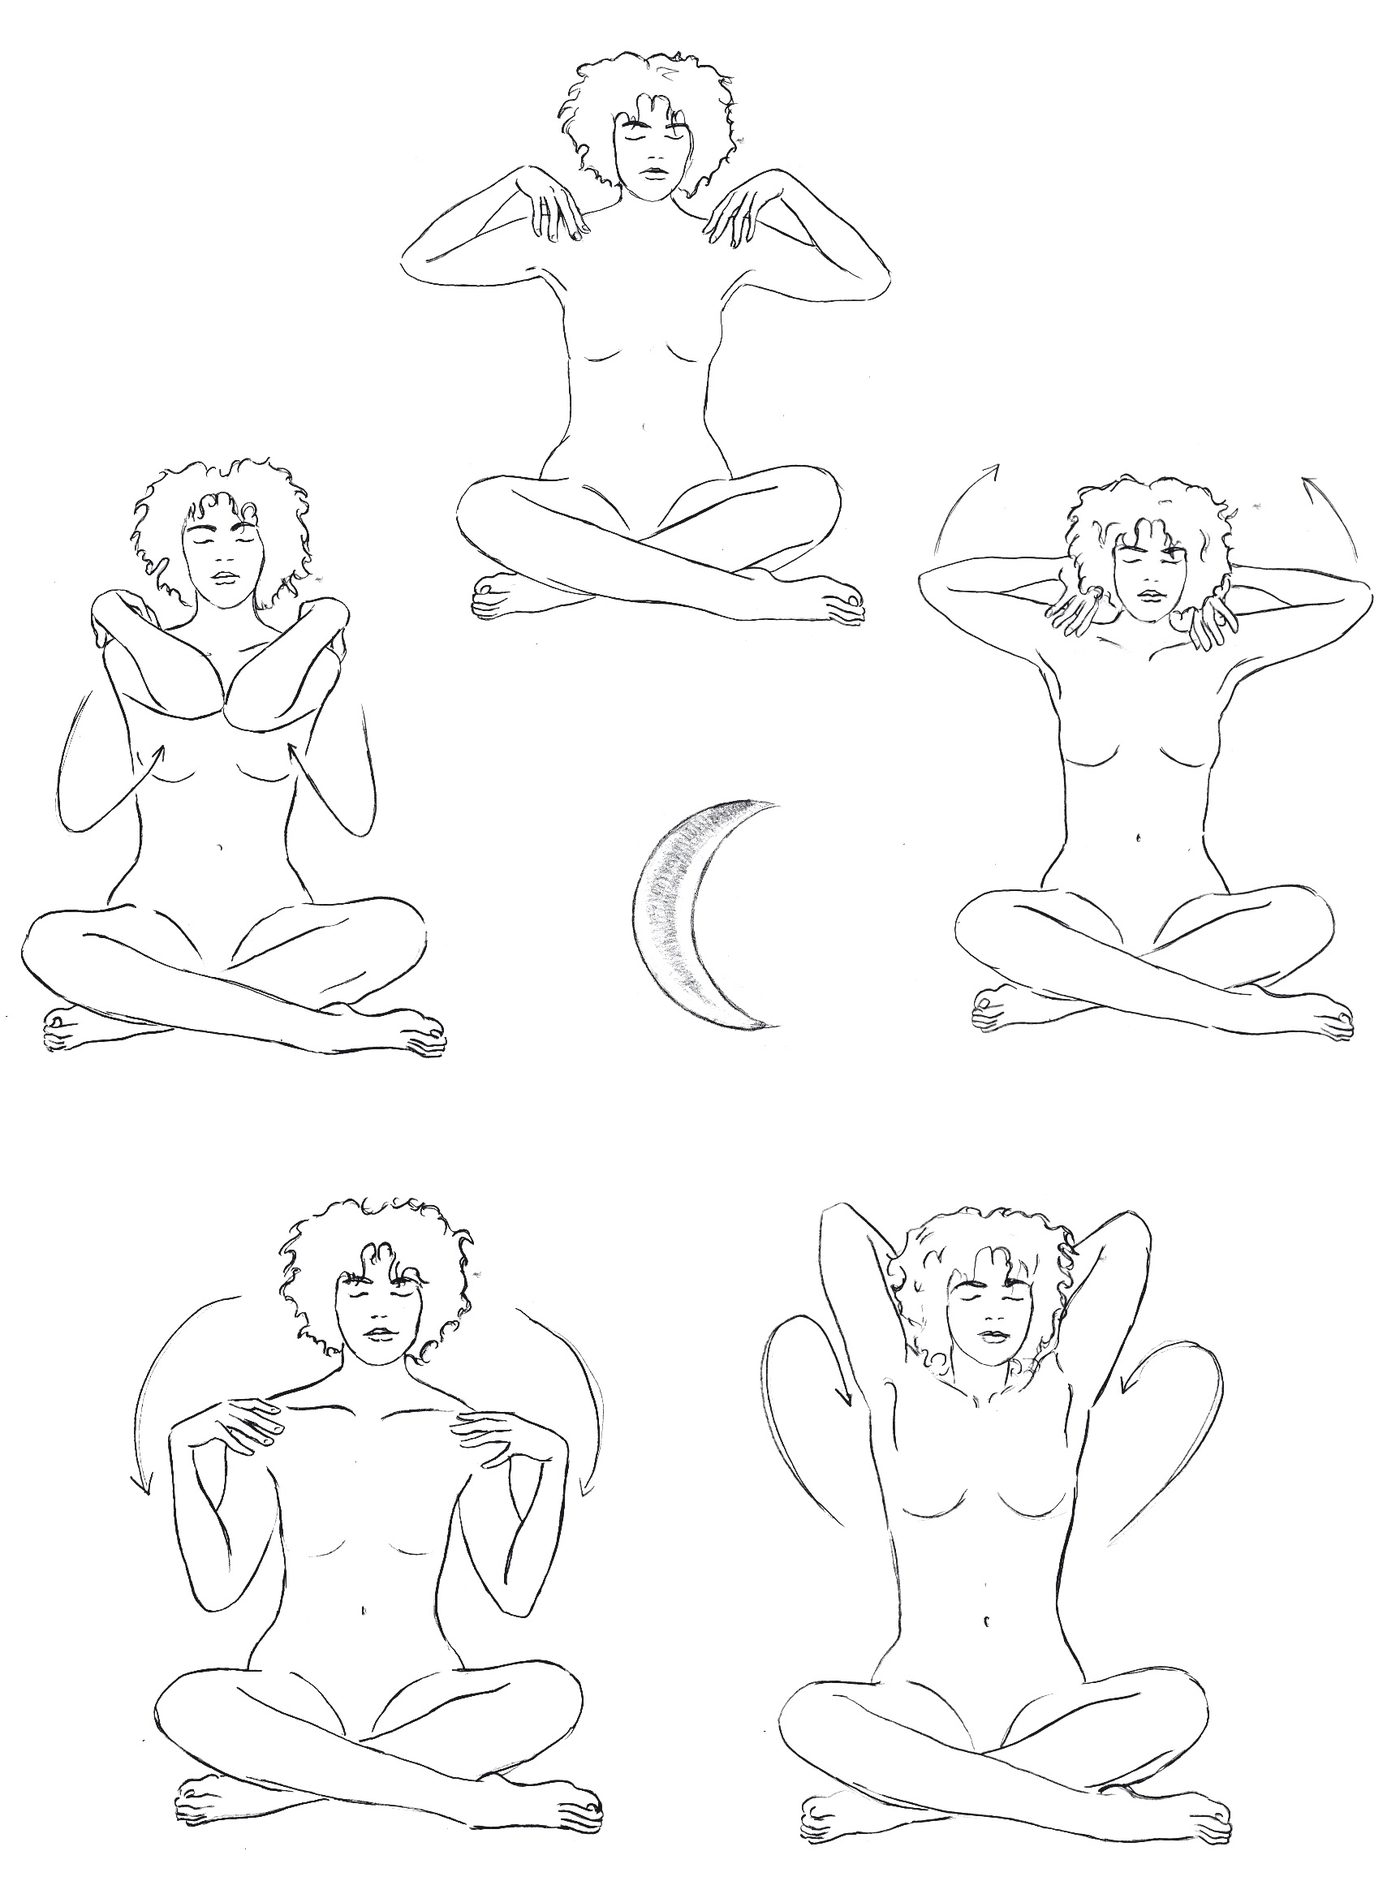
Ushtrasana camel pose in three stages, backbend from kneeling, Divine Mothers Sadhana Kundalini Yoga

Move into uṣṭrāsana or ardha uṣṭrāsana. Practise three times with deep breathing and about 30 seconds of kapālabhāti.

The backbend opens anāhata, the heart centre. That is exactly where the sound we search for in bhrāmarī lives – see Anāhata Chakra.

12. Śaśankāsana – the rabbit pose
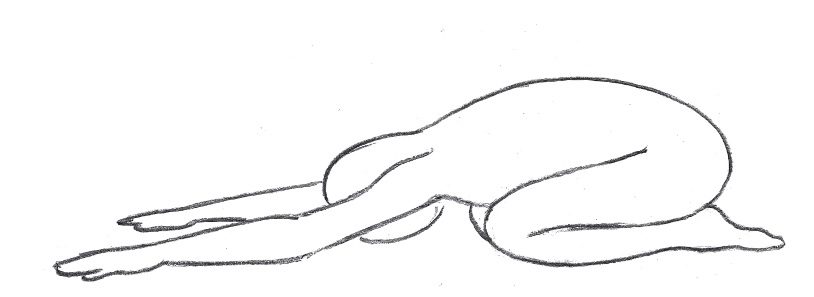
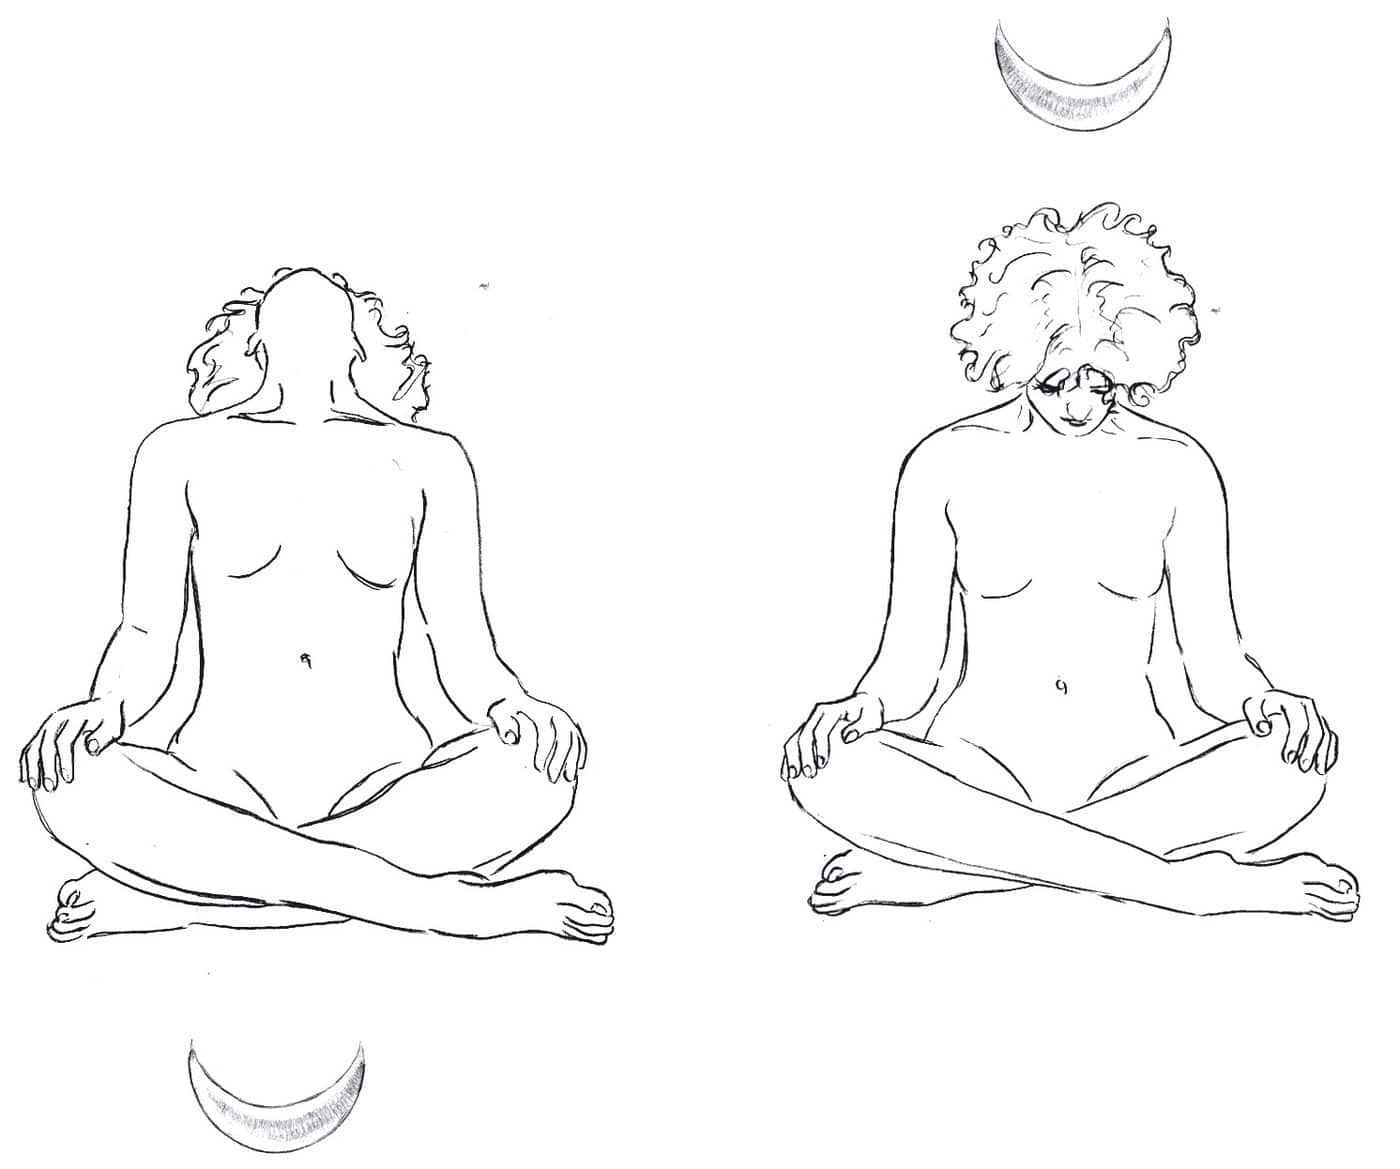
Shashankasana rabbit pose, forehead to the floor with arms extended, Divine Mothers Sadhana Kundalini Yoga

From vajrāsana, open your knees, stretch up and move down into śaśankāsana. Surrender yourself. Stretch your arms out. Take three deep breaths, at least 30 seconds of kapālabhāti and three rounds of bhrāmarī.

And then, in that surrender, silently chant the mantra of the Divine Mother:

Oṃ Mā

Two syllables. Nothing more is needed. Oṃ is the whole, is the Mother who carries it. Stay here as long as it is good.

13. Bīja Nyāsa – placing the seed sounds

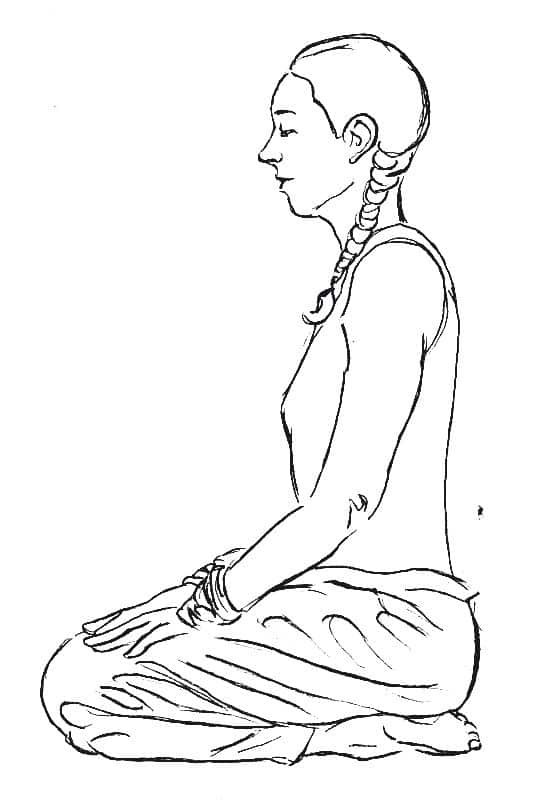
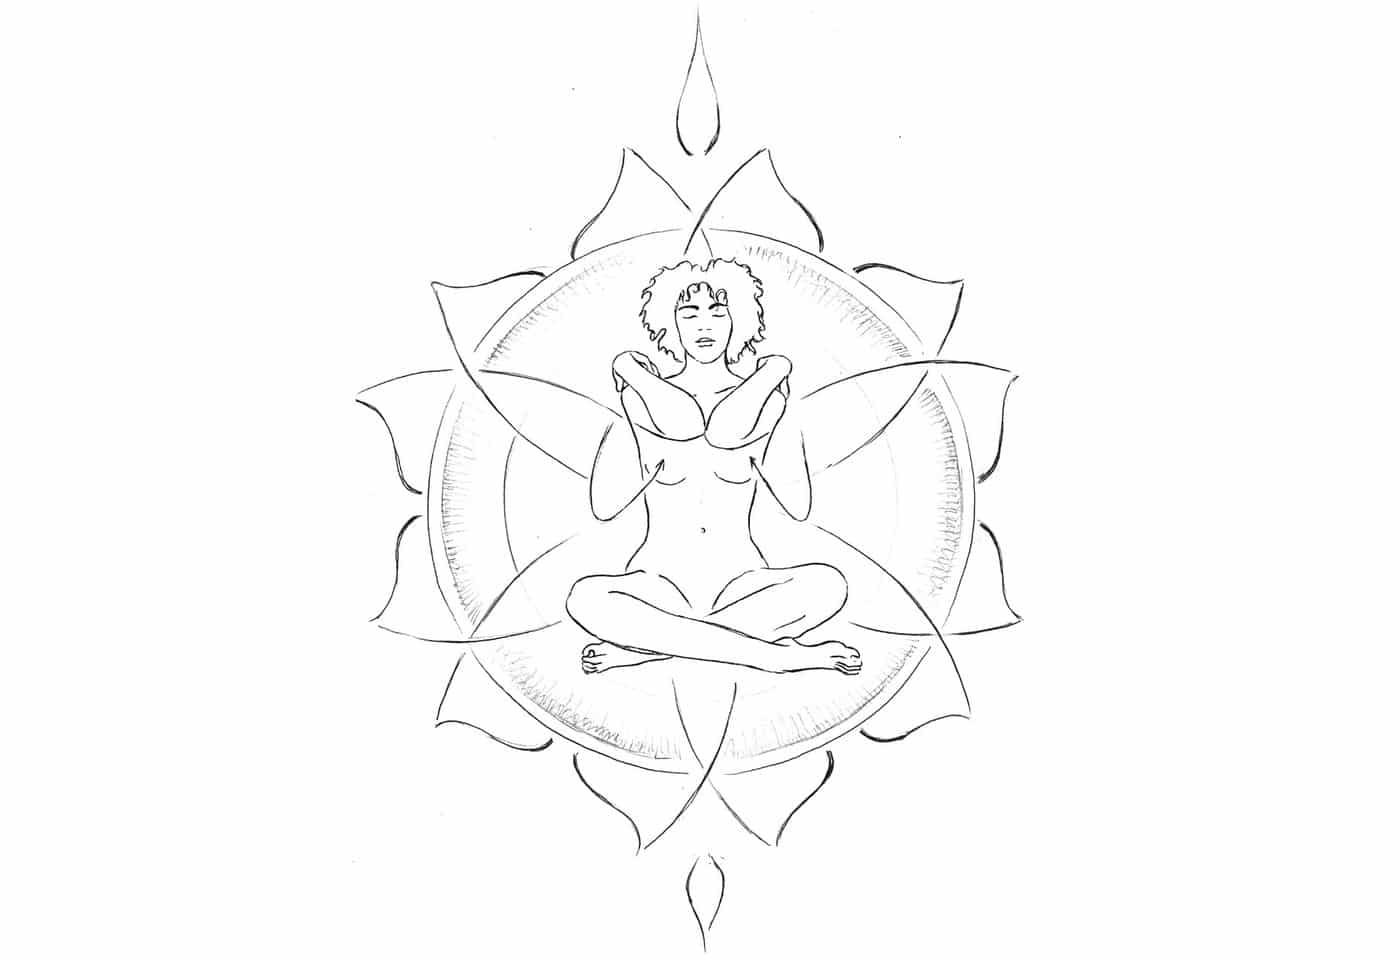
Bija nyasa meditation posture with hands outstretched on the knees, Kundalini Yoga drawing Matsya Vienna

Sit in meditation posture with your hands outstretched and fixed. Perform mūlabandha at the beginning of each sound. Finally perform namaskāra mudrā and breathe deeply.

The full instruction for bīja nyāsa follows further below – it is the practice with which every one of our classes closes.

14. Śavāsana

Shavasana final relaxation on the back with open palms, Divine Mothers Sadhana Kundalini Yoga

Lie on your back with your palms facing upwards. Contemplate the following:

I am you. You are me. We are one.

The class at a glance

Nāḍiśodhana Psychic network purification
Kapālabhāti Shining skull, breath of fire
Sūryanamaskāra Salutation to the sun
Jānuśirāsana Head to knee pose
Titali Āsana Butterfly pose
Paścimottānāsana Back stretch pose
Pāda Prasara Paścimottānāsana Open legs back stretch pose
Mārjārīāsana Cat pose
Parvatāsana Mountain pose
Vajrāsana Thunderbolt pose
Uṣṭrāsana Camel pose
Śaśankāsana Rabbit pose
Bīja Nyāsa Placing the seed sounds
Śavāsana Final relaxation

The complete script of this class is available as a PDF: download The Mother’s Sādhana. You will find it in our downloads section, together with the sound recordings for bīja nyāsa and further material from the teacher training manual.

The breathing techniques in detail

Bhrāmarī Prāṇāyāma – the humming bee breath

Bhrāmarī is a breathing technique that brings deep joy and serenity to those who practise it. It can be likened to a wedding with one’s inner self. That self vibrates in this sweet and honey-like sound, a sound that is like an eternal rushing river, without beginning or end.

When practising bhrāmarī, imagine yourself as a being made of this one sound. However, the sound you are reaching for cannot be heard with your ears. It is an inner, delicate sound that you must search for in the subtle dimension within. When you hum, listen for the more subtle sound, which shines from the joy of your ever expanded being.

The primal sound known as nāda, from which the universe is emitted, is found in the central channel called suṣumnā, or sarasvatī nāḍī. According to the yogis, sarasvatī nāḍī carries sound within her very essence. The heart lies at the core of the suṣumnā channel, and it is here that nāda resides as śabda-brahman – the eternal vibration of the divine in the form of sound.

When one listens to the unstruck sound in the heart (anāhata), that is uninterrupted just like a rushing river without beginning or end, this one will become one with that sound that is God, and enter the highest state.

Vijñāna-bhairava-tantra 38

According to the Kubjikāmata-tantra, śabda-brahman represents the individual soul, which can experience its divine essence by immersing itself in the primal sound from which it originated. In this way, practising bhrāmarī is a prayer offered to your own soul.

Inhale rapidly, producing the sound of a male bee. Then exhale with the sound of a female bee. This is followed by kumbhaka. The great yogis, by constantly practising this, experience indescribable happiness in their hearts. This is bhrāmarī.

Haṭha-Yoga-Pradīpikā 2.67

Kapālabhāti – the shining skull

Kapālabhāti is a ṣaṭkarma – one of the six purification exercises – as well as a prāṇāyāma. It moves the prāṇas and purifies them when they mix with the fire at the navel.

Kapālabhāti is performed from the kanda, the navel point. Kanda is commonly misunderstood as the Maṇipūra Chakra. In some yogic schools all the nāḍis originate from there. It has the form of a golden egg, is situated underneath the navel, and is the centre of bodily pranic force. From there the prāṇas expand upwards; the great sun makes them rise.

Sit straight, open up your face, and feel the sun rise on your forehead. Pull mūlabandha very gently. Push the air out and move your navel inwards. When the breath relaxes, you will inhale naturally rather than actively. Feel the pulse massaging your lower belly; the rest of the body stays relaxed and the face open.

The pace can be accelerated until a comfortable rhythm is reached. Imagine a stream of golden light rising from your navel to the sky. Practise gently, but quickly – and without any effort at all.

Inhale and exhale like the bellows of a blacksmith. This is kapālabhāti and it removes all ailments due to kapha.

Haṭha-Yoga-Pradīpikā 2.35

Why these two techniques belong together

Kapālabhāti awakens and moves prāṇa. Bhrāmarī gathers it and dissolves it into sound. Without the first the class stays cool; without the second the energy stays scattered. The five vāyus – the winds into which prāṇa divides within the body – show what is at stake:

The five vayus table, prana apana samana udana vyana with movement and consciousness, Kundalini Yoga Matsya Vienna

The class moves right through this series: kapālabhāti awakens prāṇa and apāna, the postures bring them together, bhrāmarī establishes samāna – the central, one-pointed silence – and bīja nyāsa opens udāna and vyāna, the ascending and the all-pervading force.

Bīja Nyāsa – the placing of the seed sounds

You are invited to practise bīja nyāsa at the end of every class. Bīja nyāsa is a practice of ancient Tantra in which a seed sound (bīja) is placed within the body. Bīja nyāsa purifies consciousness, expands it and awakens Kuṇḍalinī.

Nyāsa literally means placing, setting down, entrusting. In tantric ritual it is the act by which a deity, a mantra or an element is set into a particular place in the body. The body is not being decorated here – it is being built. What you place, you become.

One of the secrets of Kundalini Yoga is that Kuṇḍalinī is sound in her very essence. She is the word that stands at the beginning of creation, and this word is sound, and this sound is her body – your inner body. Bīja nyāsa is the awakening of the sound body of Kuṇḍalinī.

The table of seed sounds
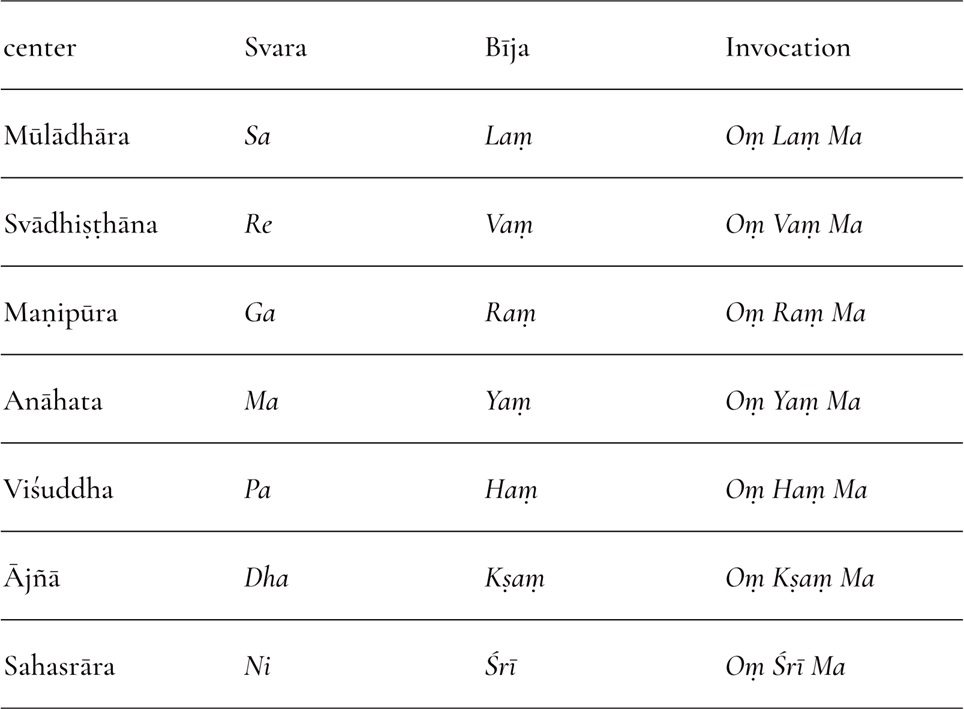
Bija nyasa table with chakras, svara, bija and invocation, seed sounds in Kundalini Yoga Matsya Vienna
Centre Svara Bīja Invocation
Mūlādhāra Sa Laṃ Oṃ Laṃ Ma
Svādhiṣṭhāna Re Vaṃ Oṃ Vaṃ Ma
Maṇipūra Ga Raṃ Oṃ Raṃ Ma
Anāhata Ma Yaṃ Oṃ Yaṃ Ma
Viśuddha Pa Haṃ Oṃ Haṃ Ma
Ājñā Dha Kṣaṃ Oṃ Kṣaṃ Ma
Sahasrāra Ni Śrī Oṃ Śrī Ma

Three columns, three levels. Svara are the seven notes of the Indian scale – the musical body. Bīja are the seed sounds of the elements – the elemental body. The invocation relates both to the Mother: Oṃ … Ma.

The practice in three steps

There are several variations of bīja nyāsa, each drawing out a particular aspect of the inner energy of all things. In this bīja nyāsa we position the seed sounds of the five elements within the revered suṣumnā, the central axis of the body, and allow their vibrations to expand.

Assume a meditative posture, comfortable but upright, arms outstretched, and rest in your centre. First fold your hands in front of your heart, feel your centre, softly sing Oṃ, and let this Oṃ travel through your body from the base to the cosmos. This Oṃ represents the teacher, guide, mother, father and soul.

Perform mūlabandha at the beginning of each sound, and let it rise in this way from the base.

  1. The seven notes. Place the seven notes in each chakra from the base upwards – Sa, Re, Ga, Ma, Pa, Dha, Ni. Simply make yourself vibrate with sound and look inwards.
  2. The bījas of the elements. Then successively place the bījas of the five elements in one chakra after the other, from below upwards – Laṃ, Vaṃ, Raṃ, Yaṃ, Haṃ. Give the sound space.
  3. The invocation. The last step invokes the elements through a mantra. Chant Oṃ at mūlādhāra and pull the perineum, then let the bīja ascend through the body and expand above in Ma – the supreme Mother.

Finally, namaskāra mudrā and a few deep breaths.

How to find the right sound

To form the correct sound it is advisable to look for a qualified teacher, or simply to ask us for help. On our website there is a section in the downloads area where we form the sounds – to listen to and sing along with.

One note from practice: the sound does not have to be beautiful. It has to be carried. A quiet tone that truly comes from the pelvis does more than a loud one that stays in the throat.

If you would like to go deeper into the sound dimension of Tantra, look at our Trika Tantra courses with Mark Dyczkowski.

Remember the teacher

All kriyās should be practised with the teacher. Nothing can be achieved in the teacher’s absence. The teacher is both the means and the goal. Every action begins with, is pervaded by, and finally rests in the teacher.

This teacher is your heart. The one teacher, manonmanī, the place beyond mind.

Before you even chant the mantra, take a few breaths with your hands folded in front of your heart. Sink into the cavity of your innermost being. Repose at the bottom of your heart. Silently remember the teacher – the flame, beautifully burning without smoke. An eternal light in the dark, illuminating the path.

The invocation mantra of the Divine Mother

Oṃ Ānandamayī – Oṃ, She, the Delight
Chaitanyamayī – She, the Consciousness
Satyāmayī – She, the Truth
Pāramī – She, the Supreme

All things beseech her. That her feet may heal the aching throb of life and break the seal upon the human soul, may she kindle the fire in the closed heart of all things!

Śrī Aurobindo, Savitri

One must develop love for God. Because if there is no love for God, yoga will not be effective.

Swami Lakshman Joo

Frequently asked questions about the Divine Mother’s Sādhana

Who was Svāmī Vidjanand?

Svāmī Vidjanand was a disciple of Svāmī Satyānanda Sarasvatī, the founder of the Bihar School of Yoga. From him our teacher learned the gentle and loving Kundalini Yoga that is still the foundation of our classes – and from him this sādhana comes. It is therefore a directly transmitted practice from the Satyānanda lineage, not a sequence assembled from books. The other teachers we count as ours are listed on Who we are.

Is this Kundalini Yoga or Hatha Yoga?

Both – and that is not an evasion. The postures are classical āsanas of Haṭha Yoga. What makes them Kundalini Yoga is the intention and the layering: breath, sound, mantra and bandha work together in the same posture to awaken and direct a force. We describe the relationship between the two paths in detail in Hatha and Kundalini Yoga.

Who is the Divine Mother in yoga?

She is śakti – creative power itself, not a person and not a belief. In the tantric view, everything that moves, breathes and perceives is her movement. The mantra Oṃ Mā is not a request addressed to a figure outside you; it is the recognition of what is carrying you right now. You do not have to believe anything to practise it. You only have to listen.

What exactly does bīja nyāsa mean?

Bīja means seed, nyāsa means placing. Together: the placing of a seed sound within the body. It is one of the oldest tantric techniques there is and appears in almost every school of Śaivism and Śāktism. In Kundalini Yoga it has a special role, because Kuṇḍalinī herself is understood as sound: whoever places the sound awakens her body.

Do I need any experience for this class?

No. The postures are simple and can be practised in any variation. What takes practice is kapālabhāti – and for that it is enough to start slowly. If you feel unsure, come to one of our yoga classes in Vienna; we will show you the technique in peace.

How often should I practise the sādhana?

A sādhana lives on repetition, not on intensity. Once a week in full length, or every morning in the short version – both carry. More important than the duration is that you begin at the same hour.

Are there any contraindications?

Kapālabhāti is not indicated during pregnancy, with untreated high blood pressure, acute cardiovascular conditions, epilepsy, or shortly after abdominal or eye surgery. In those cases practise the postures with deep breathing and bhrāmarī – that is a complete practice in itself. When in doubt, ask your doctor and talk to us.

Can I teach this class?

Yes, and we are glad if you do. The script is freely available in the downloads area. If you want to teach the class together with its background, our RYT 200h teacher training is the right place – this sādhana is part of the manual there. For already certified teachers there is the RYT 300h training and the YACEP Kundalini workshop.

Finally

This kriyā is gentle. It asks nothing of you that you cannot already do. And still it has the power to open something that has felt closed for a long time – because it works at a place you cannot reach by effort: sound.

If you would like to practise it with us, you will find the dates under yoga classes in Vienna. If you want to stay longer, come to our retreats in the Wachau valley or to one of our yoga teacher trainings, which are also available as online and hybrid formats. For any question, simply write to us through the contact page.

And here are the other foundational series of our classes:

Oṃ Mā.

The Post-Classical Era: Matsyendra and Gorakṣa

The Post-Classical Era: Matsyendra and Gorakṣa

The Post-Classical Era: Matsyendra and Gorakṣa

Beginning around 800 CE, Muslim armies advanced eastward from Persia and eventually established the Great Sultanate of Delhi in 1206 CE. Tantra, which had been widespread and institutionalized during the classical era, was driven into the forests and rural areas, and the number of practitioners declined rapidly.

It is believed today that the loss of institutional support for Tantra weakened its philosophical foundation and in this way led to its transformation into the modern-day Hatha and Kundalini yoga led. Originating in the Kashmir Valley, where Tantra first emerged, it spread southward, where some of its teachings were preserved.

download kundalini kriya class pavanmuktasana

The bridge between Tantra and Hatha Yoga

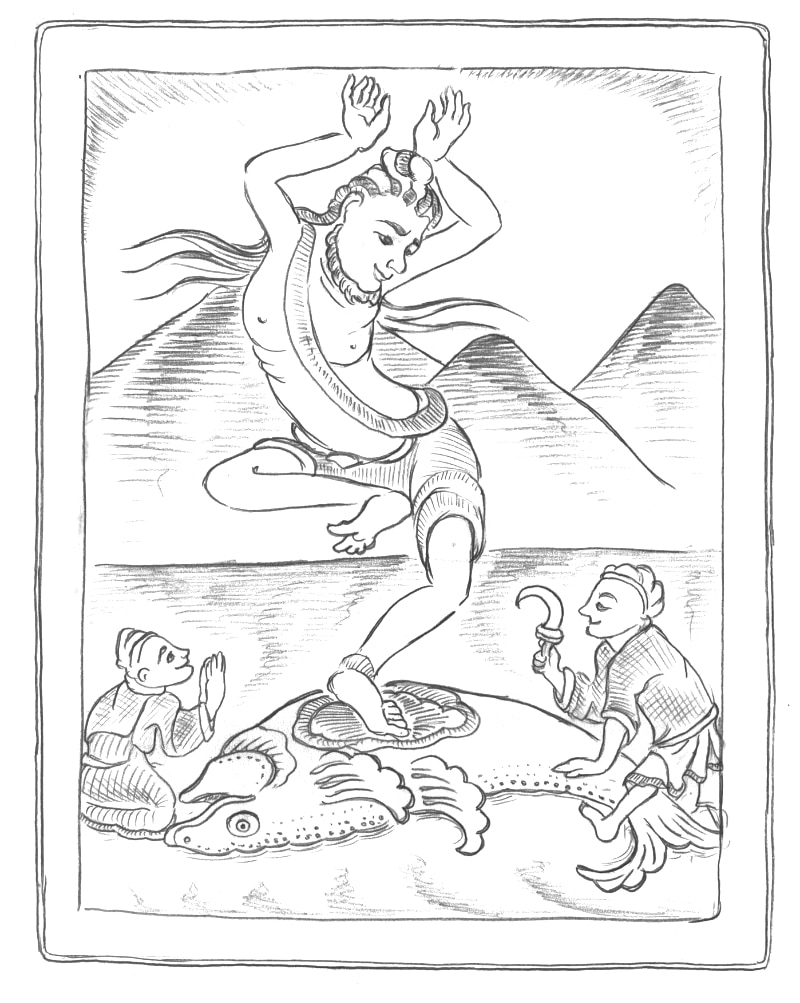
The connection between Hatha Yoga and Tantra is clarified by a 10th-century master: Matsyendra Nātha. He founded the Kaula lineage of Tantra, and his disciple Gorakṣa is credited with founding Hatha Yoga.

Matsyendra is one of the navnāth, the nine masters of the nāth lineage. He is often portrayed as a fallen hero, entangled in tantric hedonism, which his disciple Gorakṣa sought to transform through the purity of hatha. However, he is also often regarded as the luminous master who triumphs over illusion—māyā pati dādā, the father of fathers. If Gorakṣa is considered the father of Hatha Yoga, then Matsyendra can be regarded as its grandfather.

How this connection manifests itself in our specific practical experience, we describe on our website about Hatha and Kundalini Yoga.

Kundalini yoga illustration, Hatha yoga exercises drawing, chakra activation illustration, yoga poses illustration, drawing of a woman in the lotus pose

Who was Matsyendranātha really? Different perspectives

The story we recounted above is the mythical tradition as it has been preserved in the West and in later legends. But who was Matsyendranātha from the perspective of Sanskrit scholarship? The Western scholar Mark Dyczkowski, with whom Matsya is closely associated, devoted an entire lecture to this question—“Matsyendranātha and the Yuganāthas,” delivered in 2026 as part of his school, Anuttara Trika Kula. We would like to share some of his key insights here, as they paint an even richer picture.

First, the question of dating: Matsyendranātha cannot be historically pinned down to a single lifetime. Depending on the source, he is placed between the 5th and 13th centuries, in locations ranging from Bengal to Nepal and Tibet. Dyczkowski therefore describes him as a pan-Indian, transhistorical figure—less a single person than a name to which various Kaula texts and traditions attributed themselves over the centuries.

Another version: The swallowed writing

Particularly intriguing is a completely different version of the myth, as recorded in the *Kaulajñānanirṇaya*—one of the oldest Kaula texts, which, according to Dyczkowski, some have attributed to Matsyendranātha himself. Here, it is not the fisherman who is swallowed, but the secret scripture of the goddess herself:

The goddess’s son, Kārttikeya, takes the form of a mouse, steals the sacred Kula text, and throws it into the sea, where it is swallowed by a giant fish. To retrieve it, the god weaves a “net of energy” (śaktijāla), catches the fish—and, as the translation states, takes on “the form of a fisherman” to do so. Only when he opens the fish’s belly does he recover the scripture. That is why Matsyendra also bears the epithet Matsyaghna, “the slayer of the fish”—a fascinating reversal of the better-known narrative, in which he himself is the fish or its inhabitant.

Scholars disagree on which version is the more original. Some sources emphasize that Matsyendra was actually a Brahmana who, who voluntarily "descended" fisherman “descended” in order to attain the secret knowledge to reach. Others—and Dyczkowski tends toward this interpretation to – suspect the opposite: that Matsyendra was originally in fact a simple fisherman of a lower caste, to whom the later legends retrospectively a Brahmin origin were attributed in order to enhance his authority.

Abhinava Gupta's tribute

Just how deeply Matsyendra was revered in the classical Tantric world is strikingly evident at the beginning of Abhinava Gupta’s *Tantrāloka*. There, Abhinava refers to Matsyendra by his other name, Macchanda—literally “the fisherman”—and invokes his favor even before mentioning all the other teachers of his many lineages. The later commentator Jayaratha explains that Abhinava thereby unmistakably expresses his preference for the Kaula path.

According to this tradition, Matsyendra was one of four Yuganāthas—“Lords of the Ages”: Khagendranātha for the Kṛta Yuga, Kūrmanātha for the Tretā Yuga, Meṣanātha for the Dvāpara Yuga, and Matsyendranātha (Macchanda) for our present, dark Kali Yuga. As the Lord of this very last and most difficult age, he holds special significance—he is the teacher whose wisdom is said to remain accessible to us even today.

The Bengali legend: Gorakṣa saves his teacher

A third, much less well-known account from Bengal presents Matsyendra and Gorakṣa in a different light—and at the same time confirms that Matsyendra’s character as a “fallen hero,” as mentioned at the beginning, is deeply rooted in the tradition itself.

In this version, Mīna (Matsyendra), in the form of a fish, secretly eavesdrops as Śiva reveals the secret teaching to his consort—whereupon Śiva punishes him by inflicting forgetfulness upon him. At the goddess’s behest, Mīnanātha later finds himself in the “Land of Women” called Kadalī, where, surrounded by 1,600 women, he succumbs to pleasure, completely forgetting his former destiny. It is his own disciple, Gorakṣa, who ultimately rescues him—disguised as a dancer, he enters the palace and, buzzing in the form of a bee, reminds Mīna of his former life.

More about Matsyendra

If you'd like to delve even deeper into the figure of Matsyendra, you'll find further insights in our in-depth article Fish in Yoga: Matsyendra.

Source of the scholarly classification in this section: Mark Dyczkowski, Anuttara Trika Kula, lecture “Matsyendranātha and the Yuganāthas,” 2026.

This post is part of our series on the history of yoga. You can find out there how these roots live on today in our own yoga teacher training program.

More

If you want to know more about us, take a look in the downloads section!

Dort haben wir Kundalini Yoga Kriyas, Mantras und viele schöne Dinge. Nur für dich 😉

The Tantras (Āgamas)

The Tantras (Āgamas)

The Tantras (Āgamas)

The tantras are spiritual teachings that focus on the worship of the divine for both spiritual and material success. What distinguishes them above all, however, is their particularly high regard for the feminine aspect of existence and spirituality. Mahāyāna Buddhism was an important precursor to Tantric thought, and the first Tantric texts, which appeared beginning in 500 CE, were unconventional and free from the traditional spiritual approaches of the time.

Trika Yantra Tantra Drawing

The Śiva-Sūtra and the Nine Schools of Tantra

The most significant early work of non-dual Tantra is probably the Śiva-Sūtra, which first appeared around 900 CE. According to legend, it appeared to Vasugupta in a dream. It is a highly mystical work that explores the foundations of Śaiva Tantra and non-dualistic thought.

Tantric philosophy continued to develop rapidly from the 9th century CE onward, until the end of the classical period in the 13th century. Nine major schools of Tantra shaped India —including Trika, the Trinity, whose teachings we at Matsya also pass on in our Trika Pūjā initiation.

What Tantra Has Contributed to Modern Yoga

The Tantric schools contributed greatly to the yoga we practice today: physical purification techniques, the gestures of power (mudrās), additional prāṇāyamas, and the chakra system. It is interesting to note that the Tantras incorporated Patañjali’s aṣṭāṅga yoga into their body of practice early on —as a foundation for successfully practicing Tantric yoga. It was precisely from this synthesis that our modern Hatha Yoga developed.

Among the concepts derived directly from tantric sources are: the goddess Kuṇḍalinī, the system of the six chakras, the 72,000 nāḍis of subtle physiology, the ten prāṇa-vāyus, and the ascent of consciousness through prāṇāyāma, dhāraṇā, and dhyāna—topics that still form the core of our own Hatha and Kundalini yoga practices today.

Meditate on the kuṇḍalinīśakti, which rises like a bolt of lightning through all the chakras, one by one, until it reaches the dvādaśānta. Then, finally, the magnificent form of Bhairava appears.

Vijñāna-Bhairava Tantra (29)

samana prana tantra shakti

Abhinava Gupta and the *Tantrāloka*

Abhinava Gupta was born around 950 CE into a family of musicians and Brahmins and showed an early talent for spirituality and the arts. He chose to live as a brahmachari—without a family of his own, but continuing to live with his own family. Over the course of his life, he was initiated into 15 major spiritual lineages in India, including all the great tantric traditions of his time, and attained mastery in all of them.

At that time, the tantric corpus was as extensive as it was fragmented. Abhinava Gupta then began composing a monumental work of 37 books, the Tantrāloka (Light on Tantra), to systematize the rituals, meditation, and philosophy of 64 Āgamas into a comprehensive work. Since the *Tantrāloka* was so extensive, he later wrote a more concise summary of it, the *Tantrasāra*, to make the gift of tantric thought accessible even to laypeople.

For those who wish to delve deeper: Mark Dyczkowski, a Western Sanskrit scholar with whom Matsya is closely associated, has dedicated his life to translating this very *Tantrāloka*.

Abhinava Gupta died in 1020 AD. Legend has it that his physical form vanished while he was reading the *Bhairavastava* to his followers.

Just as the mirror underlies everything in the reflection, so God, as consciousness, permeates everything that is reflected in it.
Śrī Abhinava

This post is part of our series on the history of yoga. In the next post, we’ll begin the post-classical era—with the story of Matsyendra and Gorakṣa, the founders of Hatha Yoga.

More

If you want to know more about us, take a look in the downloads section!

Dort haben wir Kundalini Yoga Kriyas, Mantras und viele schöne Dinge. Nur für dich 😉

Pavanmuktāsana 3 – The Śakti-Bandha-Series in Kundalini Yoga

Pavanmuktāsana 3 – The Śakti-Bandha-Series in Kundalini Yoga

Note: All exercises are illustrated by hand with a pen and written by Clemens Biedrawa.

Pavanmuktāsana 3 – the Śakti Bandha Series in Kundalini Yoga

The third part carries a name that makes you sit up: Śakti Bandha Vyāyāma – the series for releasing energy blockages.

Part 1 opened the joints, part 2 strengthened the centre. Part 3 takes what has been freed and sets it flowing. The exercises are more dynamic, louder, more physical than anything before – pulling a rope, turning a millstone, rowing, chopping wood. This is the series in which yoga looks like work.

And that is exactly the point.

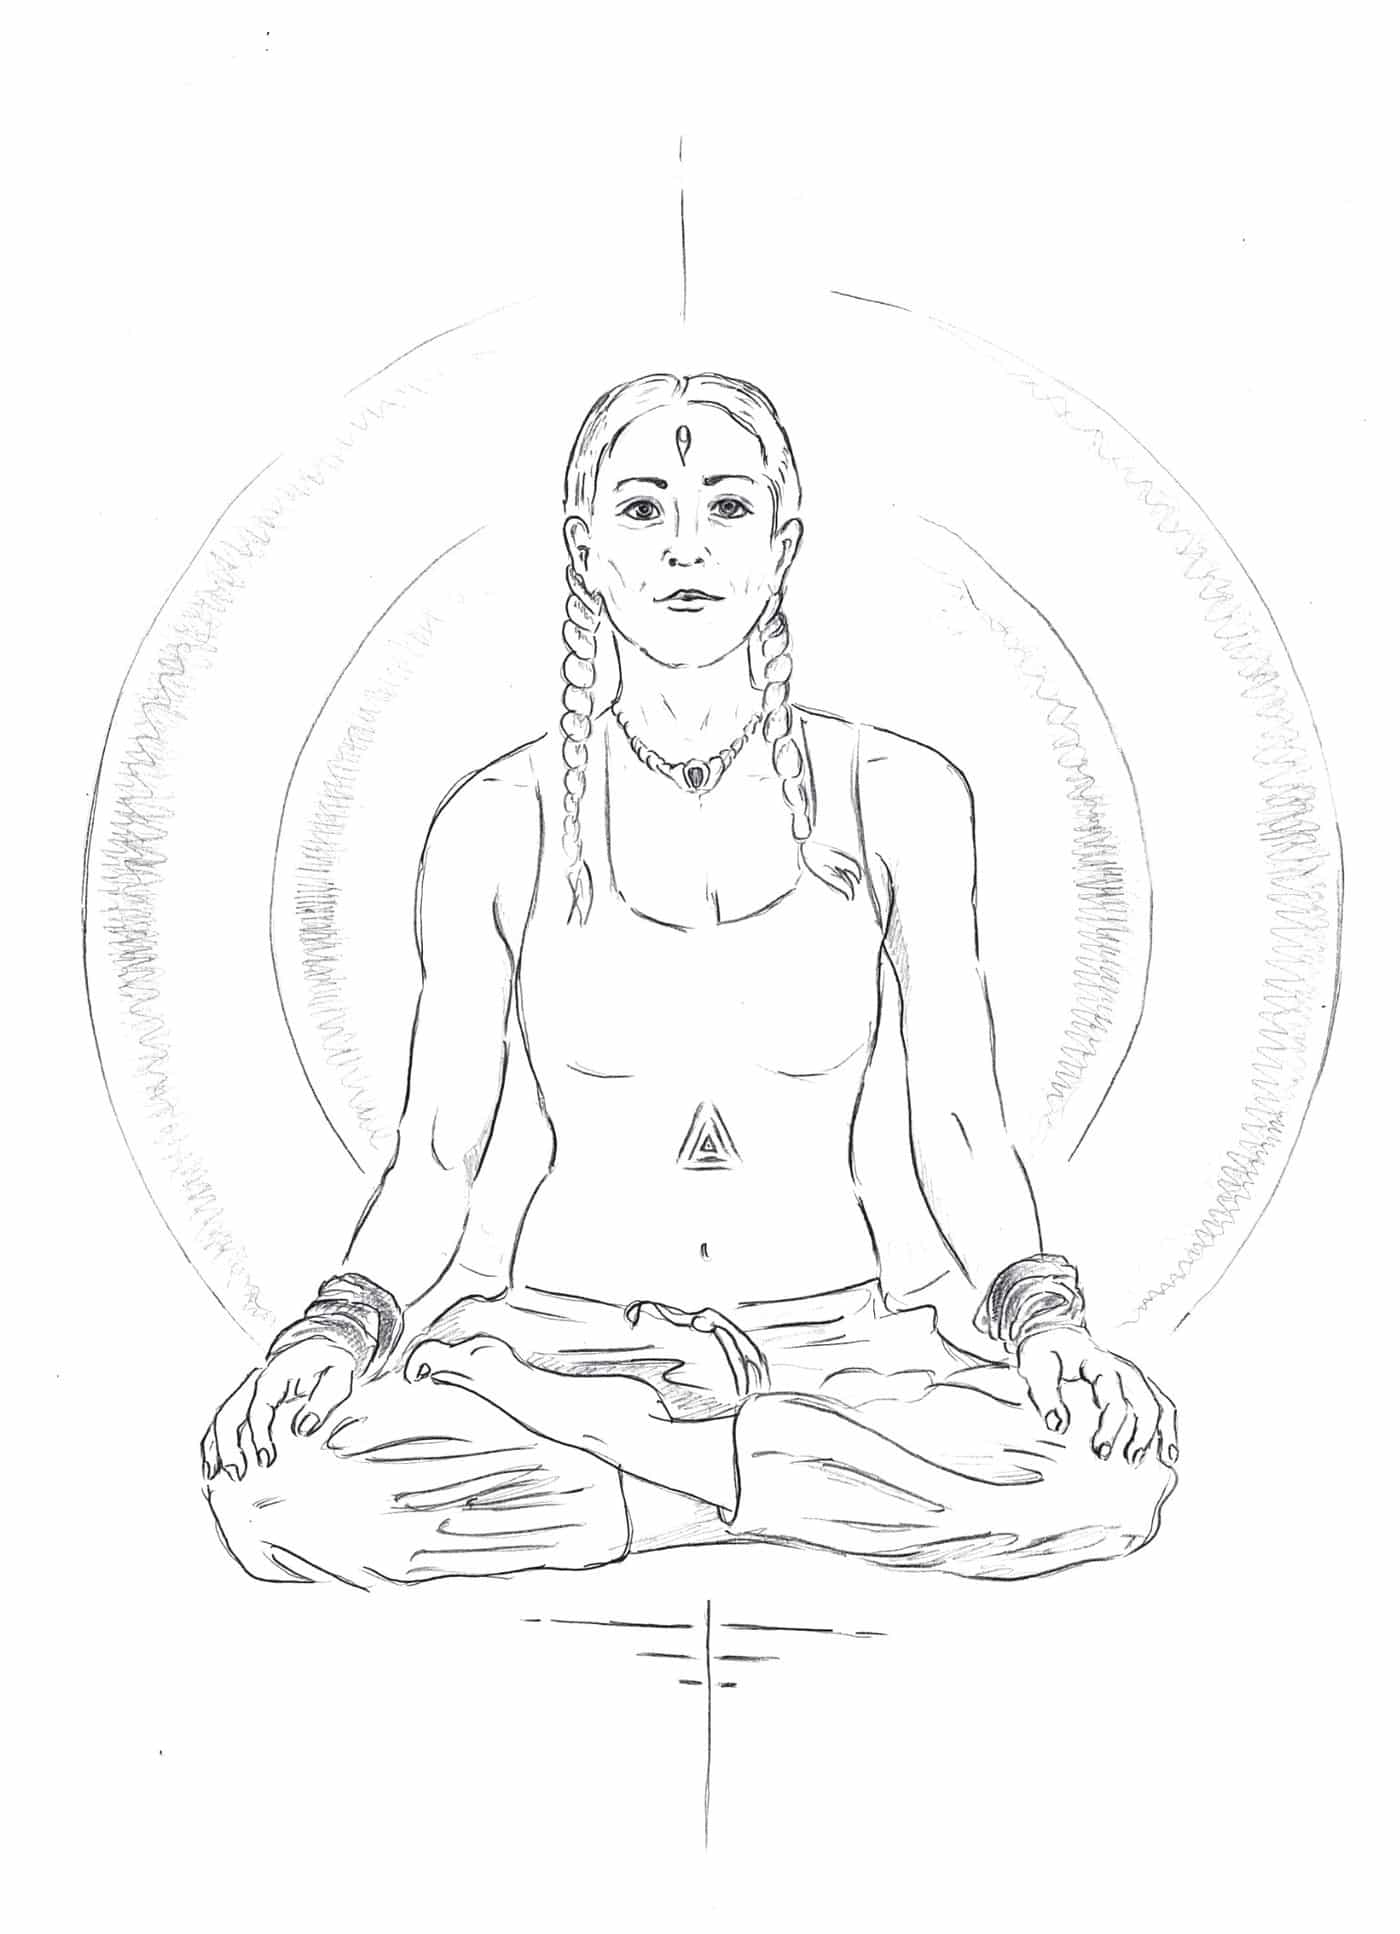
Pavanmuktasana 3 Shakti Bandha series Kundalini Yoga, meditation with sound halo, hand drawing Matsya Yoga Vienna

The Series for Releasing Energy Blockages

Swami Satyānanda, a renowned teacher, was the first to make this unique sequence available to the West. It is an integral part of sūkṣma vyāyāma, the subtle exercises of yoga.

The pavanmuktāsana series aims to optimise the flow of energy, to promote vitality and to strengthen the centre. This particular sequence also activates apāna prāṇa, the life energy that streams through the hips, the abdomen and the legs. Apāna prāṇa supports the will to live, self-confidence, digestion and sexual vitality.

The particular strength of this series lies in its capacity not only to intensify the flow of energy at the base, but also to cultivate fundamental warmth, trust and strength.

The presentation of this series follows the practice of our Kundalini Yoga tradition. Let yourself be enchanted by its beauty!

How to Practise This Series

Because these exercises are meant to work primarily on the subtle level and to interact with the energetic body rather than only with the physical one, it is essential to practise them with a focus on breath and rhythmic movement.

  • Two base postures. The first part of the series takes place in daṇḍāsana, the seat with the legs extended. The second part moves into the squat – where apāna is at home.
  • Titalī āsana is the pause. Between the strong exercises you return again and again to the butterfly, often with bhrāmarī, the humming of the bees.
  • Mūlabandha sets the full stop. Almost every exercise ends with drawing the force into the centre. Without that, the movement stays gymnastics.
  • Begin slowly, build the tempo. The series lives on rhythm, not on strength.
  • Duration. About 60–90 minutes.

Pavanmuktāsana 3 – the Exercises Step by Step

Rajju Karṣanāsanā – Pulling the Rope

Begin in a seated position with your legs extended, similar to daṇḍāsana. Keep your chest open and your spine straight. Let your hands rest quietly in your lap – this is your base position.

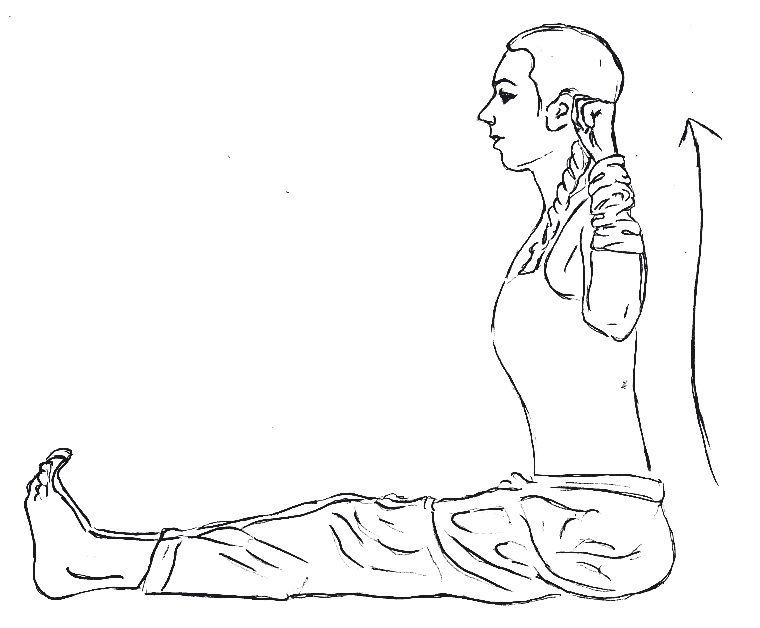
Rajju Karsanasana base position Pavanmuktasana 3, Dandasana seated staff pose with raised arm, Kundalini Yoga drawing

Inhale and raise your right arm out to the side while opening your hand. Then close your hand by first placing the thumb into your palm and then closing the fingers over the thumb – as though you were gripping an imaginary rope above you.

Hand position Rajju Karsanasana Pavanmuktasana 3, thumb into the palm closing the fist, yoga illustration

Exhale and pull your fist down so that it taps gently onto your lap. As soon as you feel your fist pressing softly against your thigh, activate mūlabandha and draw the force into the centre. Perform this movement alternately on the right and the left side.

To finish, pull your hand down, exhale and hold the breath in the centre. Practise with deep, rhythmic breathing; begin slowly and then increase the tempo.

Duration: 1–3 minutes.

Rajju Karsanasana pulling the rope Pavanmuktasana 3, arm up and fist down, Shakti Bandha Kundalini Yoga

Titalī Āsana – the Butterfly

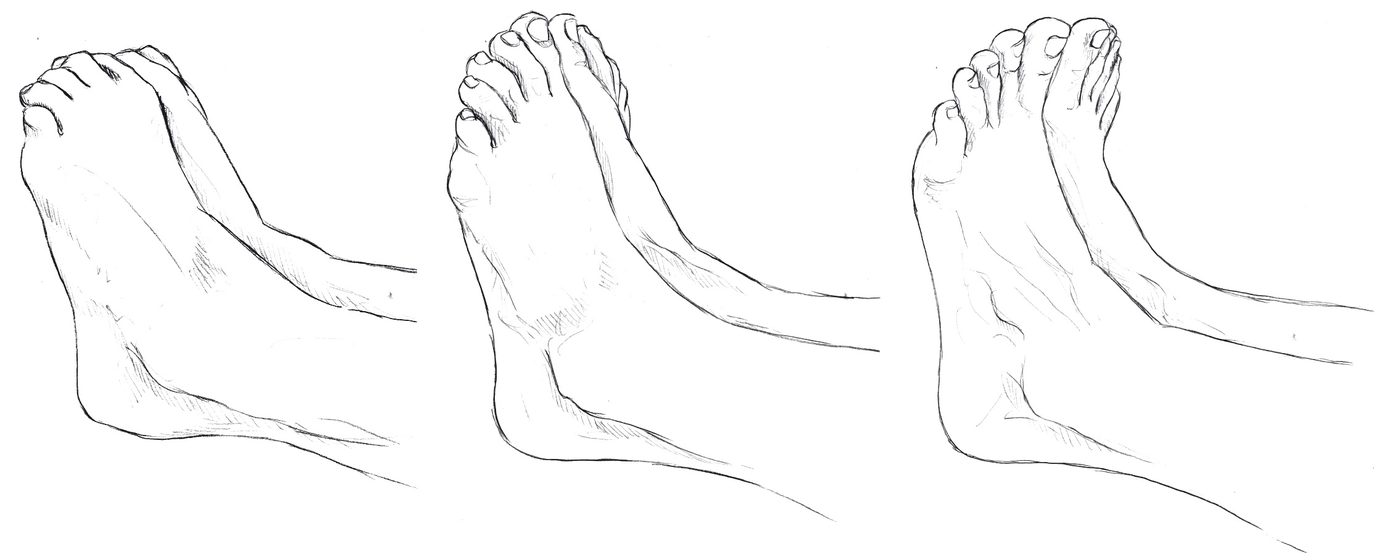
Then relax in the butterfly pose. Draw your knees to your chest, open them gently to the sides and bring your hands to your feet. Interlace your fingers underneath your feet, with your thumbs resting on the big toes. Inhale and lengthen your spine, exhale and lean forward while your feet rest relaxed on the floor.

Titali Asana preparation Pavanmuktasana 3, knees to the chest and opening the butterfly, yoga hand drawing

Advanced practitioners can deepen the exercise with bhrāmarī. Remember that bhrāmarī means a gentle expansion of your self and honours the inner sound that flows into eternal space. Bhrāmarī resembles the humming of bees; it calms the mind and expands the self.

When leaving titalī āsana, lift your knees passively with the help of your arms, to avoid unnecessary activation of the adductors and to encourage the opening of the hips.

Practise this exercise with deep breathing for 1–2 minutes.

Titali Asana butterfly Pavanmuktasana 3, Baddha Konasana and forward bend, Shakti Bandha series drawing

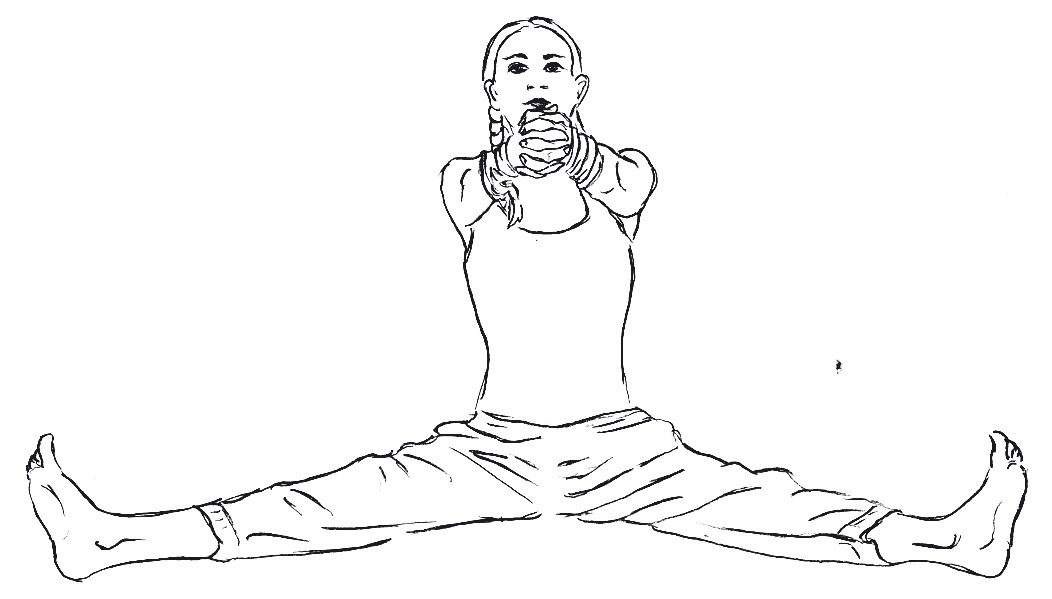
Cākī Cālaṇāsana – Turning the Millstone

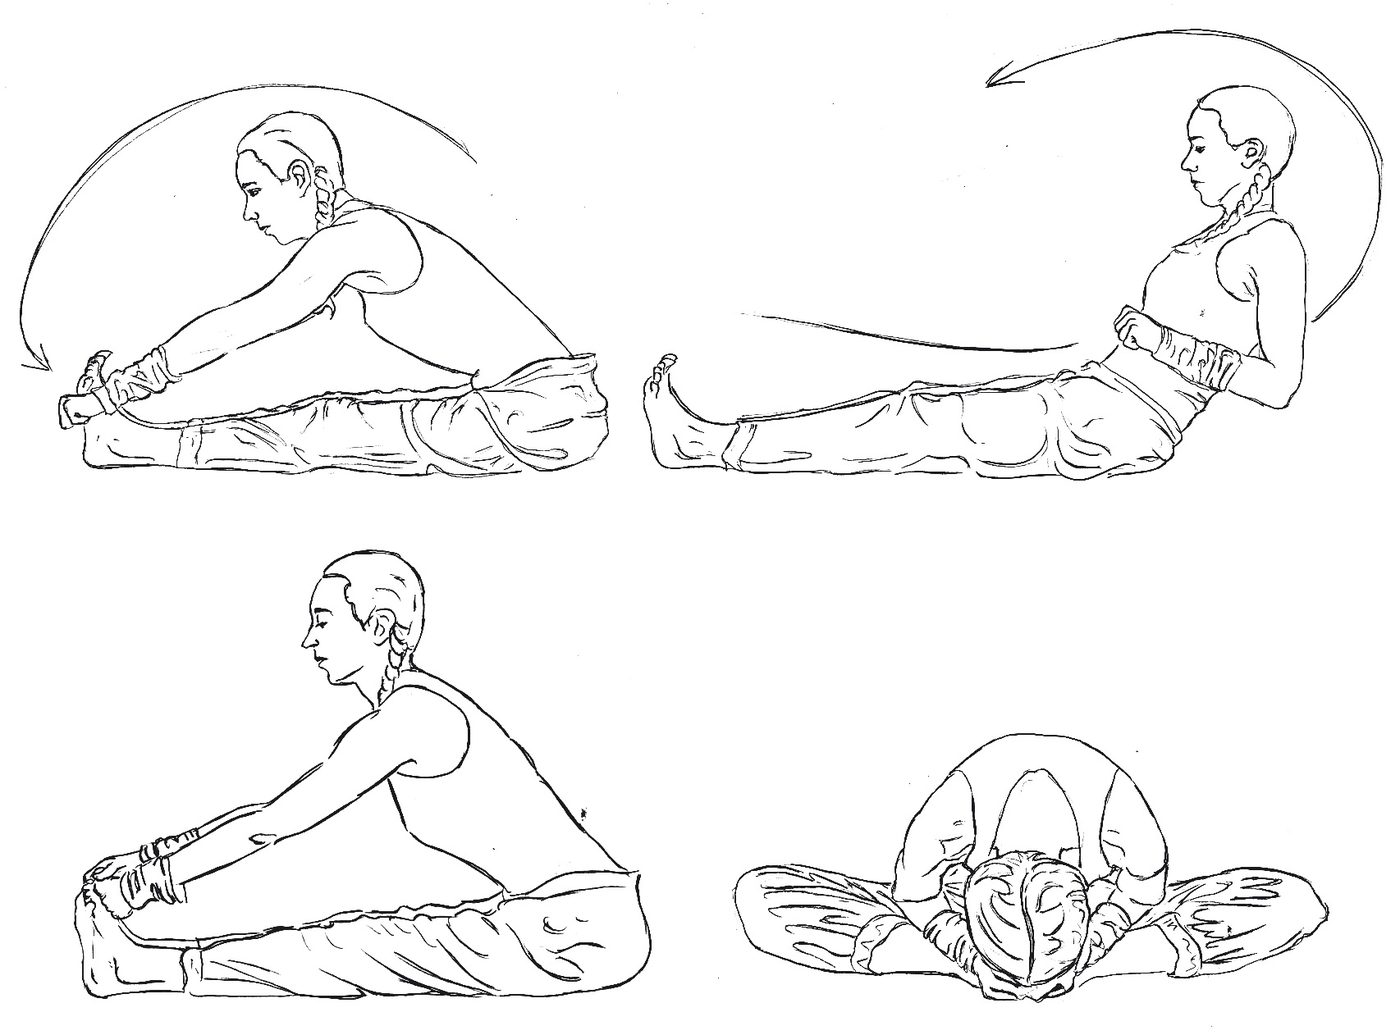
Return from titalī āsana to the base position – daṇḍāsana. Open your legs wide and stretch your arms out horizontally above the floor. Interlace your fingers as though you were holding the handle of a giant millstone.

Caki Calanasana wide legs Pavanmuktasana 3, Upavistha Konasana starting position, Kundalini Yoga drawing
Caki Calanasana millstone grip Pavanmuktasana 3, arms extended horizontally, Shakti Bandha illustration
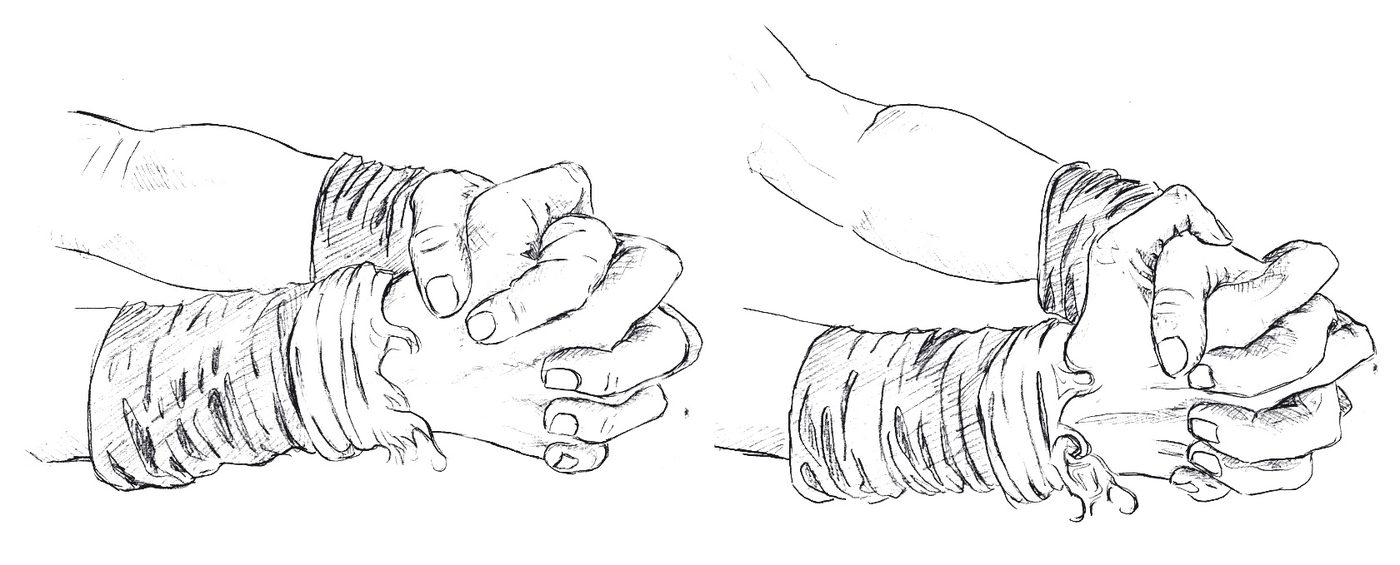
Finger interlace Caki Calanasana Pavanmuktasana 3, shifting the grip by one finger, yoga hand drawing

Inhale, lift your upper body, exhale and make a circular movement forwards, then move backwards. The circular movement should come from the hips, while your spine stays straight. Your arms should remain parallel to the floor and extended throughout the whole exercise.

Begin slowly, but with deep breathing. After a while, increase the tempo and deepen your breath. At the end, inhale, stretch your body and then change direction.

When changing direction, invert the interlacing of your fingers as well. A simple way to do this is to interlace them the usual way and then shift them by one finger.

After finishing the exercise, return slowly to titalī āsana and relax with bhrāmarī or deep breathing.

Practise with deep, rhythmic breathing and gradually become faster. 1–2 minutes in each direction.

Caki Calanasana turning the millstone Pavanmuktasana 3, circular movement from the hips, releasing energy blockages yoga

Nauka Sañcālanāsana – Rowing the Boat

Sit again in the base position, your upper body upright. Make fists with your hands, as though you were gripping the oars of a boat.

Nauka Sancalanasana starting position Pavanmuktasana 3, fists beside the shoulders, Kundalini Yoga drawing

Then inhale and open your chest; exhale and make a big circle forwards with your arms until your hands come to the floor beside your feet – bend your knees too, if needed. As you inhale again, lean back and bring your fists beside your shoulders.

Do this in a dynamic, circular movement and breathe deeply. At the end, inhale and draw the force into the centre. Relax in titalī āsana with deep breathing or bhrāmarī.

Move with deep, rhythmic breathing that gradually becomes faster, 1–2 minutes.

Nauka Sancalanasana rowing the boat Pavanmuktasana 3, circular rowing movement in seated staff pose, Shakti Bandha series

Gatyātmaka Meru Vakrāsana – Dynamic Spinal Twist

Return carefully from titalī āsana to the base position – daṇḍāsana. Open your legs hip-width apart and bend gently forward. Take hold of your right big toe with both hands. If you cannot comfortably reach your toes without bending the knees, take hold of your right shin with both hands instead.

As you inhale, raise your right arm and turn to the right, look behind you and open the arm and the chest. As you exhale, turn back to the front, take the left toe with your right hand, inhale and open the left arm to the left while directing your gaze and upper body back to the left.

Move in this way, in a joyful rhythmic motion. At the end, inhale in the centre, come up carefully, draw the knees towards the body and relax in titalī āsana with deep breathing or bhrāmarī.

Deep rhythmic breathing, gradually accelerating, 1–3 minutes.

Gatyatmaka Meru Vakrasana dynamic spinal twist Pavanmuktasana 3, twist in seated staff pose, Kundalini Yoga

Kāṣṭha Takṣanāsana – Chopping Wood

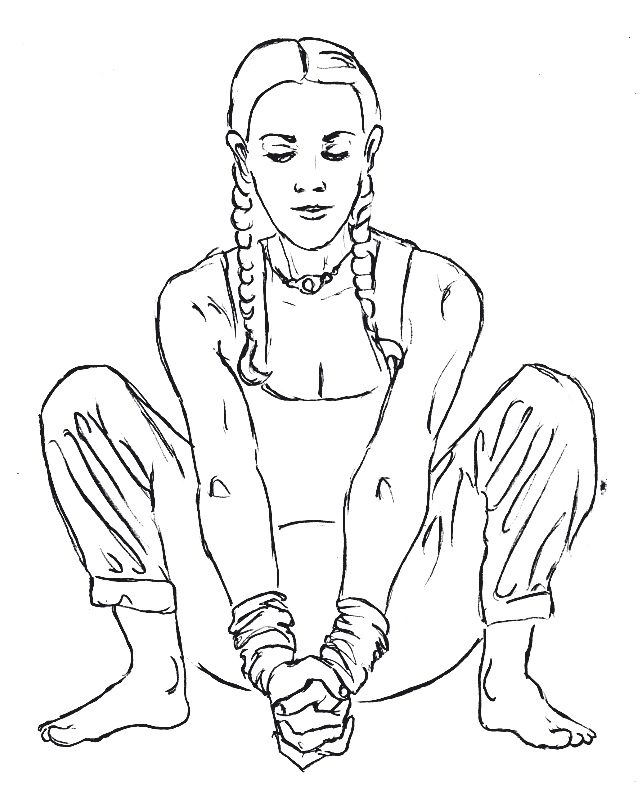
Come into a squat; your feet may be a mat's width apart, the toes turning slightly outwards. Interlock your fingers into one fist and stretch your arms down towards the mat. Fix your gaze on a point on the mat directly in front of you – with the arms extended, your fist should point at that spot.

Kastha Taksanasana squat starting position Pavanmuktasana 3, Malasana with interlocked fists, yoga drawing

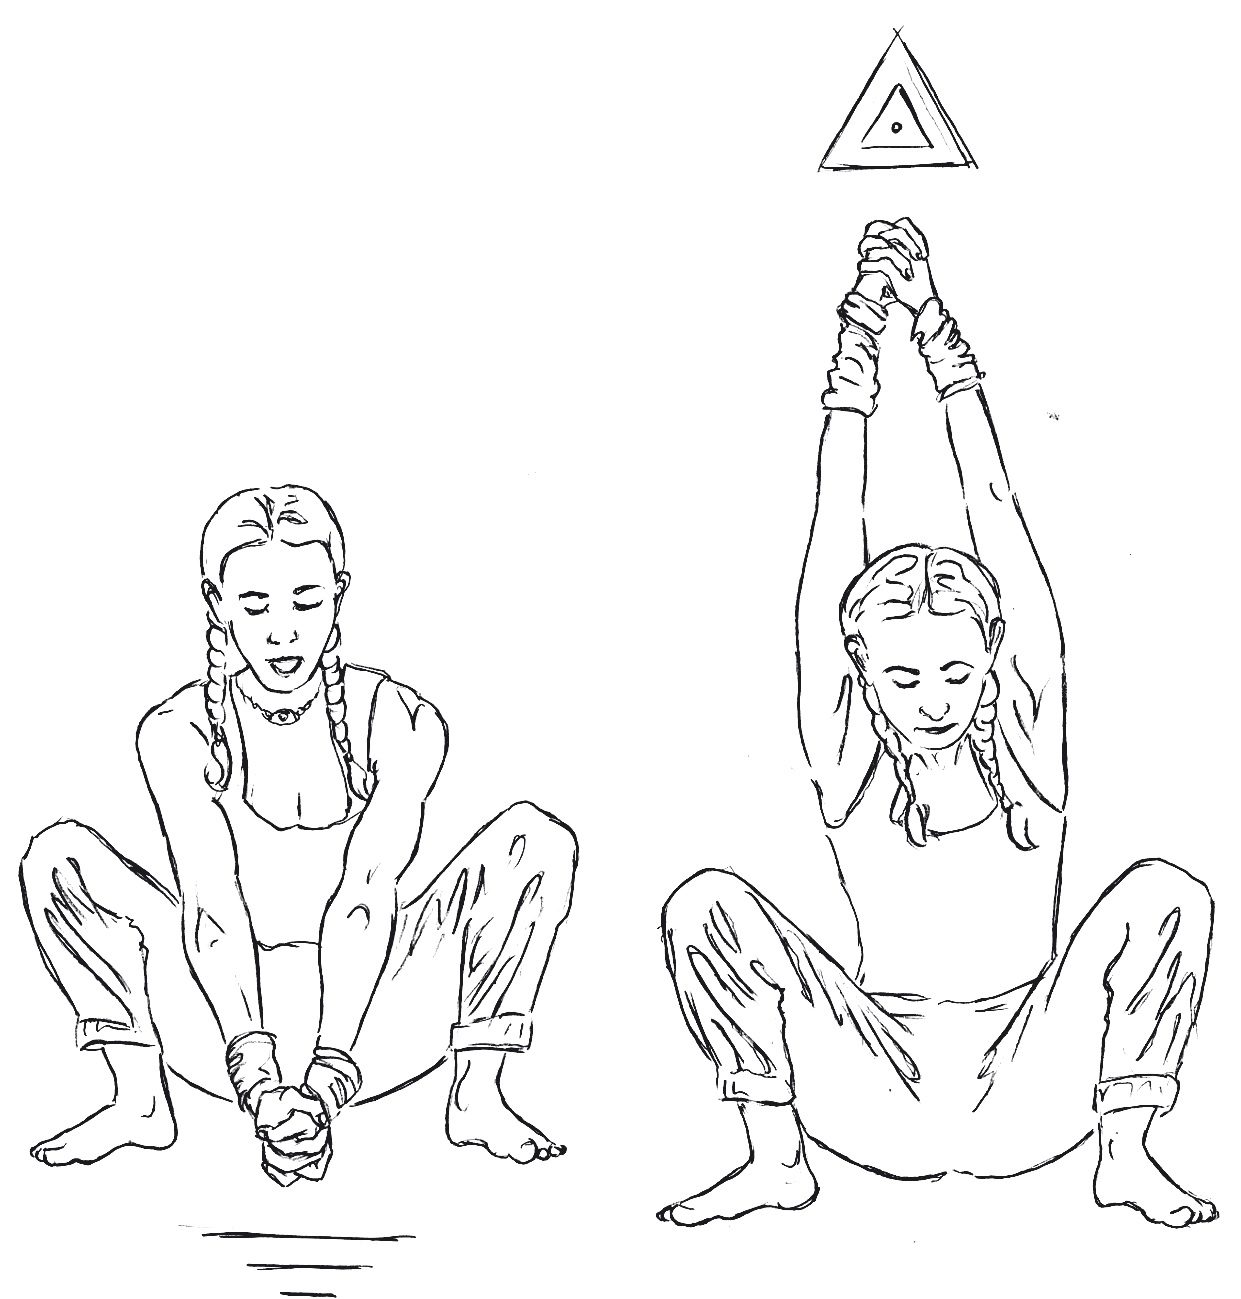
Inhale and raise your arms so that they form a line with your back. Then exhale through the mouth and let the fists fall powerfully downwards, as though you were chopping wood. When the fists touch the floor, activate mūlabandha.

Call out “Ha” as you exhale and chop downwards. Look down at the floor and set a strong tempo in movement and breath. At the end, hold the breath and draw mūlabandha.

Perform this exercise with powerful, rhythmic breathing that gradually becomes faster, for 1–3 minutes.

Kastha Taksanasana chopping wood Pavanmuktasana 3, raising the arms and chopping down with Ha, Shakti Bandha Kundalini Yoga

Namaskārāsana – the Salutation Posture

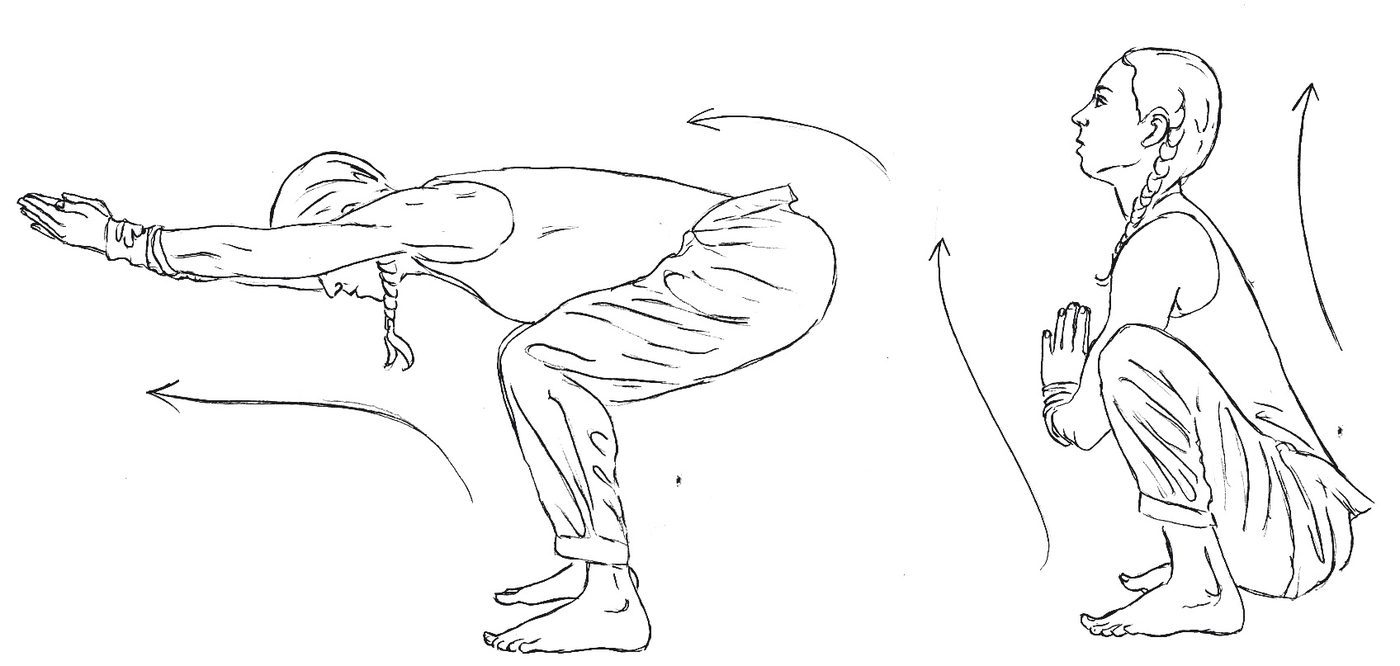
Come into the squat and form namaskāra mudrā. Open your knees with the help of your elbows and keep the spine upright.

Breathe in deeply and, as you inhale, extend your upper body horizontally above the floor while stretching the arms out straight. Exhale and return to the squat with a straight back and your gaze directed forward. Your hands come back into namaskāra mudrā.

Practise with deep breathing for 1–2 minutes.

Namaskarasana salutation posture Pavanmuktasana 3, squat with Namaskara Mudra and horizontal extension, yoga illustration

Vāyu Niṣkāsana – the Wind-Releasing Posture

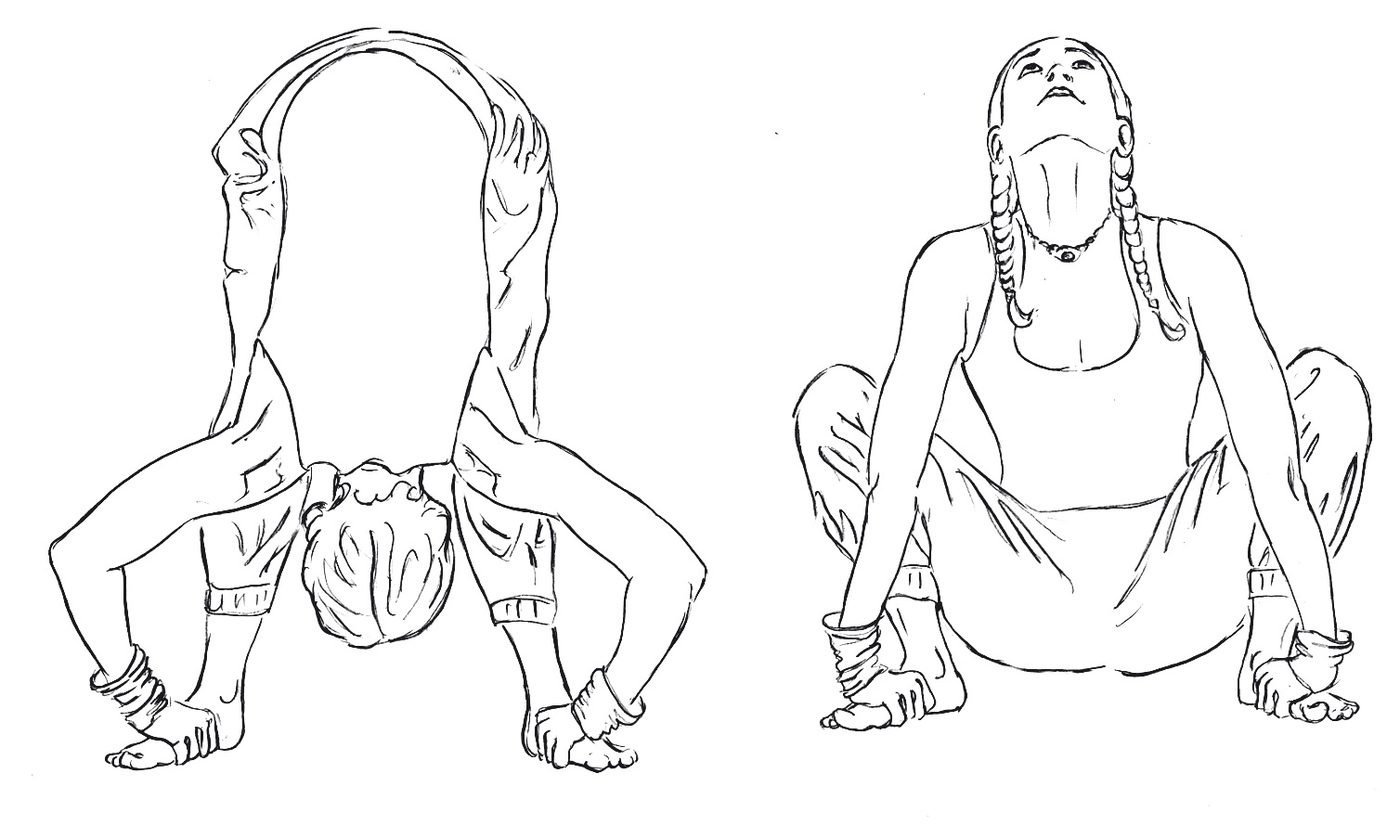
From the squat, take hold of the inner edges of your feet, thumbs pointing upwards and fingers reaching underneath the feet.

In this squatting position, inhale, draw your back straight, tilt your head back and look up into the cosmos. Hold the breath for a moment and activate mūlabandha. Then exhale, straighten your legs, bend forward and turn your gaze inwards. Hold the breath out and activate mūlabandha again.

Move up and down in the rhythm of your deep breathing. At the end, exhale deeply and hold bāhyakumbhaka, the outer retention of the breath.

Move with deep breathing for 1–2 minutes. Afterwards relax in vajrāsana, the seat on the heels.

Vayu Niskasana wind-releasing posture Pavanmuktasana 3, squat and forward bend with Mulabandha, Kundalini Yoga drawing

Vajra Balāsana – the Dynamic Thunderbolt-Child Posture

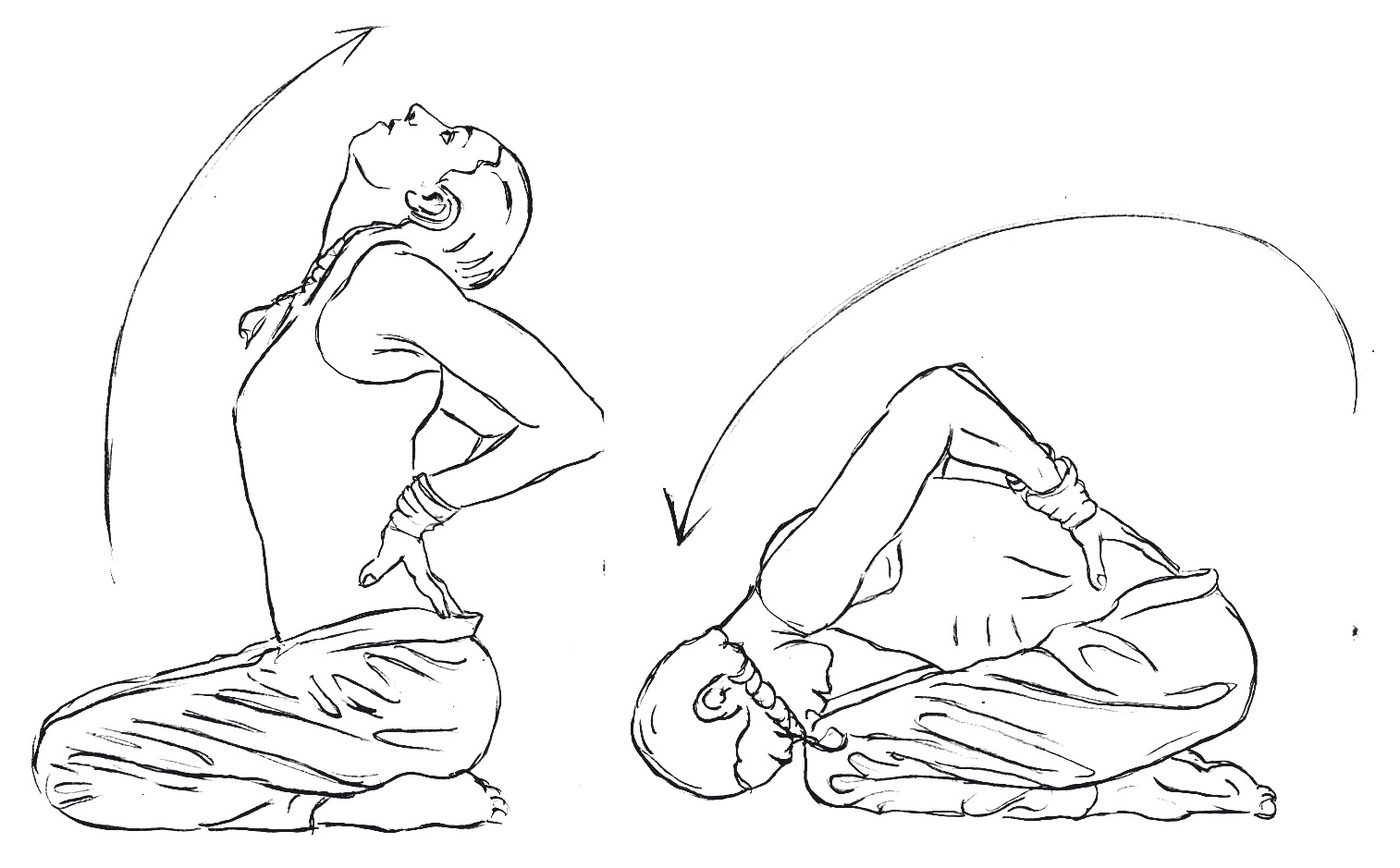
Come into vajrāsana, sitting on your heels. Bring your arms behind you onto your back so that your fingers point down and your thumbs point forward. The hands rest on your back directly above the pelvis, while you draw your elbows close together.

Vajrasana seat on the heels Pavanmuktasana 3, starting position for Vajra Balasana, Kundalini Yoga hand drawing

As you inhale, lift your chin, arch your back and keep your elbows as close together as possible. Breathe in slowly and deeply.

With the exhalation, guide your chin gently back towards the chest and fold your upper body forward from the hips. Let your forehead touch the floor and hold the exhalation for a moment in silence.

Inhale, come up slowly, arch your back and open towards the sky. Repeat this sequence with slow, deep breathing for about one to two minutes.

This posture fosters inner calm and quietens the mind. After a few rounds of deep breathing, relax in vajrāsana with your chin on your chest, similar to jālandhara bandha.

Practise this posture with deep breathing for 1–2 minutes.

Vajra Balasana thunderbolt-child posture Pavanmuktasana 3, backbend and forehead to the floor, Shakti Bandha series

Udarākarṣaṇāsana – the Abdominal Massage Posture

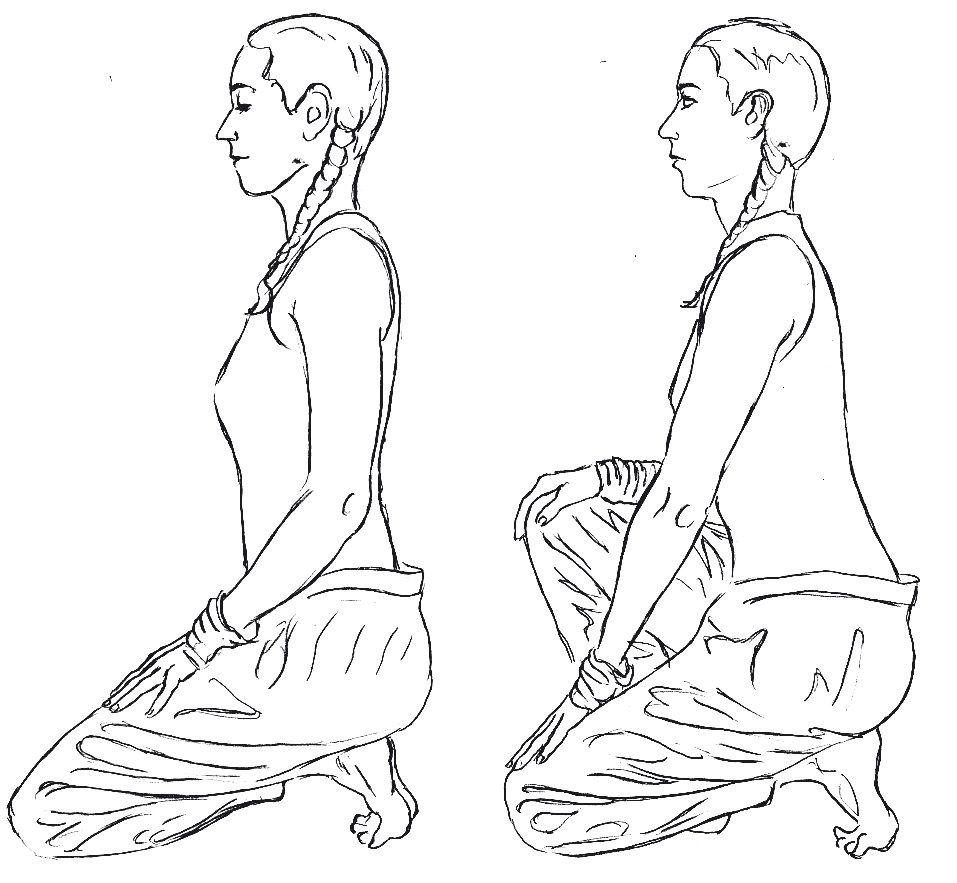
Sit on your left heel with your left knee on the floor in front of you. Your right foot stands beside the left knee, the knee upright. Your left arm is extended, the hand resting on the left knee. The right hand rests on the right knee. This is your starting position.

Udarakarsanasana starting position Pavanmuktasana 3, sitting on the heel with one knee upright, yoga drawing

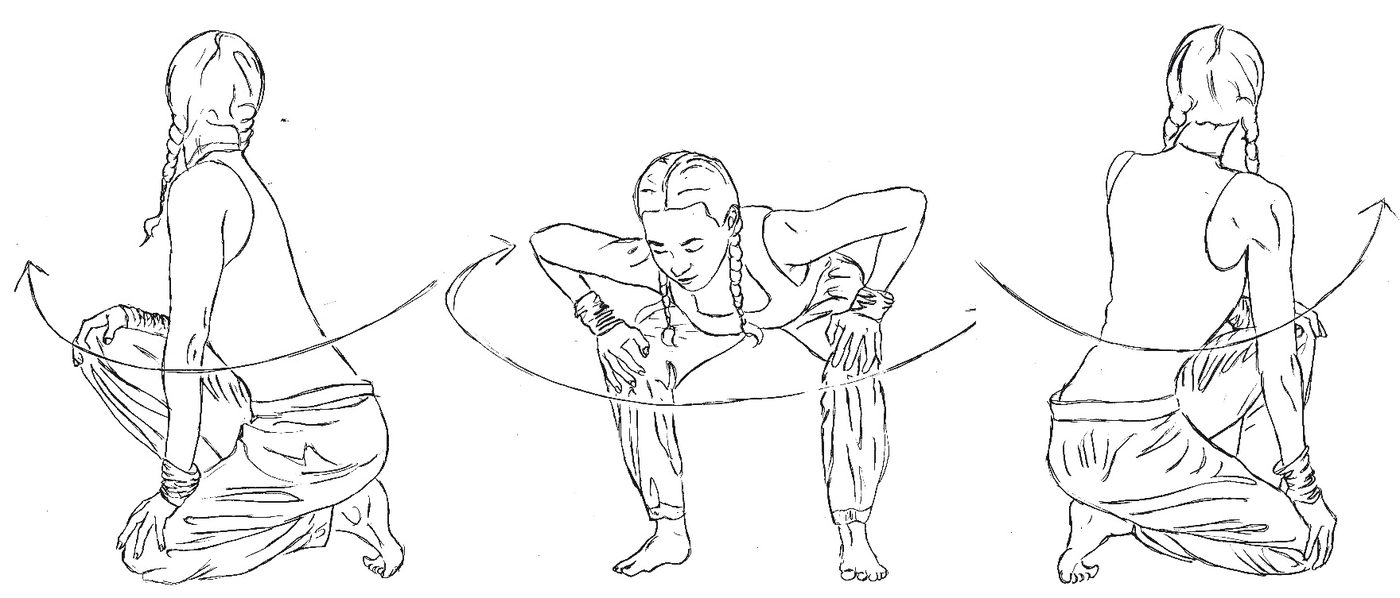
Inhale, lift the body gently and turn it to the left. As soon as the body passes the centre, exhale and let the buttock come to rest on the right heel, your right knee on the floor and your left leg upright. Turn your body further to the left and look over your left shoulder, to massage your abdomen even more deeply on the exhalation.

In this way your body makes a 180-degree movement and comes to rest in the exactly mirrored position. Move and turn your upper body from left to right in this way, while noticing the rising heat in the body.

Turn with deep breathing for 1–2 minutes.

Then relax in vajrāsana for three deep breaths; feel the warmth in your thighs and under your hands. Your vital force lies in your thighs.

Udarakarsanasana abdominal twist Pavanmuktasana 3, 180 degree turn from heel to heel, Kundalini Yoga illustration

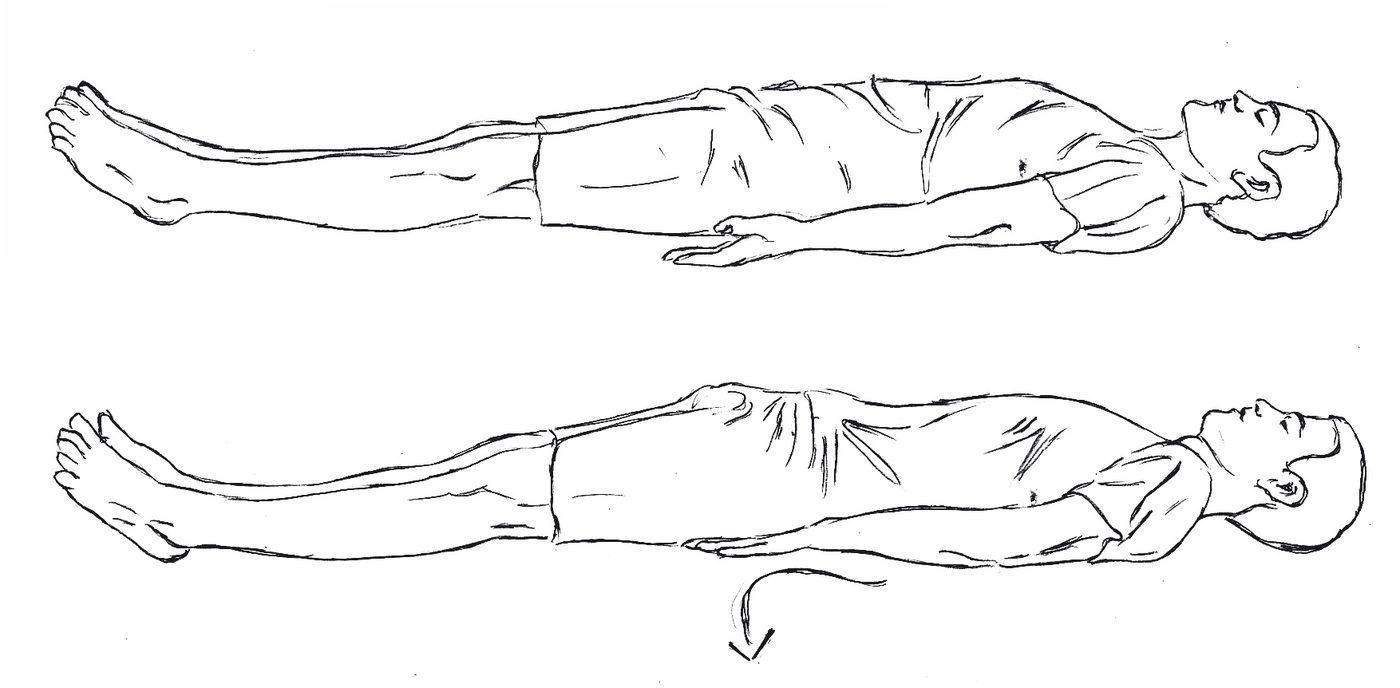
Śavāsana – the Corpse Pose

Lie down on your back and relax deeply, palms facing up. Imagine that you are floating in space and expanding.

Recognise your strength and your life. You are allowed to be, and you need hold on to nothing, because everything is already there. Be thankful.

The Series at a Glance

  1. Rajju karṣanāsanā – Pulling the rope
  2. Titalī āsana – The butterfly
  3. Cākī cālaṇāsana – Turning the millstone
  4. Nauka sañcālanāsana – Rowing the boat
  5. Gatyātmaka meru vakrāsana – Dynamic spinal twist
  6. Kāṣṭha takṣanāsana – Chopping wood
  7. Namaskārāsana – Salutation posture
  8. Vāyu niṣkāsana – Wind-releasing posture
  9. Vajra balāsana – Thunderbolt-child posture
  10. Udarākarṣaṇāsana – Abdominal twist
  11. Śavāsana – Corpse pose

With that the trilogy is complete: part 1 opens the joints, part 2 builds fire in the centre, part 3 sets the energy flowing and anchors it below. Practised in this order, the three series are a complete path through the energy body – and the foundation for everything that follows in our school.

Savasana and closing meditation Pavanmuktasana 3, seat with Manipura triangle and sound halo, Matsya Kundalini Yoga

Śakti Bandha, Apāna and the Satyananda System – Frequently Asked Questions

What does Śakti Bandha mean?

Śakti is force, energy, the feminine principle of the universe. Bandha literally means fetter, binding, lock – in yoga usually the conscious lock, as in mūlabandha or jālandhara bandha.

In the name of this series, however, bandha stands for something else: for the blockage. Śakti bandha are the places where the force is stuck. In English the series is therefore often listed as “energy block postures” – postures against the blocking of energy. Both readings belong together: you release the unconscious binding by practising the conscious lock.

What is apāna – and what does it have to do with the five vāyus?

In yoga, prāṇa is not one single thing but divides into five vāyus, five “winds”, each with its own direction and task:

  • Prāṇa – in the chest, takes in: breath, impression, food.
  • Apāna – below the navel, streams downwards and outwards: elimination, birth, letting go, grounding.
  • Samāna – at the navel, digests and distributes.
  • Udāna – in the throat and head, leads upwards: speech, expression, uprightness.
  • Vyāna – throughout the body, pervades and connects.

Pavanmuktāsana 3 works deliberately with apāna. Hence the squat, hence mūlabandha at the end of almost every exercise, hence the emphasis on hips, pelvis and legs. A weak apāna shows itself as listlessness, constipation, insecurity; a wild apāna as restlessness. This series brings it into a rhythm.

In Kundalini Yoga this is more than physiology: the union of prāṇa and apāna in the navel centre is regarded as the moment in which the force begins to rise along the spine. If you are interested in the map behind this, you will find it on our page about the chakras and in the article on Svādhiṣṭhāna, the centre in the pelvis.

Why is this series so often practised in a squat?

Because the deep squat is the most natural eliminating and birthing posture of the human being – the shape in which apāna can flow downwards unhindered. In most cultures where people live without chairs it is an everyday resting position. With us it has all but disappeared.

For many Western practitioners this is the real challenge of the series: not the strength, but the squat. If your heels do not reach the floor, put a folded blanket underneath. That is not a makeshift solution but the correct answer.

Why do you call out “Ha” when chopping wood?

The sound completes the exhalation. A “Ha” from the belly empties the lungs more deeply than a silent exhalation ever could – and it carries something out with it. Old anger, heaviness, the residue of days on which you pulled yourself together.

It is also one of the few places in yoga where sound is expressly allowed. Use it. Whoever does this exercise quietly does it by halves.

Why does bhrāmarī appear so often here?

Bhrāmarī, the humming of the bees, is the counterpole to the powerful part of the series. After every dynamic exercise you return to the butterfly and hum – and the nervous system settles without the generated energy evaporating.

The sound calms the mind and expands the self. It is the bridge between movement and meditation. If you leave out this alternation, what remains is effort where practice should be. You will find more on this way of practising in our YACEP meditation workshop.

Who was Swami Satyananda – and what is the Satyananda system?

Swami Satyananda Saraswati (1923–2009) met his teacher Swami Sivananda in Rishikesh at the age of twenty and was initiated into the monastic order in 1947. In 1962 he founded the International Yoga Fellowship Movement, and in 1964 the Bihar School of Yoga in Munger on the Ganges. In 1988 he handed over its leadership to his successor, Swami Niranjanananda.

What is known today as “Satyananda Yoga” or “Bihar Yoga” is a system that brings together six paths of yoga: Haṭha, Rāja and Kriyā Yoga as outer practice, Karma, Bhakti and Jñāna Yoga as inner paths – head, heart and hands. He wrote more than eighty books; Asana Pranayama Mudra Bandha of 1969 is still one of the most widely used manuals in yoga teacher trainings worldwide. Inseparably linked with his name is also Yoga Nidrā, the modern form of guided deep relaxation.

Is Satyananda's Kundalini Yoga the same as the one known in the West?

No, and this confuses many people. There are two large currents that are both called “Kundalini Yoga”, historically related but different.

Satyananda's approach is that of a monk in the Sivananda lineage: systematically built up, tantrically grounded, with kriyā, yoga nidrā and a long preparatory path through āsana, prāṇāyāma, mudrā and bandha. The variant that spread in the West from the 1970s onwards is considerably more immediate: short, powerful sets with Breath of Fire, mantra and white clothing. How this second lineage came about, and what part sūkṣma vyāyāma played in it, we described in detail in part 2 of this series.

Our own lineage, in turn, sits fully in neither of them – we come from the Trika Tantra of Kashmir. If you want to know what that means, you will find it in the article about our teacher Mark Dyczkowski and on our page Yoga and Philosophy.

What sets part 3 apart from parts 1 and 2?

Part 1 is fine and meditative, seated, joint by joint. Part 2 is warm and concentrated, lying down, everything around the navel. Part 3 is the most physical and the loudest: dynamic circles, twists, the squat, a shout.

Energetically the movement goes from the outside inwards and downwards – from the periphery through the centre to the base. That is why the order is not accidental, and why part 3 is not the right entry point if you have never worked with this kind of exercise before.

When should I not practise this series?

With knee problems the deep squat needs care – work with a support under the heels or leave out the squatting exercises. Restraint is also called for with acute back complaints, disc problems, during pregnancy, after abdominal surgery and in the first days of menstruation.

This article describes yogic tradition and is not a substitute for medical advice. If you have complaints, please speak to your doctor.

Where can I learn the three series with guidance?

In our Kundalini Yoga classes in Vienna all three parts are a fixed component of the practice. We cover them systematically – with anatomy, the energy model and didactics – in the RYT 200h yoga teacher training and deepen them in the RYT 300h training; both are also available as online and hybrid training. For teachers, the YACEP Kundalini training is the right setting, and if you want to go deeper into sound and silence, the chakra workshop is the place. A look at who we are will show you the people who walk this path.
Even more inspiration for you

If you would like to dive deeper, do take a look at our download area.

There you will find a lovingly assembled selection of Kundalini Yoga kriyās, mantras and other beautiful impulses that I have put together for you.

And if the world of thought behind the practice interests you: Yoga and Philosophy gathers our texts on the subject, and The Chakras answers the question that sooner or later everybody asks.

Shakti Bandha meditation, Matsya Kundalini Yoga Academy Vienna
Pavanmuktāsana 2 – the Abdominal Series in Kundalini Yoga

Pavanmuktāsana 2 – the Abdominal Series in Kundalini Yoga

Note: All exercises are illustrated by hand with a pen and written by Clemens Biedrawa.

Pavanmuktāsana 2 – the Abdominal Series in Kundalini Yoga

When Pavanmuktāsana 1 opens the joints, then part 2 moves to the center.

The series is called udarapoṣaṇa āsana—“the postures that nourish the abdomen.” Ten exercises, all performed while lying down, all focused on the navel. They look like calisthenics. And in fact, physically, they do exactly what they promise: They stimulate intestinal peristalsis, facilitate elimination and digestion, and build core strength.

But that's not the reason we teach them.

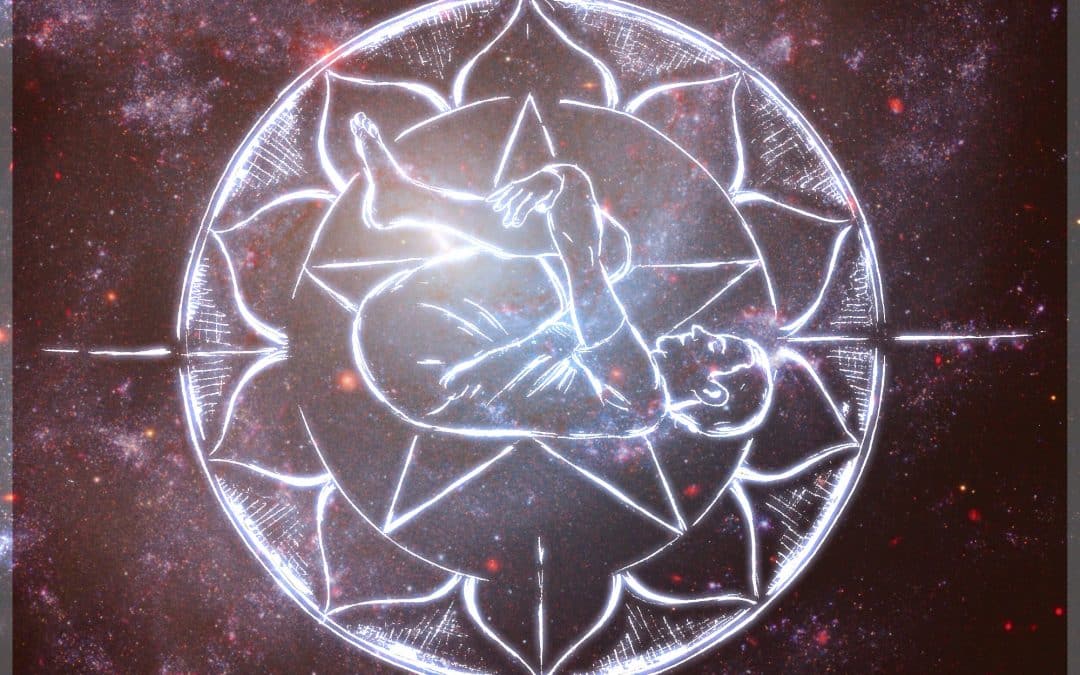
pavanmuktasana-2-titel-supta-pavanamuktasana-mandala

Udarapoṣaṇa āsana – the series that nourishes the center

From an energetic perspective, this series is even more interesting than its physical effects: It can strengthen willpower and that self-confidence and foster a warm feeling of grounding deeply within our inner core. The more we feel the strength of our center, the more freely we can live – free from worries and fear.

This is not a coincidence and not a metaphor. The abdominal cavity is in yoga the seat of Maṇipūra, the center of fire. Anyone who reads about the Maṇipūra chakra will find, will find there the same themes again: discipline, strength, transformation—and the storm clouds that obscure the sky, when this center loses its balance . These ten exercises are the physical approach to this.

The way the pavanamuktāsana series is presented here differs somewhat from the original method taught by Satyānanda. Here it is taught the way it is customary in our Kundalini Yoga tradition .

How to Practice This Series

Since these exercises are meant to work subtly with our energy rather than merely affecting the physical body, they should be practiced with a clear focus on breathing and rhythmic movement.

  • The belly breathes along. With every inhalation it expands, with every exhalation it contracts. The movement massages the centre from within.
  • The lower back stays safe. The hands stabilise the hips from the sides — with the backs of the hands from underneath. This is not a detail but the condition for the series strengthening rather than straining you.
  • Begin slowly, then speed up. Almost every exercise follows this arc: start consciously and slowly, become dynamic, come back to stillness at the end.
  • Breathe passionately. The more intense the breath, the more vitality can be gained. The navel is the point of reference.
  • Let go in between. Pūrṇa supta pavanamuktāsana — both knees to the chest — is the resting posture you return to again and again after the strong exercises.
  • Duration. About 60–90 minutes.

Pavanmuktāsana 2 – the Exercises Step by Step

Dṛḍha Uttānpādāsana – Dynamic Leg Raising

Lie on the floor with your legs together and your arms stretched out beside your body. The palms face down onto the floor; your hands stabilise the hips from the sides.

Drdha Uttanpadasana starting position Pavanmuktasana 2, supine with arms beside the body, Kundalini Yoga drawing

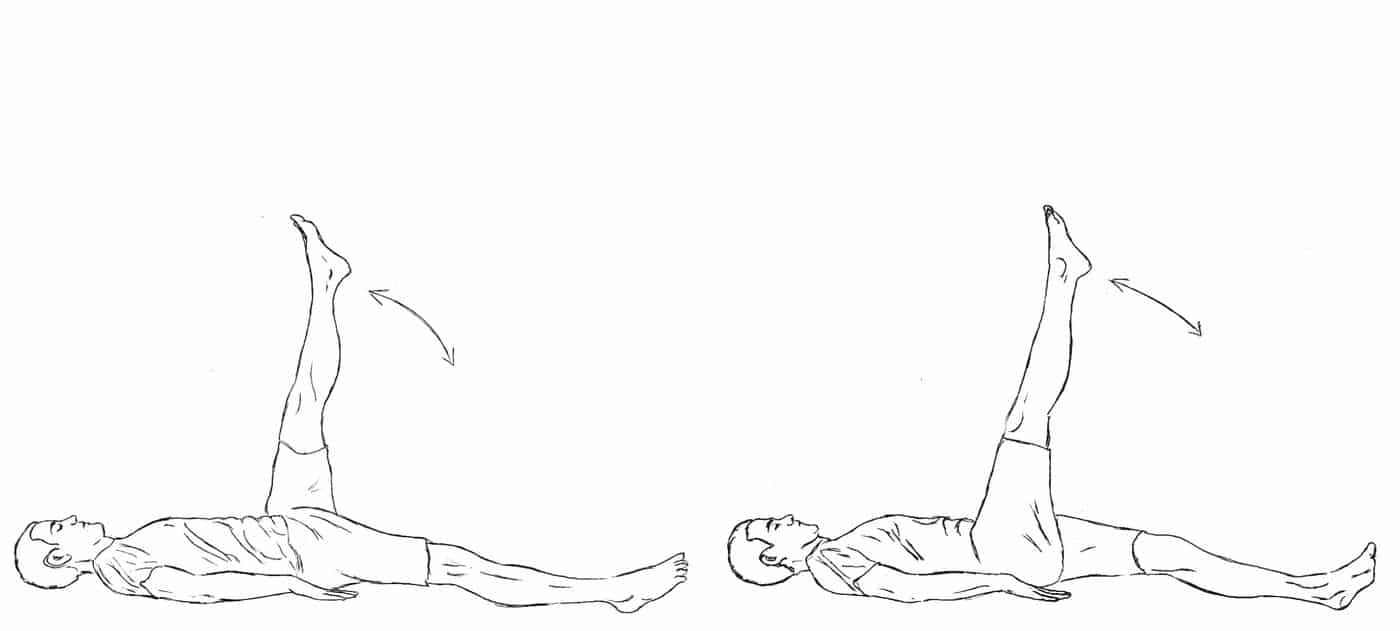
Raise the right leg as you inhale. As you exhale, lower it to the floor. Inhale and raise the left leg, exhale and lower it to the floor. Continue in this way. Make sure your toes point away from your body.

Begin slowly, then become faster and more dynamic. Stabilise your hips with the backs of your hands from underneath, and make sure your lower back stays stable and safe.

Breathe deeply and rhythmically. Your belly should expand with every inhalation and contract with every exhalation – massage the centre.

Deep, rhythmic breathing. Gradually become faster, then slow down again at the end, 1–2 minutes.

Drdha Uttanpadasana single leg raise Pavanmuktasana 2, abdominal series Kundalini Yoga hand drawing

Then do the same exercise with both legs pressed together. Raise and lower them in the rhythm of one breath. Stabilise your lower back with your hands.

Relax by drawing your knees towards your chest. This resting posture is called pūrṇa supta pavanamuktāsana.

Drdha Uttanpadasana double leg raise Pavanmuktasana 2, strengthening the navel centre, yoga illustration
Purna supta pavanamuktasana resting posture Pavanmuktasana 2, knees to the chest, Kundalini Yoga drawing

Cakra Pādāsana – Leg Rotation

Bring your arms back alongside your body, palms facing down, and stabilize your hips from the sides with your hands.Bring your arms back alongside your body, palms facing down, and stabilise your hips from the sides with your hands.

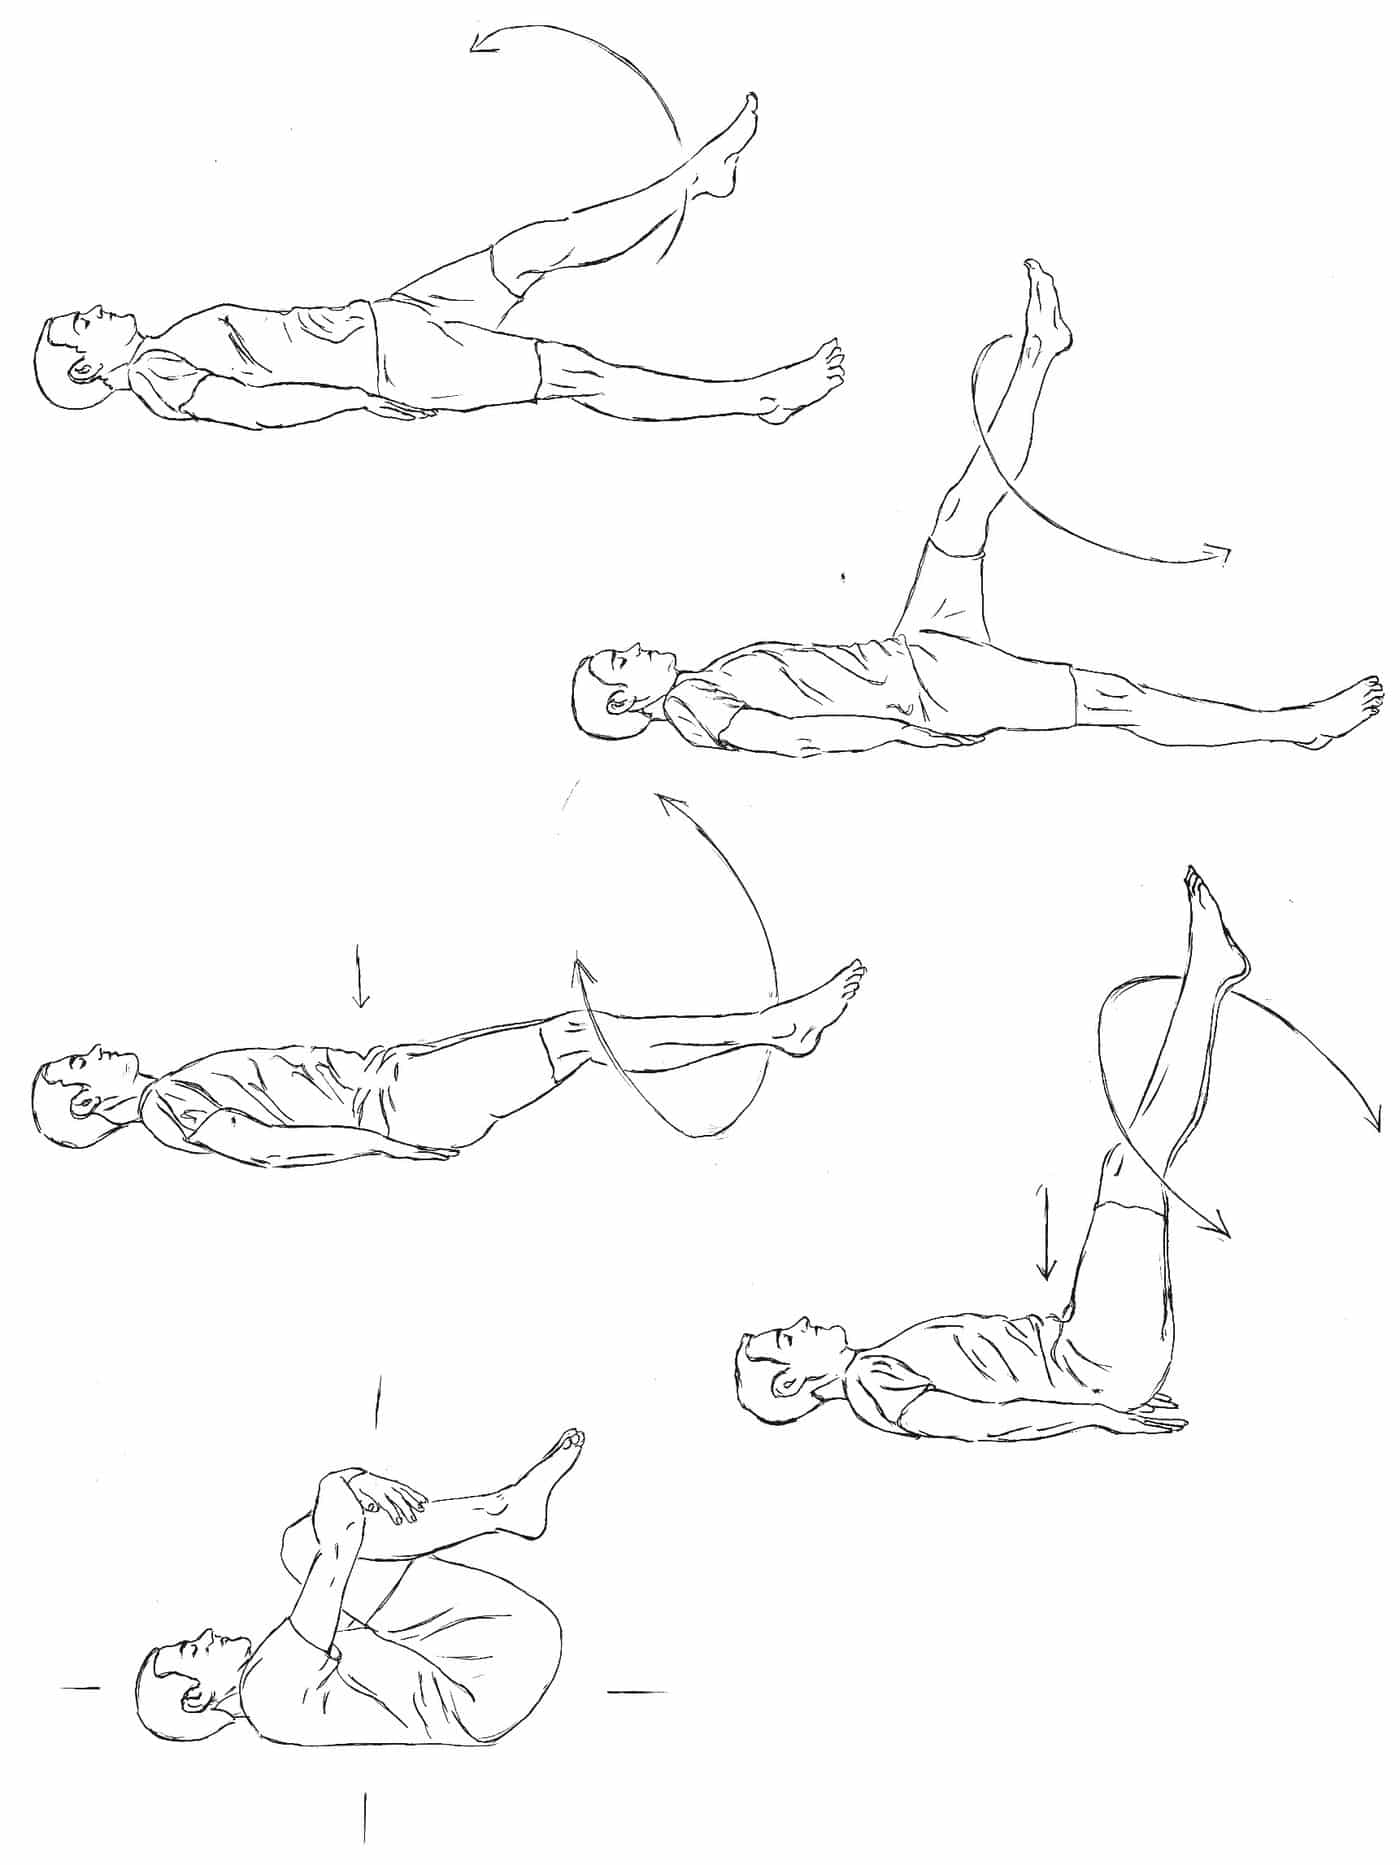
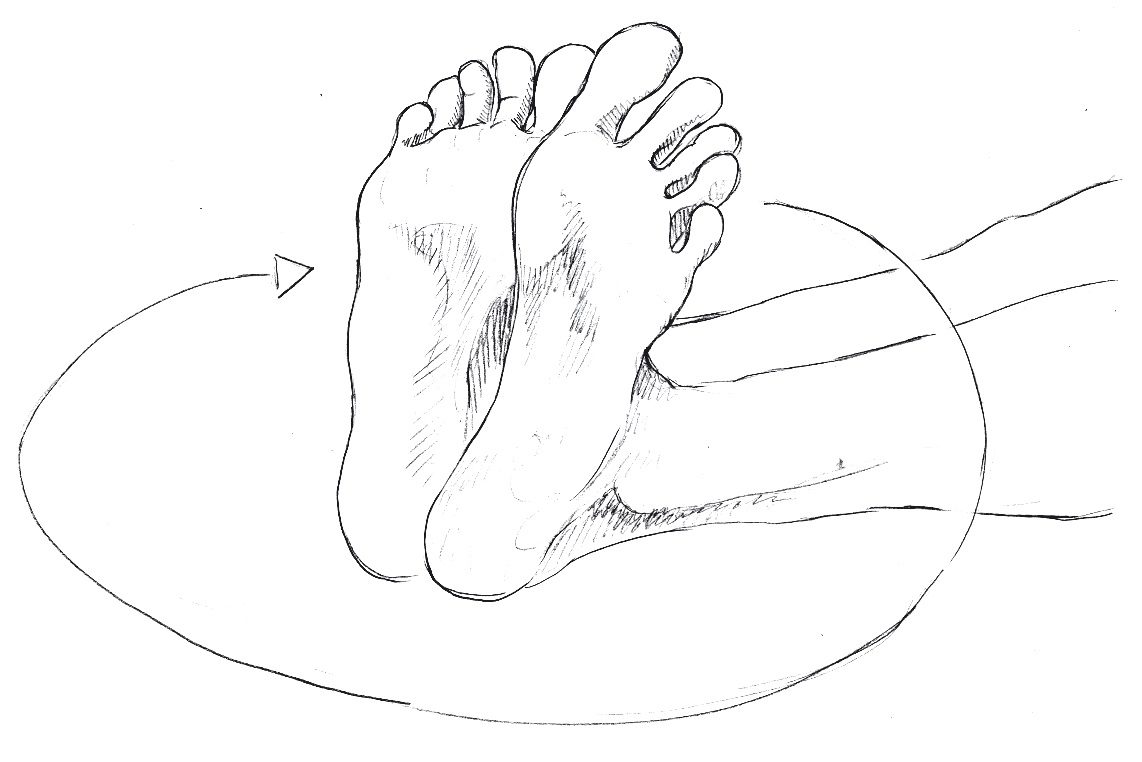
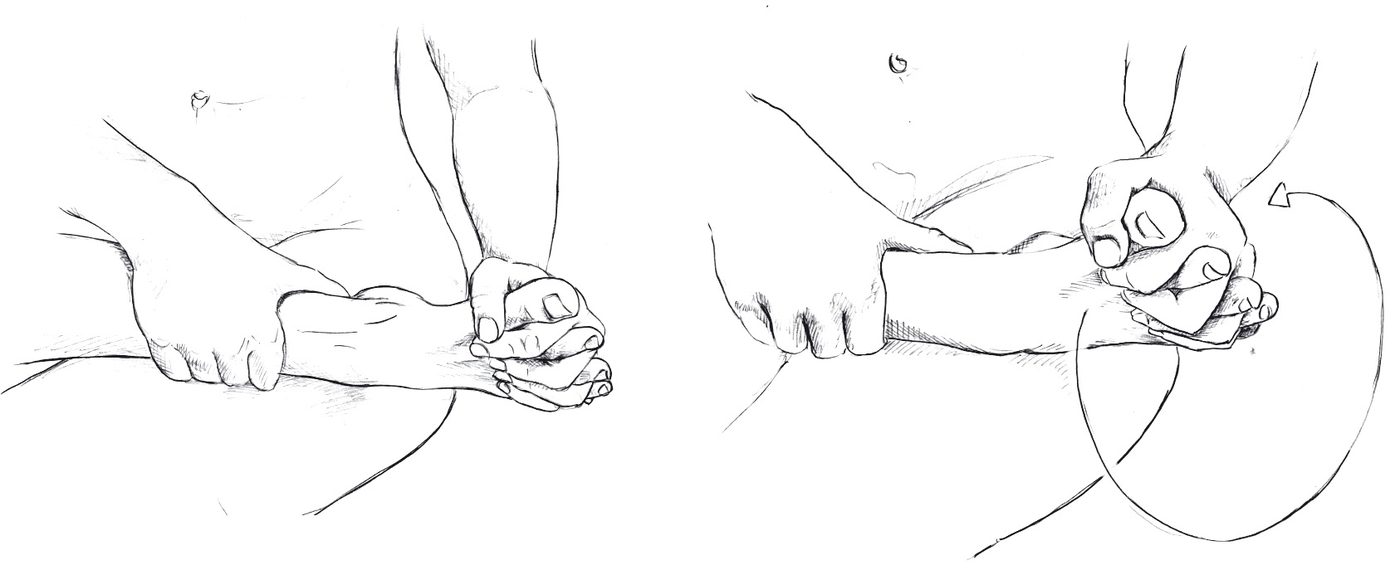
Raise the right leg and begin to rotate it carefully and consciously from the hip, clockwise. Move it inwards across the physical centre, then up, then out and back to the centre.

Be aware: If the foot follows the direction of the leg movement from the ankle, and the leg is guided inwards through the physical centre, you can avoid an uncomfortable clicking in the hip joint.

Make this movement consciously and with deep breathing, moving the belly out and in with the breath. Rotate one leg first, then the other.

Breathe deeply and rhythmically from the belly for 1–2 minutes on each side.

Then do the same exercise rotating both legs together, pressed against each other, while stabilising your lower back with your hands. Rotate in one direction, then the other. Relax by drawing your knees to your chest.

Rhythmic belly breathing for one minute in each direction.

Cakra Padasana leg rotation Pavanmuktasana 2, circling the leg from the hip, Kundalini Yoga hand drawing

Pāda sañcālanāsana – Cycling

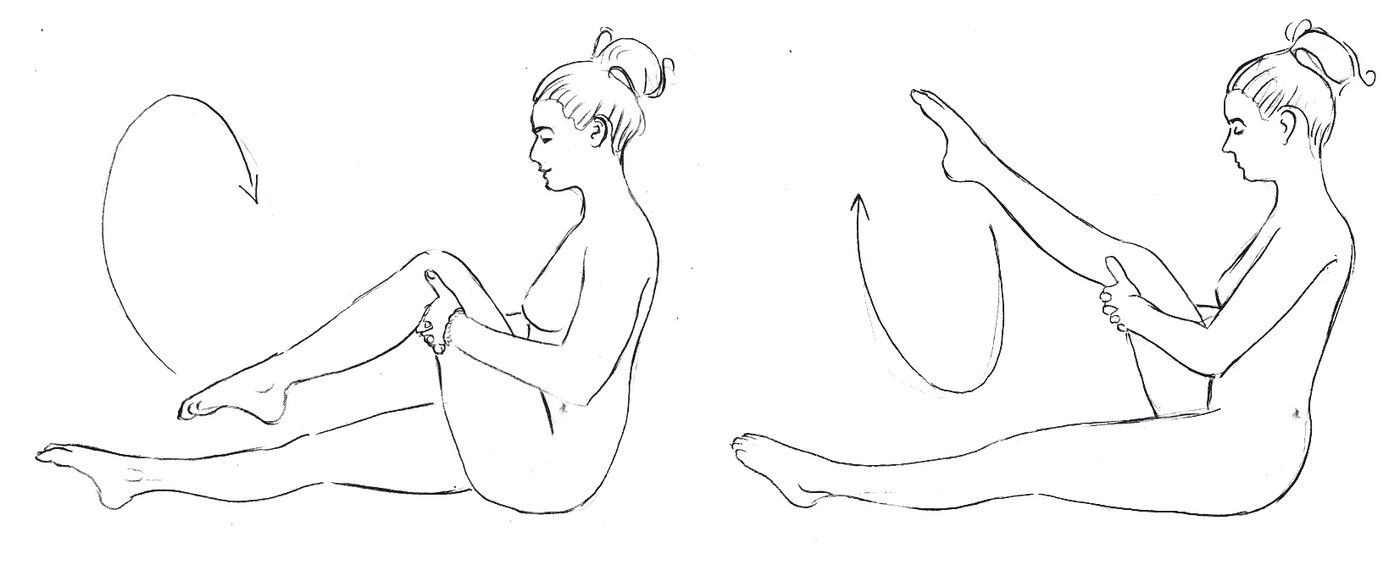
Bring your hands to your sides and stabilise your hips firmly with the backs of both hands, left and right of the hip joint. Draw both knees to your chest and take a few deep breaths in and out. Then inhale and extend the left leg so that it is parallel to the floor.

From here, begin a cycling movement with your legs. Exhale as the left knee is drawn up towards the chest, and inhale as the right knee comes towards the chest. This sequence of breath and movement supports the natural motion of the intestines.

At the end, inhale and extend the legs parallel to the floor and hold the position; exhale, bring the legs to the chest and relax. Repeat the exercise in the opposite direction. Then draw the knees to the chest and relax, in pūrṇa supta pavanamuktāsana.

Note: When the foot from the ankle articulates with the direction of the leg movement it is mobilized and the leg also moves inward through the body center. You can feel the strength of our center, the more freely we can live – free from worries and fear.Hinweis: Breathe intensely and passionately. The belly must arch in and out; concentrate on your navel. The more passionate the exercise, the more vitality can be gained.

Do this movement consciously and with deep breath. Move the belly with the breath outward and inward. Rotate first one leg, then the other.Practise this exercise rhythmically for 1–2 minutes in both directions.

Pada sancalanasana cycling Pavanmuktasana 2, stimulating intestinal peristalsis, yoga drawing abdominal series

Supta Pavanamuktāsana – the Sleeping Wind-Releasing Pose

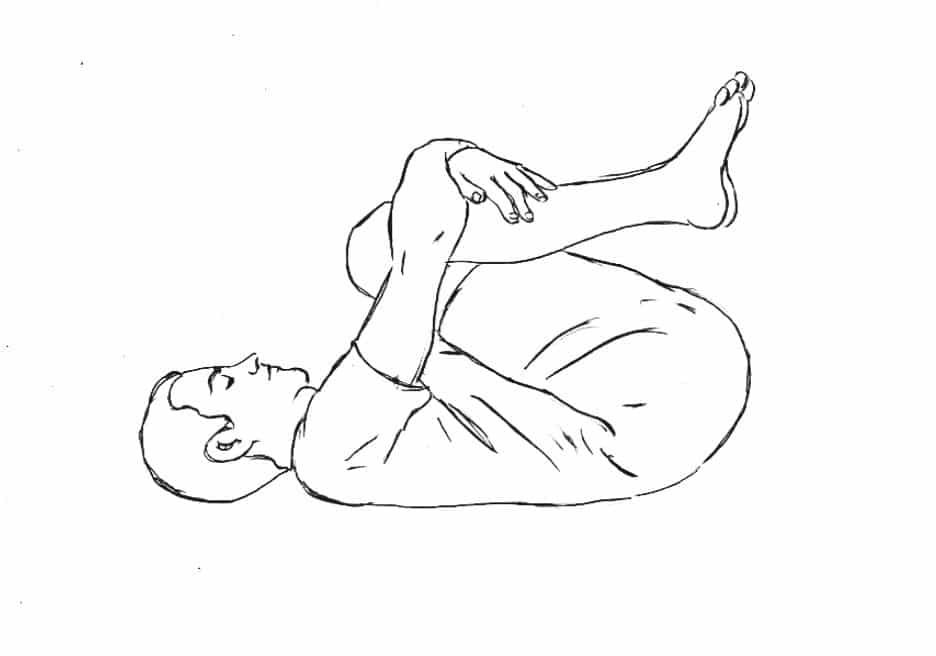
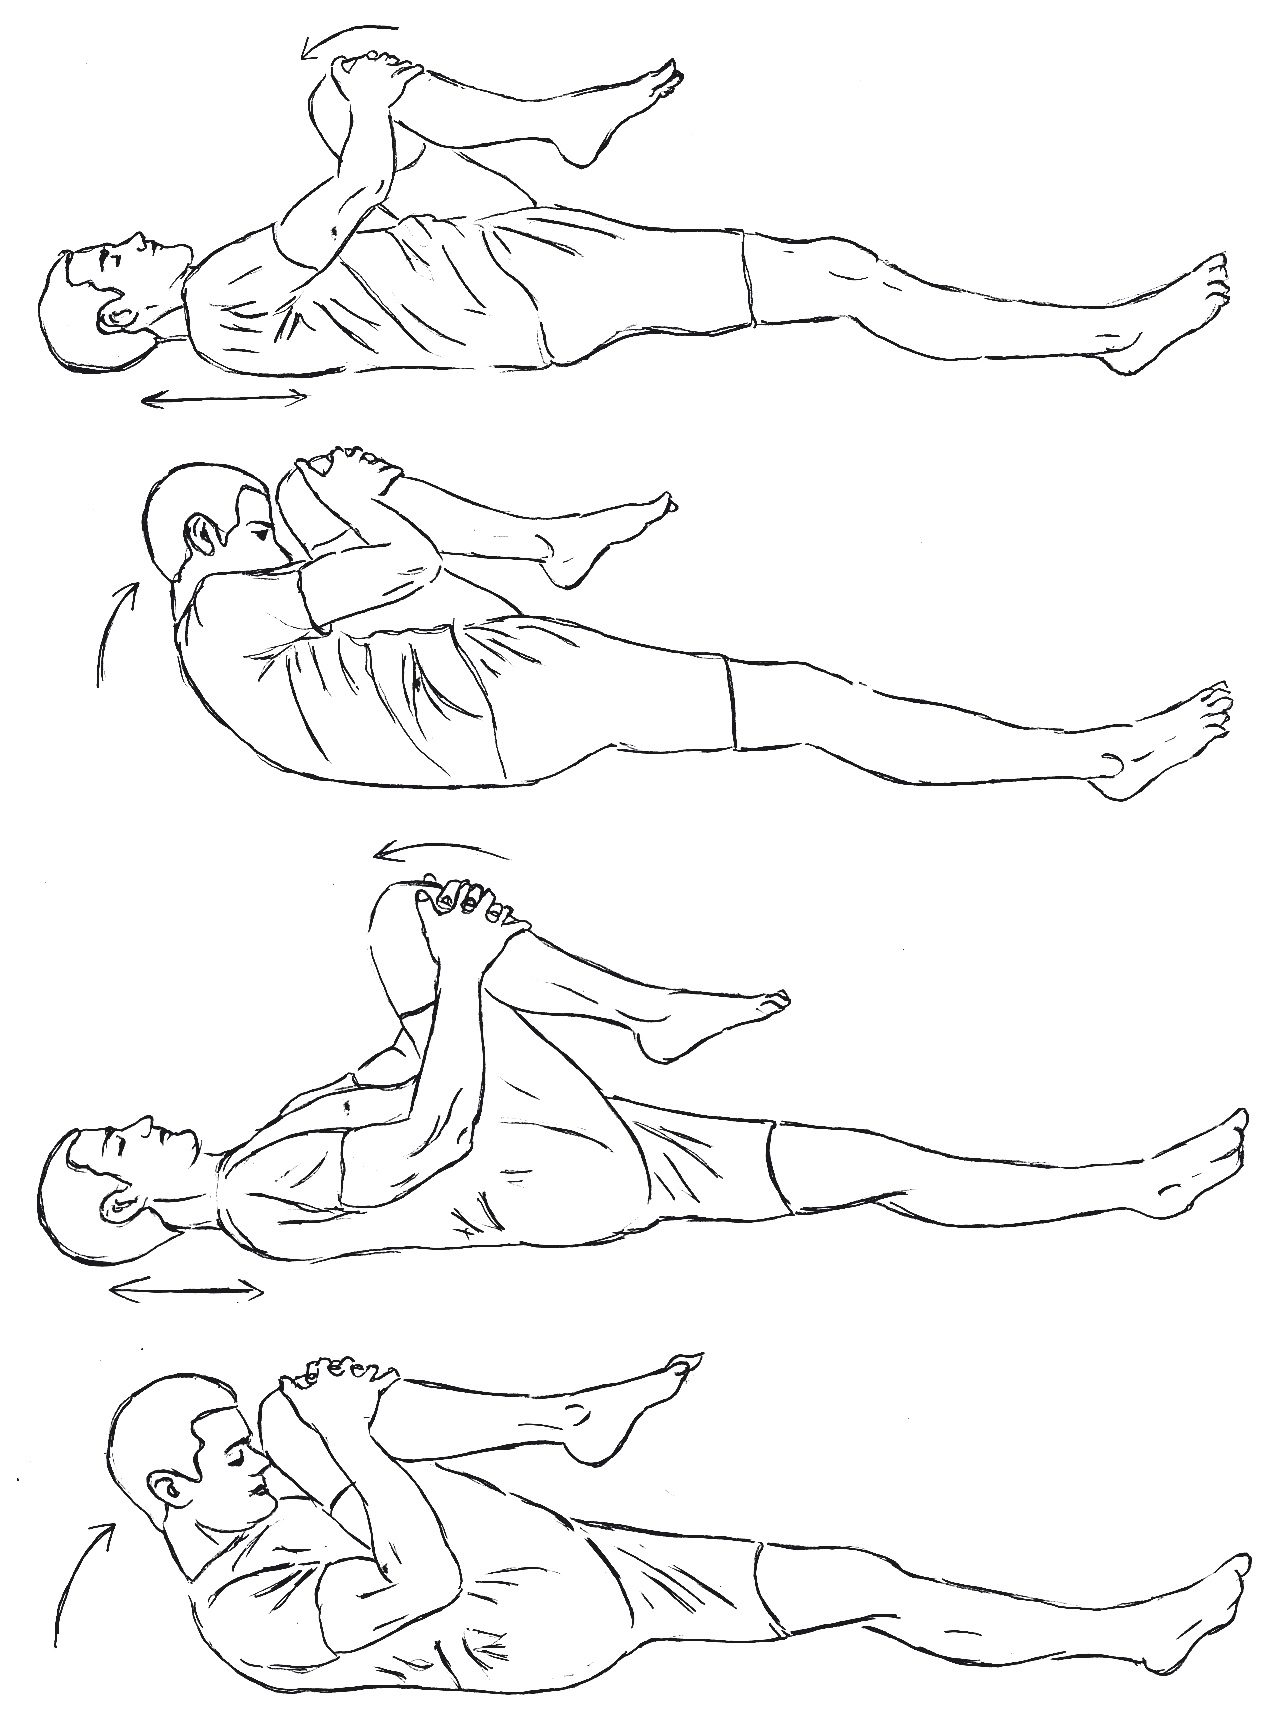
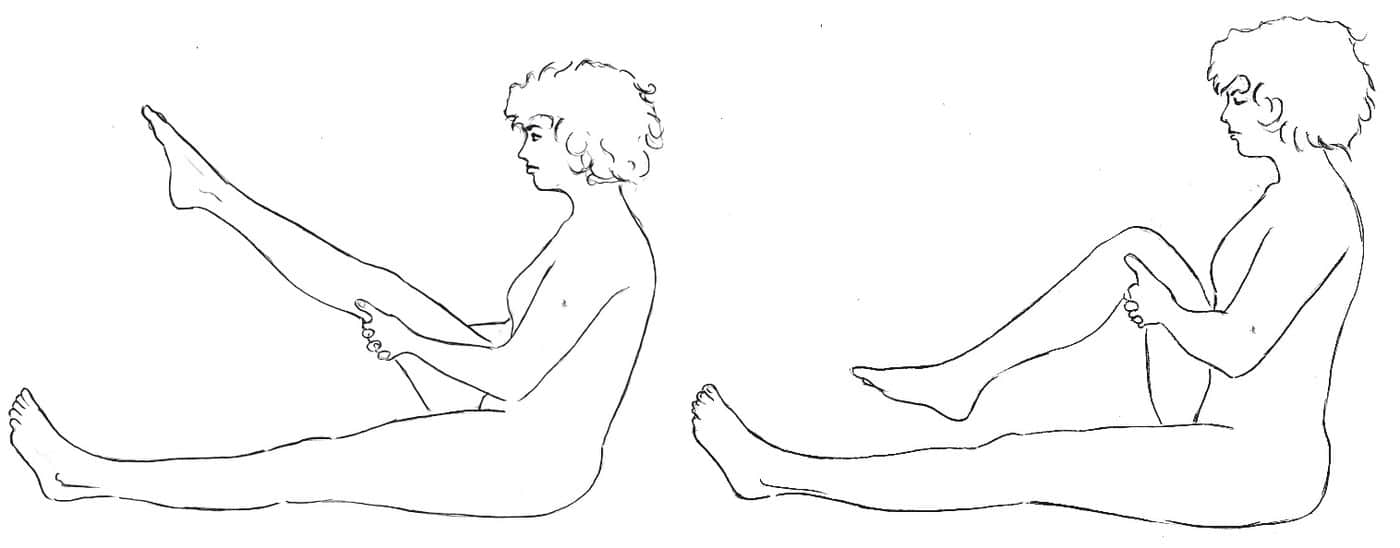
Still lying on the floor with your legs together, draw the right knee to your chest, interlace your fingers and hold the leg on the shin, just below the knee.

Inhale and lengthen your neck and torso above the floor. As you exhale, slowly bring your forehead towards the knee. Inhale and lower your body back to the floor as before. Move up and down in this way and massage your belly.

At the end, come to rest, then reverse the position and repeat the exercise with the other leg.

Move with deep, slow breathing, 1–2 minutes per side.

Then bring both legs to the chest, into pūrṇa supta pavanamuktāsana. Repeat the same exercise, pressing both legs firmly to your chest and massaging your belly. Relax by releasing your legs and stretching out on the floor, palms facing up.

Move with deep, slow breathing, 1–2 minutes.

Supta Pavanamuktasana sleeping wind-releasing pose Pavanmuktasana 2, forehead to the knee, Kundalini Yoga illustration

Supta Udarākarṣaṇāsana – the Sleeping Abdominal Twist

Still lying on the floor, interlace your fingers behind your neck with your thumbs on either side of your throat. Lift your knees, inhale and open your chest, and as you exhale let your knees fall slowly to the right.

Keep your elbows in contact with the floor. Stay here for a few breaths and look inwards. Then inhale, bring your legs back to the centre and let them fall to the left as you exhale.

Twist with deep breathing and stay on each side for at least 1 minute.

Supta Udarakarsanasana sleeping abdominal twist Pavanmuktasana 2, knees to the side, yoga hand drawing

Makra vyāyāma – the Crocodile Pose

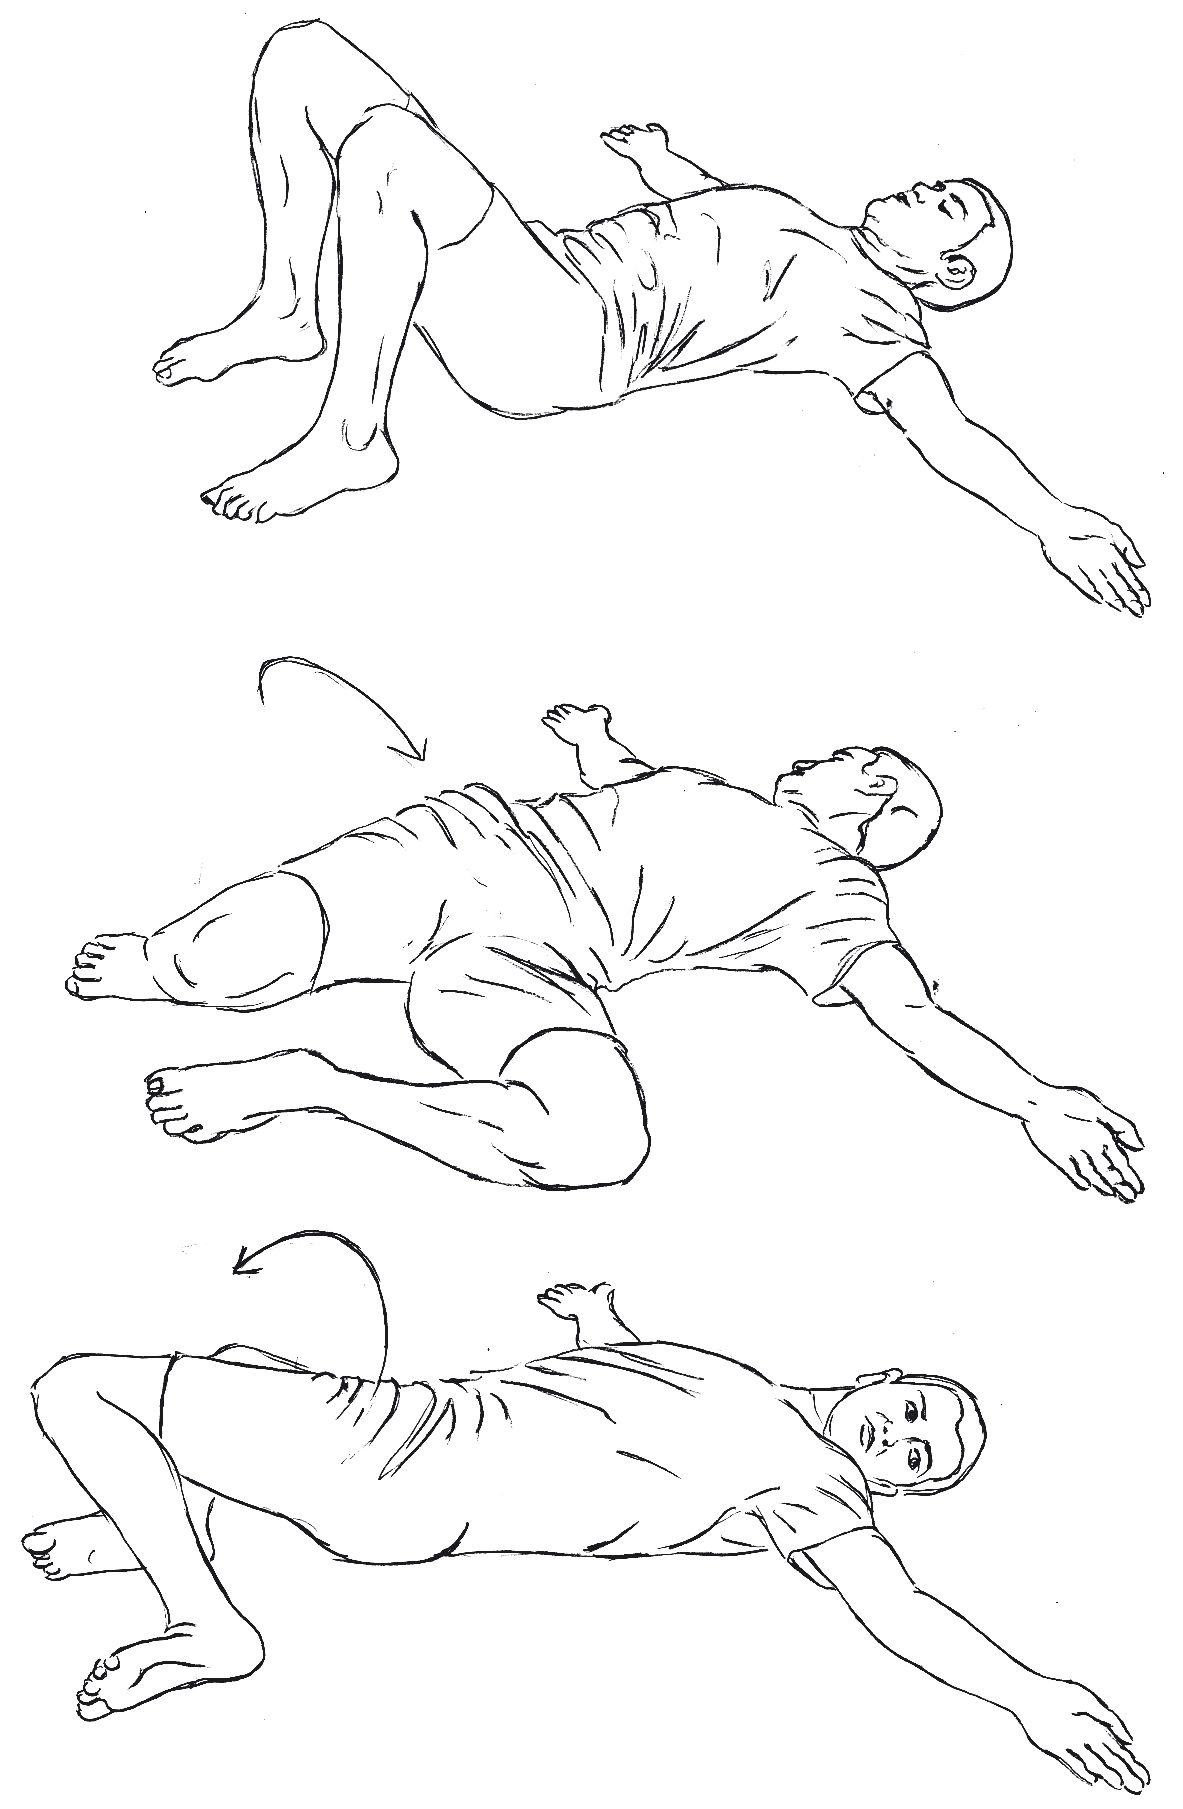
From the starting position, lie down on the floor and breathe deeply into your belly. Draw your knees up, feet on the floor close to your buttocks. The feet are about 30 to 40 cm apart. Open your arms and turn your palms upwards, arms resting extended on the floor.

Inhale and open your belly and chest. Exhale and let your legs fall to the left while you turn your head to the right and gaze into your open right palm. Inhale, bring your knees back up and turn your head to the centre. Exhale and let your knees fall to the right while you turn your head to the left and gaze into your open left palm.

Begin slowly and carefully, then become faster with breath and movement, and at the end come into śavāsana and rest for at least one minute.

Variant: To intensify the effect of this exercise, repeat it with your feet and knees closed. This variation allows the energy to move from the hips upwards into the spine and the belly. Begin with slow, conscious movements and then gradually increase the pace of breath and movement.

This exercise stimulates the spinal canal like no other. Deep rest for at least one minute is obligatory.

Move from side to side in this way with deep, rhythmic breath. 2–3 minutes.

Makra vyayama crocodile exercise Pavanmuktasana 2, letting the knees fall to the side, stimulating the spinal canal, yoga

Śavāsana – the relaxation between poses

Lie on your back, palms facing up. Let the movement echo and the warmth in your belly spread.

After the crocodile exercise this pause is not optional. What gets integrated here is exactly what the whole series is made for.

Savasana rest between poses Pavanmuktasana 2, supine with palms facing up, Kundalini Yoga drawing

Śava udarākarṣaṇāsana – the Universal Abdominal Twist

Vom śavāsana , lift your right knee and place your right foot over your left knee onto the left thigh. Raise your left hand and take hold of your right knee. Extend your right arm out across the floor, palm facing up.

Now draw your right knee to the left with your left hand and turn your head to the right, gazing at your right palm. Breathe deeply in silence. After a while, change sides.

Breathe deeply and stay on each side for at least one minute.

Sava udarakarsanasana universal abdominal twist Pavanmuktasana 2, supine twist, yoga illustration

Jhulanā Luḍhakanāsana – Rocking and Rolling

Hold both legs pressed to your chest. Begin to roll gently from one side to the other. Look inwards and turn this into a soft dance around your inner centre.

Then change the direction of movement and roll forwards and backwards. Roll forward onto your feet and back over your spine in a playful movement. As you come forward, try to press your body weight onto your feet without actually lifting up. This will push the energy into the navel centre.

Finally, stretch out your arms and legs and relax.

Play with deep breathing and roll for 1–2 minutes.

Jhulana Ludhakanasana rocking and rolling Pavanmuktasana 2, rolling on the spine, Kundalini Yoga drawing

Uttānpādāsana – the Extended Leg Pose

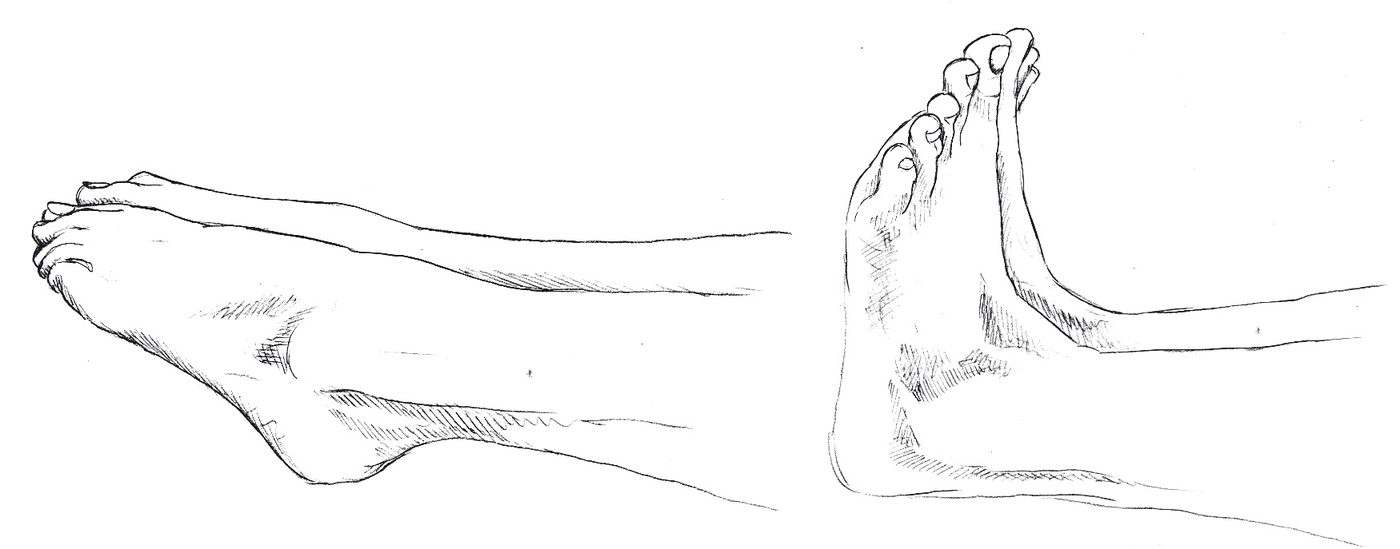
In our lineage this āsana als uttānpādāsana is called, not to be confused with naukāsana, in which the legs are raised 60 degrees above the floor.

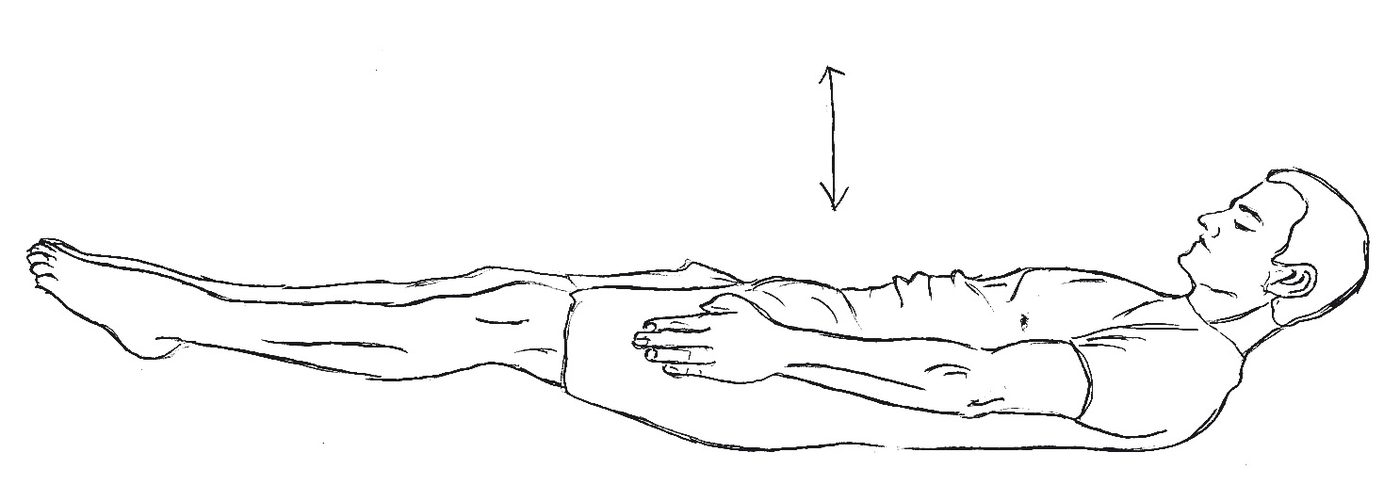
From lying on your back, turn your palms inwards and close your fingers, then raise your arms so that your fingers point horizontally towards your toes. Lift your feet and your head just above the floor. Look at your toes with an open, alert gaze.

Breathe deeply in and out a few times, then begin with a gentle but deep kapālabhātī from your navel centre. Finally inhale, concentrate on your centre, hold the air in, then exhale and draw your belly inwards, holding the breath out for a moment here as well.

Fire is the teacher.

Deep breathing or kapālabhātī for 1–2 minutes.

Uttanpadasana extended leg pose Pavanmuktasana 2, head and feet raised, kapalabhati navel centre yoga

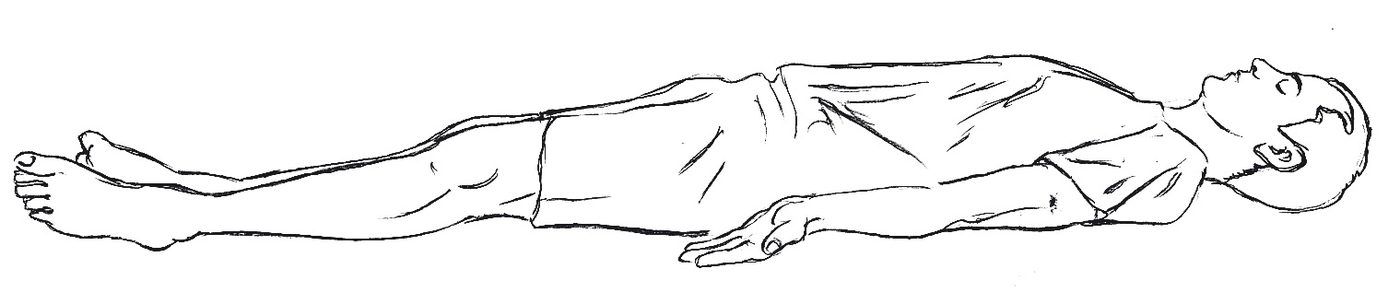
Śavāsana – Corpse Pose

Lie on your back with your palms facing up. Centre yourself — you are loved.

You are truth, you are perfect.

Savasana corpse pose Pavanmuktasana 2, final relaxation of the abdominal series, hand drawing Matsya Kundalini Yoga

The Series at a Glance

  1. Dṛḍha uttānpādāsana – Dynamische Beinhebehaltung
  2. Cakra pādāsana – Leg rotation
  3. Pāda sañcālanāsana – Cycling
  4. Supta pavanamuktāsana – Sleeping wind-releasing pose
  5. Supta udarākarṣaṇāsana – Sleeping abdominal twist
  6. Makra vyāyāma – Crocodile exercise
  7. Śava udarākarṣaṇāsana – Universal abdominal twist
  8. Jhulanā luḍhakanāsana – Rocking and rolling
  9. Uttānpādāsana – Extended leg pose
  10. Śavāsana – Corpse pose

Ten exercises, one direction: everything pulls towards the navel. If you have practised Teil 1 , you will notice the difference at once — part 1 is fine and meditative, part 2 is fire. And part 3, the Śakti Bandha series, finally sets the accumulated energy flowing and anchors it low in the pelvis.

Sūksma vyāyāma, Dhirendra Brahmacāri and Western Kundalini Yoga – Frequently Asked Questions

What is sūkṣma vyāyāma?

Sūksma means subtle or fine, vyāyāma means exercise. It refers to a category of movements that do not address the muscles, but rather the energy body: small, precise, repetitive, always linked to the breath. The difference from other, more dynamic exercises is subtle – but it is significant. Sūksma vyāyāma works with the subtle body where the power lies.Sūkṣma means subtle or fine, vyāyāma means exercise. What is meant is a category of movements that address not the muscle but the energy body: small, precise, repeated, always coupled to the breath. The difference from classical āsana is the focus — not holding a shape, but moving prāṇa through a particular region.

The pavanmuktasana belongs to this family. And precisely for this reason Part 2 also works when the exercises seem mundane: the effect is not created through effort, but through rhythm, breath, and awareness.Das pavanmuktāsana belongs to this family. And that is exactly why part 2 works even when the exercises strike you as banal: the effect does not come from effort, but from rhythm, breath and attention.Who was Dhirendra Brahmacāri?

Who was Dhīrendra Brahmacārī?

Dhīrendra Brahmacārī (1924–1994), born Dhirendra Choudhary in Bihar, left his parents' home at thirteen and learned yoga from his teacher Maharshi Kartikeya in an ashram near Lucknow. He became one of the most influential and most controversial figures in twentieth-century Indian yoga.

He taught Indira Gandhi, introduced yoga as a school subject in Delhi, trained Soviet cosmonauts in the 1960s and, in the late 1970s, presented the television programme Yogabhyaas on Doordarshan. His Vishwayatan Yogashram in New Delhi lives on today as the Morarji Desai National Institute of Yoga. His books Yogic Sūkṣma Vyāyāma and Yogāsana Vijñāna were the first to set down in writing the very sequence we are dealing with here.

His later closeness to power – during the Emergency of 1975–77 he was regarded as an influential adviser to Indira Gandhi – and several criminal proceedings damaged his reputation. For the history of sūkṣma vyāyāma he nevertheless remains the key figure.

What does Dhīrendra Brahmacārī have to do with Yogi Bhajan?

More than was long known. Yogi Bhajan (1929–2004), who went to North America in 1968 and founded 3HO there, studied at Dhīrendra’s Vishwayatan Yogashram in New Delhi in the early 1960s. The director of the ashram later described him as “a frequent visitor, but not a very close student”.

The religious-studies scholar Philip Deslippe traced in his paper „From Maharaj to Mahan Tantric: The Construction of Yogi Bhajan's Kundalini Yoga“ how the defining physical features of Bhajan’s Kundalini Yoga can be found within sūkṣma vyāyāma – the rapid breathing (bhastrikā, known in the West as “Breath of Fire”), certain postures and the bandhas. Deslippe also shows that a 3HO text on “The Navel Point” was an unaccredited reworking of an earlier chapter by Dhīrendra.

The mantra and the figure of the master came from a different source: the Sikh sant Maharaj Virsa Singh, to whom Bhajan explicitly deferred during his first years in the West.

Why does Pavanmuktāsana 2 feel so much like Western Kundalini Yoga?

Because both come from the same root. Anyone who has ever lain on their back in a 3HO class, raising and lowering the legs dynamically while doing Breath of Fire and searching for the navel point, will recognise the exercises in this article at once — dṛḍha uttānpādāsana, the cycling, uttānpādāsana with kapālabhātī.

The term “navel point”, which plays a central role in Western Kundalini Yoga, has its origin precisely here. This series is therefore not merely similar — it is one of the historical building blocks of what has been taught in the West as Kundalini Yoga since the 1970s.

Does that make Pavanmuktāsana “real” Kundalini Yoga?

The question is put the wrong way round, but it is understandable. An exercise does not become Kundalini Yoga because it is called that — nor because a particular school lays claim to it. It becomes that through what you do with it inwardly.

What makes this series Kundalini Yoga is the same point as in Teil 1: the conscious handling of the breath, kumbhaka, mūlabandha and the gaze turned inwards. Without that it is abdominal training. With it, it is work on the energy along the spine. How we understand this in our lineage is set out in more detail in the article on Kriyās and Classes in Kundalini Yoga.
Why does an abdominal series affect willpower and self-confidence?

Because in yoga the abdomen was never only about digestion. Maṇipūra, the navel centre, is the fire centre: the place where the raw is turned into the usable — food as much as experience. If this fire is weak, everything becomes a burden. If it burns too hot, it scorches your own people.

The exercises here work mechanically on the gut and energetically on precisely this fire. Hence the line “Fire is the teacher” at uttānpādāsana — and hence the warm feeling of being anchored that often arises after the series. More on this in the article on the Maṇipūra Chakra and on Mūlādhāra, the centre below it.

What sets part 2 apart from part 1?

Part 1 is fine, slow, meditative — one joint after another, seated. Part 2 is dynamic, warm and physically demanding, entirely lying down. Part 1 releases blockages in the periphery; part 2 builds strength and heat in the centre.

In practice they complement each other: part 1 makes you permeable, part 2 gives the released energy a centre.

How often to practise — and when better not to?

The complete series takes 60–90 minutes. You can also practise a shortened version; more important than completeness is that the breath carries you and the lower back stays stable.

Restraint is called for with acute back problems, recent abdominal surgery, during pregnancy and in the first days of menstruation — dynamic leg raising and kapālabhātī are not the right thing then. If in doubt, speak to your doctor; this article describes yogic tradition and is not a substitute for medical advice.

Where can I learn this series with guidance?

In our Kundalini-Yoga-Klassen in Wien and at the retreats in the Wachau it is a fixed part of the practice. We cover all three Pavanmuktāsana series systematically — with anatomy, didactics and background — in the RYT 200h Yogalehrer-Ausbildung and deepen them in the RYT 300h Ausbildung. If you already teach, the YACEP Kundalini-Fortbildung is the right setting; everything is also available as online and hybrid training . On our Zertifizierungen and Förderung in Österreich you will find all the details — or simply write to us via the Kontaktformular.

Even more inspiration for you

If you'd like to explore this topic further, feel free to check out our downloads section.

There you'll find a carefully curated selection of Kundalini yoga kriyas, mantras, and other wonderful ideas that I've put together for you.

And if you are curious how these exercises historically arrived where they stand today: Die Yoga and Philosophy and The Chakras tell the long story that came before.

Supta pavanmuktasana in the Lotus Mandala, Matsya Kundalini Yoga Academy Vienna
Pavanmuktāsana 1 – The Joint Series in Kundalini Yoga

Pavanmuktāsana 1 – The Joint Series in Kundalini Yoga

Note: All exercises are illustrated by hand with a pen and written by Clemens Biedrawa.

Pavanmuktāsana 1 – The Joint Series in Kundalini Yoga

“Pavana”means wind—and in yoga, the wind is always also prāṇa, the breath, the life force.“Mukta”means liberated, released, unleashed.

Pavanmuktāsana is, therefore, the pose that releases the wind. Not just the wind in your belly, as some translations suggest, but the wind that’s trapped in your joints. In places where movement has been lacking for years, something builds up. The breath can no longer reach those areas. Energy becomes stagnant.

This series targets exactly those areas—from the toes to the neck, one joint at a time. It looks simple. It isn't.

Pavanmuktasana, Series 1 of Kundalini Yoga, Anti-Rheumatism Series, Hand-drawn illustration by Matsya Yoga Vienna

Exercises for Rheumatism – āmavātī rodhaka vyāyāma

The pavanmuktāsana series was first introduced in the West by Swami Satyānanda, which led many people to believe that it originated there at the Bihar School of Yoga. This is a misunderstanding: pavanmuktāsana belongs to a much older tradition that was taught as part of sūkṣma vyāyāma —the subtle yogic exercises—and which we have already encountered through the teacher Dhīrendra Brahmacārī.

Here I demonstrate a variation of pavanmuktāsana as practiced in our Kundalini yoga tradition. This series for rheumatism is much more than just a series for joint pain. It is a very energetic series that can release energy blockages and also stimulate the flow of cerebrospinal fluid. It can expand consciousness and has powerful healing properties for both mind and body.

Since this series has a strong effect on the flow of energy along the spinal cord, it is recommended that you relax in śavāsana whenever you feel a tingling sensation. This helps calm the nervous system and integrate the energy generated.

How to Practice This Series

Since this series is meant to be subtle rather than focusing solely on the physical body, it should be practiced with an emphasis on breathing and rhythmic movement.

  • Breathing first. Every movement follows the breath, not the other way around. Deep, rhythmic, clear.
  • Gaze and attention. Wherever your eyes go, that's where you go. Keep your gaze steady as you move.
  • Kumbhaka at the end of each exercise. Hold your breath—with mūlabandha—for as long as is comfortably possible. Hold your breath until a sense of stillness arises in the center.
  • Take a break now and then. When you feel a tingling sensation coming on: lie down, do śavāsana, and let it sink in.
  • Duration. About 60–90 minutes for the entire series.

In my opinion, the only difference between Hatha and Kundalini yoga is the concentrated focus on kumbhaka. When kumbhaka is practiced with complete concentration, even the simplest exercise becomes Kundalini yoga.

Pavanmuktāsana 1 – The Exercises Step by Step

Prāraṃbhik Sthiti – Basic Position

Sit with your legs extended and place your hands either on your knees or behind your buttocks, with your fingers pointing backward. Make sure your spine is straight and that your posture embodies energy.

This is the starting position to which you return between many exercises.

Prarambhik Sthiti (Basic Position) Pavanmuktasana 1, Seated Pose with Hands Kundalini Yoga

Pādāṅguli naman – Toe bends

Sit in the basic position with your legs extended and your feet slightly apart, and focus on your toes. Keep your face open and your eyes fixed firmly on your toes. Wherever your eyes go, that’s where you go. Since these exercises are subtle, it’s important that you stay in the right place.

Bend your toes forward and back toward your body in time with your breath. Your breath should be deep and intense throughout the entire exercise to stimulate the prāṇa and allow it to flow.

At the end, inhale and curl your toes toward your body, holding your breath. Then exhale and point your toes away from your body, holding your breath as you do so.

Deep, rhythmic breathing for 1–2 minutes.

Padanguli, Toe Bends, Pavanmuktasana 1, Foot Drawing, Yoga Joint Series

Kulph naman – Ankle bends

Stay in the same position and begin to bend your feet forward and backward from the ankles in the manner described earlier. Keep your breathing rhythmic and passionate. At the end of the exercise, gently hold your breath as you inhale and exhale.

Deep, rhythmic breathing for 1–2 minutes.

Kulph Naman Ankle Bends Pavanmuktasana 1, Ankle Exercise Kundalini Yoga Illustration

Kulph cakra – Ankle rotation

Stay in the same position and bring your feet together so that they touch on the inside. Begin by rotating both feet from the ankles. Observe the rotation with innocent curiosity, just as a child would watch a new and fascinating toy. Nothing is trivial—allow the exercise to unfold its magic. Synchronize the movement with your breath. After a while, change the direction.

Step 2. Open your feet slightly, placing them just 20 cm apart. Begin by rotating your feet in opposite directions, starting from the ankles. Synchronize this movement with your breath. Keep your breath deep. When you’re done, inhale and gently direct your breath toward your center while drawing your feet toward your body. Exhale, hold, and push your feet away from your body. Change direction and repeat the exercise.

Deep, rhythmic breathing for 1–2 minutes.

Kulph Cakra, Ankle Rotation, Pavanmuktasana 1, Foot Rotation, Illustration, Yoga Anti-Rheumatism Series

Kulph ghūrṇan – ankle crank

Grasp your right knee with both hands, lift your knee, and pull it toward your chest; press your knee outward, then take your right ankle and gently place it on your right thigh.

Hold your ankle firmly with your right hand; feel that your grip is strong and secure. Take the fingers of your left hand and interlace them with the toes of your right foot, one finger at a time.

Once you’re in this position, straighten your spine and open your chest, look inward, and slowly begin to rotate your right foot in time with your breath. As you inhale, move your foot upward; as you exhale, press it downward. Be aware that the movement is deep and that the foot itself is not actively involved in the movement. Give it your full attention, like a curious child.

At the end, take a breath and hold it. Take your time. Then exhale, hold, and relax. Gently move your leg outward horizontally, bring your knee toward the center, and straighten your right leg again. Repeat the same on the other side.

Deep, rhythmic breathing, 1–2 minutes on each side.

Kulph ghurnan, Ankle Crank, Pavanmuktasana 1, Fingers Between Toes, Hand Gesture, Kundalini Yoga

Jānuphalak ākarṣaṇ – Patellar Contraction

Return to the starting position with your legs extended. Place your hands on your knees, with your thumbs and index fingers resting on either side of your kneecaps.

In time with the rhythm of your deep breathing, contract the muscles in your thighs so that your kneecaps are lifted upward. At the end of the exercise, hold your breath and keep your kneecaps gently lifted after inhaling. Then exhale slowly and relax them. Enjoy the internal massage of your knees—vitality will flow.

Deep, rhythmic breathing for 30 seconds to 1 minute.

Januphalak akarsan: Patella Contraction in Pavanmuktasana 1, Knee Exercise, Yoga Illustration

Jānu naman – Squats

From the starting position, place both hands under your right knee and interlock your fingers with your palms facing up. Then pull your knee toward your chest and exhale as you lengthen your spine. Inhale and extend your leg across the floor with your arms outstretched. Keep your gaze fixed on your toes.

Breathe in a deep, steady rhythm as you straighten and bend your knee. Keep your chest open. Let the rhythm carry you. Repeat the exercise on the other side.

Deep, rhythmic breathing for 1–2 minutes on each side.

Janu Naman Squats, Pavanmuktasana 1, Leg Stretches and Bends, Hand Gestures in Kundalini Yoga

Jānu cakra – Knee Joint Rotation

As in the previous exercise, hook your fingers under your thigh, open your chest, and lift your knee. Gently begin to trace a circle with your foot and lower leg while keeping your thigh in place. Your thigh will rotate gently outward and inward, but without your knee moving up or down.

Synchronize the movement with your deep breathing. Straighten your leg as you inhale, and bend it as you exhale. At the end, take a deep breath, hold it, exhale, and relax the pose.

Focus on this movement—if you lose yourself in it, the movement will naturally become meditative.

Deep, rhythmic breathing, 1–2 minutes on each side.

Janu Cakra Knee Joint Rotation Pavanmuktasana 1, Leg Circles Drawing Yoga Joint Series

Ardha Titalī Āsana – Half Butterfly Pose

Starting from the basic position with your legs straight, lift your right knee, move it to the side, and rest your right ankle on your left thigh. Once again, interlace the fingers of your left hand with the toes of your right foot, starting with the little toe and working your way up one by one. Straighten your spine and relax your face. If you’d like, close your eyes and turn your gaze inward.

Slowly begin to pull your leg toward your chest as you inhale. As you exhale, press it toward the floor. Move your hand in circular motions around your knee, gently pulling and pressing it. Gradually increase your speed and rhythm, and focus your gaze inward.

After a while, inhale and straighten your spine. Hold your breath and gaze into the stillness. Exhale gently, press your knee to the floor, and hold your breath there. Move your foot outward, lift your knee, and then straighten your leg. Repeat the same process on the other side.

Deep, rhythmic breathing, 1–2 minutes on each side.

Ardha Titali Asana (Half Butterfly Pose), Pavanmuktasana 1, Opening the Hips, Kundalini Yoga Illustration

Pūrṇa titalī āsana – Full Butterfly Pose

From the starting position with your legs extended, bring both knees toward your chest as in bījāsana and gaze toward your center. Straighten your spine and feel the sky above you. After a few breaths, gently open your knees and bring your hands between your legs. Interlace your fingers, hold your feet from below, and rest your thumbs on your big toes. Then bring your feet to the floor and lengthen your spine.

Then gently begin to move your legs up and down like a flying butterfly. Keep your breath deep. Move slowly, then faster, and finally slowly again. Your breathing doesn’t have to be synchronized with the movement. Smile and enjoy flying like a butterfly. At the end, inhale, stretch toward the sky, exhale, and bend forward. Hold the stretch for a few breaths.

Flutter like a happy butterfly for 2–3 minutes.

Purna Titali Asana (Full Butterfly Pose), Pavanmuktasana 1, Baddha Konasana (Hand-Drawn Yoga Illustration)

Śroṇi cakra – Hip Rotation

Return to the same position as in ardha titalī āsana. Rest your right hand on your right knee.

Start slowly, with an open expression and focused attention, rotating your knee in a circle. Synchronize your breathing with the movements. As you inhale, move your knee upward. As you exhale, move it downward. Move with the utmost attention—this happens inwardly. After a while, change the direction.

Move your foot outward, lift your knee, and then straighten your leg. Repeat the same process on the other side.

Deep, rhythmic breathing, 1–2 minutes on each side.

Makra vyāyāma – the Crocodile Pose

From the starting position, lift your knees and place your feet on the floor. Spread your legs so that your feet are about 40 cm apart. Bring your arms behind your body, with your fingers pointing backward; your arms stabilize your torso as you lift it upward.

Breathe in and open your chest. Breathe out and let your legs fall to the left while turning your head to the right. Breathe in and bring your knees back up and your head to the center. Breathe out, let your knees fall to the right, and turn your head to the left.

Move from side to side in this way, breathing deeply and rhythmically. 1–2 minutes.

Makra Vyayama, Crocodile Pose, Pavanmuktasana 1, Spinal Twist, Kundalini Yoga Illustration

Step 2. Then bring your feet and knees together as shown in the illustration and perform the same exercise with your legs together, so that the sensation travels upward along the spinal cord.

Move from side to side while breathing deeply and rhythmically. 1–2 minutes.

Makra Vyayama Step 2: Closed Legs, Pavanmuktasana 1, Spinal Cord Stimulation Yoga Illustration

Śavāsana – the relaxation between poses

Then lie on your back with your palms facing up. Let the vibrations spread out in the silence.

This exercise stimulates the spinal cord like no other. A deep relaxation period of at least 2 minutes is essential. Don't skip it—this is where you integrate what you've just created.

Muṣṭika bandha – Clasping the Hands

Sit in sukhāsana, centered within yourself, and extend your arms forward, spreading your fingers wide. Keep your gaze fixed straight ahead. As you exhale, clench your fists with your thumbs tucked inside; as you inhale, spread your fingers wide again. Find a comfortable rhythm.

At the end, inhale, open your hands, hold the pose, and look inward. Then exhale slowly.

Deep, rhythmic breathing for 1–2 minutes.

Mustika Bandha Hand Locks Pavanmuktasana 1, Fist and Open Hand Drawing Kundalini Yoga

Maṇibandha naman – Wrist Bends

Stay in the simple pose with your arms extended horizontally in front of you. Close your fingers, but keep them straight, and begin to bend your wrist. Inhale and press your palm forward and your fingers upward. Exhale and bend your hand downward from the wrist. Maintain a good, rhythmic pace here as well.

At the end, inhale, press your palm forward, and hold the position. Then exhale slowly and relax.

Deep, rhythmic breathing for 1–2 minutes.

Manibandha (Wrist Bends), Pavanmuktasana 1, Wrist Exercise, Kundalini Yoga Illustration

Maṇibandha cakra – Wrist Rotation

Remain seated in sukhāsana with your arms extended in front of you. Support your left arm with your right hand directly beneath the elbow. Clench your fingers into a fist with your thumb in the center. Very slowly and with full attention, begin to rotate your fist from the wrist, keeping your palm facing down at all times. Synchronize the movement with your breath.

At the end, inhale, turn your fist upward, and maintain your center. Then exhale slowly and relax both arms. Repeat the exercise on the other side.

Deep, rhythmic breathing for 1–2 minutes on each side.

Manibandha cakra, wrist rotation, Pavanmuktasana 1, turning the fist, hand pose, yoga joint series

Kaphoṇi naman – Elbow Bends

Extend both arms to the sides, palms facing up, and inhale—this opens mahā-prāṇa, the great energy. Then bring both arms forward and spread your fingers slightly so that they form a bowl-like shape.

As you exhale, bend your elbows to bring your hands toward your shoulders. Straighten them again as you inhale. Find a good, rhythmic pace. At the end, extend your arms and hold the position. Exhale slowly and relax.

Deep, rhythmic breathing for 1–2 minutes.

Kaphoni, Naman, Elbow Bends, Pavanmuktasana 1, Arm Bends, Vajrasana, Illustration, Kundalini Yoga

Skandha Cakra – Shoulder Rotations

Open your arms to the sides, palms facing up. Place your hands on your shoulders, with your fingers forming a bowl-like shape. Inhale and raise your elbows very slowly until your hands meet behind your neck. Slowly bring your elbows behind you and let your arms rotate backward and downward. Draw a complete circle.

As you move your arms forward, exhale and draw your chest in. The insides of your elbows should touch in front of your face as your arms rotate forward. Rotate your arms slowly while breathing deeply, and switch directions after 5–10 repetitions.

Deep, rhythmic breathing, 1–2 minutes in each direction.

Skandha Cakra Shoulder Rotations, Pavanmuktasana 1, Shoulder Rotation, Crescent Moon Hand Pose, Kundalini Yoga

Grīva sañcālana – Neck Movements

Sit up straight and gently begin turning your head to the left as you inhale, and then to the right as you exhale. Breathe slowly and deeply. After a while, reverse your breathing. As you move your head, be sure to gently explore the full range of motion in your neck by turning your head as far as possible to the left and right.

Then come to the center and begin to slowly turn your head along your chest and neck. Slowly and deliberately roll your head from one shoulder, across your neck, toward your chest, and to the opposite shoulder. Synchronize your breathing with the movement. After a while, reverse the movement. Sink deeply into the movement, and take your time exploring the full range of motion.

Move your head while breathing deeply and rhythmically, for 1–2 minutes in each direction.

Griva sancalana Neck Movements Pavanmuktasana 1, Neck Rotation Vishuddha Chakra Drawing Yoga

Jālandhara bandha – the cosmic water lock

Sealing the Source of Cosmic Nectar. Breathe in and tilt your head back; feel the gentle pressure in the back of your neck. Close your eyes and imagine yourself gliding up into the sky. A bright light shines on your forehead. Breathe deeply and be still.

Then, after a few breaths, bring your chin to your chest as you exhale, look inward, and bow to the vast cosmos. Breathe deeply.

Stay in each position for about 3–5 breaths. Silence.

Jalandhara Bandha, Pavanmuktasana 1, Chin Lock, Crescent Moon, Hand Gesture, Kundalini Yoga, Vienna

Bīja nyāsa – the placement of seed syllables

Sit in the meditation posture. Stretch and open your arms. Engage mūlabandha at the beginning of each sound, and place the seed sounds, the bīja, in their respective locations within the body.

Sound is not just an afterthought here. It is what connects the open joints—what transforms twenty-one individual exercises into a single, continuous movement of consciousness. You can find out more about this inner map in our article on the chakras and their history.

Finally, fold your hands in front of your heart in namaskāra mudrā and breathe calmly.

Bija Nyasa Meditation, Pavanmuktasana 1, Seed Sounds, Lotus Mandala, Hand Drawing, Kundalini Yoga

Śavāsana – Corpse Pose

Lie on your back with your palms facing up. Gaze out at the ocean of life—your home.

Be grateful.

Savasana (Corpse Pose) Pavanmuktasana 1, Final Relaxation Hand Drawing Kundalini Yoga Matsya

Series Overview

  1. Prāraṃbhik Sthiti – Basic Position
  2. Pādāṅguli naman – Toe bends
  3. Kulph naman – Ankle bends
  4. Kulph cakra – Ankle rotation
  5. Kulph ghūrṇan – Ankle twist
  6. Jānuphalak ākarṣaṇ – Patellar Contraction
  7. Jānu naman – Squats
  8. Jānu cakra – Knee Joint Rotation
  9. Ardha titalī āsana – Half Butterfly Pose
  10. Pūrṇa titalī āsana – Full Butterfly Pose
  11. Śroṇi cakra – Hip Rotation
  12. Makra vyāyāma – Crocodile Exercise
  13. Śavāsana – Corpse Pose
  14. Muṣṭika bandha – Hand Clasp
  15. Maṇibandha naman – Wrist Bends
  16. Maṇibandha cakra – Wrist rotation
  17. Kaphoṇi naman – Elbow Bends
  18. Skandha cakra – Shoulder Rotations
  19. Grīva sañcālana – Neck Movements
  20. Jālandhara bandha – Cosmic Water Lock
  21. Bīja nyāsa – Placement of the seed syllables
  22. Śavāsana – Corpse Pose

Pavanmuktāsana 1 is the first of three parts. Part 2—the udarapoṣaṇa series —focuses on the abdominal region, digestion, and willpower. Part 3 specifically addresses energy blockages. Together, they form the foundation upon which everything else in our school is built—from the From the Sun Salutation to the Moon Salutation and on to the Chakra Kriyas.

Swami Satyananda, the Bihar School of Yoga, and Pavanmuktāsana—Frequently Asked Questions

Who was Swami Satyananda Saraswati?

Swami Satyananda Saraswati (1923–2009) was a disciple of Swami Sivananda of Rishikesh. He was also the teacher of one of my important teachers, Swamiji Vidjanand. For this reason, we often refer to this eminent yoga teacher in our practice. In 1963, Satyananda founded the Bihar School of Yoga in Munger, Bihar. His great contribution lies in systematization: he transformed yogic techniques—which had previously been passed down orally and often only to individual students—into a clear, teachable form.

His book *Asana Pranayama Mudra Bandha* remains one of the most widely used standard texts in yoga teacher training worldwide.

What is the Bihar School of Yoga?

The Bihar School of Yoga is a yoga institution located in Munger, in northern India, on the banks of the Ganges. It pioneered what is now known internationally as “Satyananda Yoga” or “Bihar Yoga”—a synthesis of Hatha Yoga, Rāja Yoga, Kriyā Yoga, and tantric elements. Through its affiliated Yoga Publications Trust, many classical techniques were systematically adapted for a Western audience for the first time.

Did the Bihar School of Yoga invent Pavanmuktāsana?

No. That is the most common misconception about this series. Swami Satyānanda introduced pavanmuktāsana to the West and divided it into three clearly structured parts—which is why it is often equated with Munger. The exercises themselves, however, belong to a much older tradition: sūkṣma vyāyāma, the subtle yogic exercises.

What is sūkṣma vyāyāma—and who was Dhīrendra Brahmacārī?

Sūkṣma means subtle, delicate; vyāyāma means practice. This refers to movements that address not the muscles but the energy body—small, precise, repeated movements that guide the breath into a joint. Dhīrendra Brahmacārī documented and taught these sequences of exercises in the 20th century, thereby bringing to light an older lineage from which pavanmuktāsana also originates.

Why is the series called the “Anti-Rheumatism Series”?

The Sanskrit name is āmavātī rodhaka vyāyāma —literally, “exercises that ward off āmavāta.” In Ayurveda, āmā refers to undigested matter, similar to metabolic waste; vāta is wind. Āmavāta thus describes a condition in which undigested matter is carried by the wind into the joints—the Ayurvedic metaphor for rheumatic ailments. The series mobilizes each joint individually and brings movement precisely where it is lacking.

What does Pavanmuktāsana have to do with Kundalini Yoga?

At first glance, it seems like very little—after all, they’re “just” joint exercises. But on closer inspection, it’s everything. The sequence has a powerful effect on the flow of energy along the spinal cord and stimulates the cerebrospinal fluid. It is precisely there, along the suṣumṇā, that Kundalini Yoga takes place. And the crucial point is kumbhaka, the conscious holding of the breath with mūlabandha at the end of each exercise. When kumbhaka is performed with complete concentration, even the simplest exercise becomes Kundalini Yoga. You can find more on this in our article on Hatha and Kundalini Yoga.

How does your version differ from the classic Satyananda version?

The way pavanmuktāsana is presented here is somewhat different from the original method taught by Satyānanda. We teach it as is customary in our Kundalini Yoga tradition: with a much stronger emphasis on kumbhaka, mūlabandha, the inner gaze, and integration into śavāsana. For us, the series is less about joint exercises and more of an energetic practice that culminates in bīja nyāsa and meditation within Sound Yoga.

How often and for how long should I practice Pavanmuktāsana 1?

The complete series takes about 60–90 minutes. You can practice it as a standalone session or use parts of it as a warm-up before a kriyā. Especially when you’re just starting out, it’s a good idea to take your time: it’s better to do seven exercises with full breath and full attention than twenty-one in a rush.

Who is this series intended for?

It’s for just about everyone. It requires no flexibility, no strength, and no prior experience—it’s practiced while sitting or lying down. That’s why it’s an ideal starting point for beginners, older adults, and anyone who wants to get back into movement after an injury or a long break. For experienced yogis, it’s a school of mindfulness.

Where can I learn Pavanmuktāsana 1 with step-by-step instructions?

In our Kundalini yoga classes in the Wachau region, this series is an integral part of our practice. We cover it in detail—including background information and teaching methods—in the RYT 200-hour yoga teacher training program and explore it in greater depth in the RYT 300-hour training program. If you’re already teaching, the YACEP Kundalini Yoga continuing education program is the right choice for you. All formats are also available as online and hybrid courses —and in Austria, you may be eligible for financial support for your training.
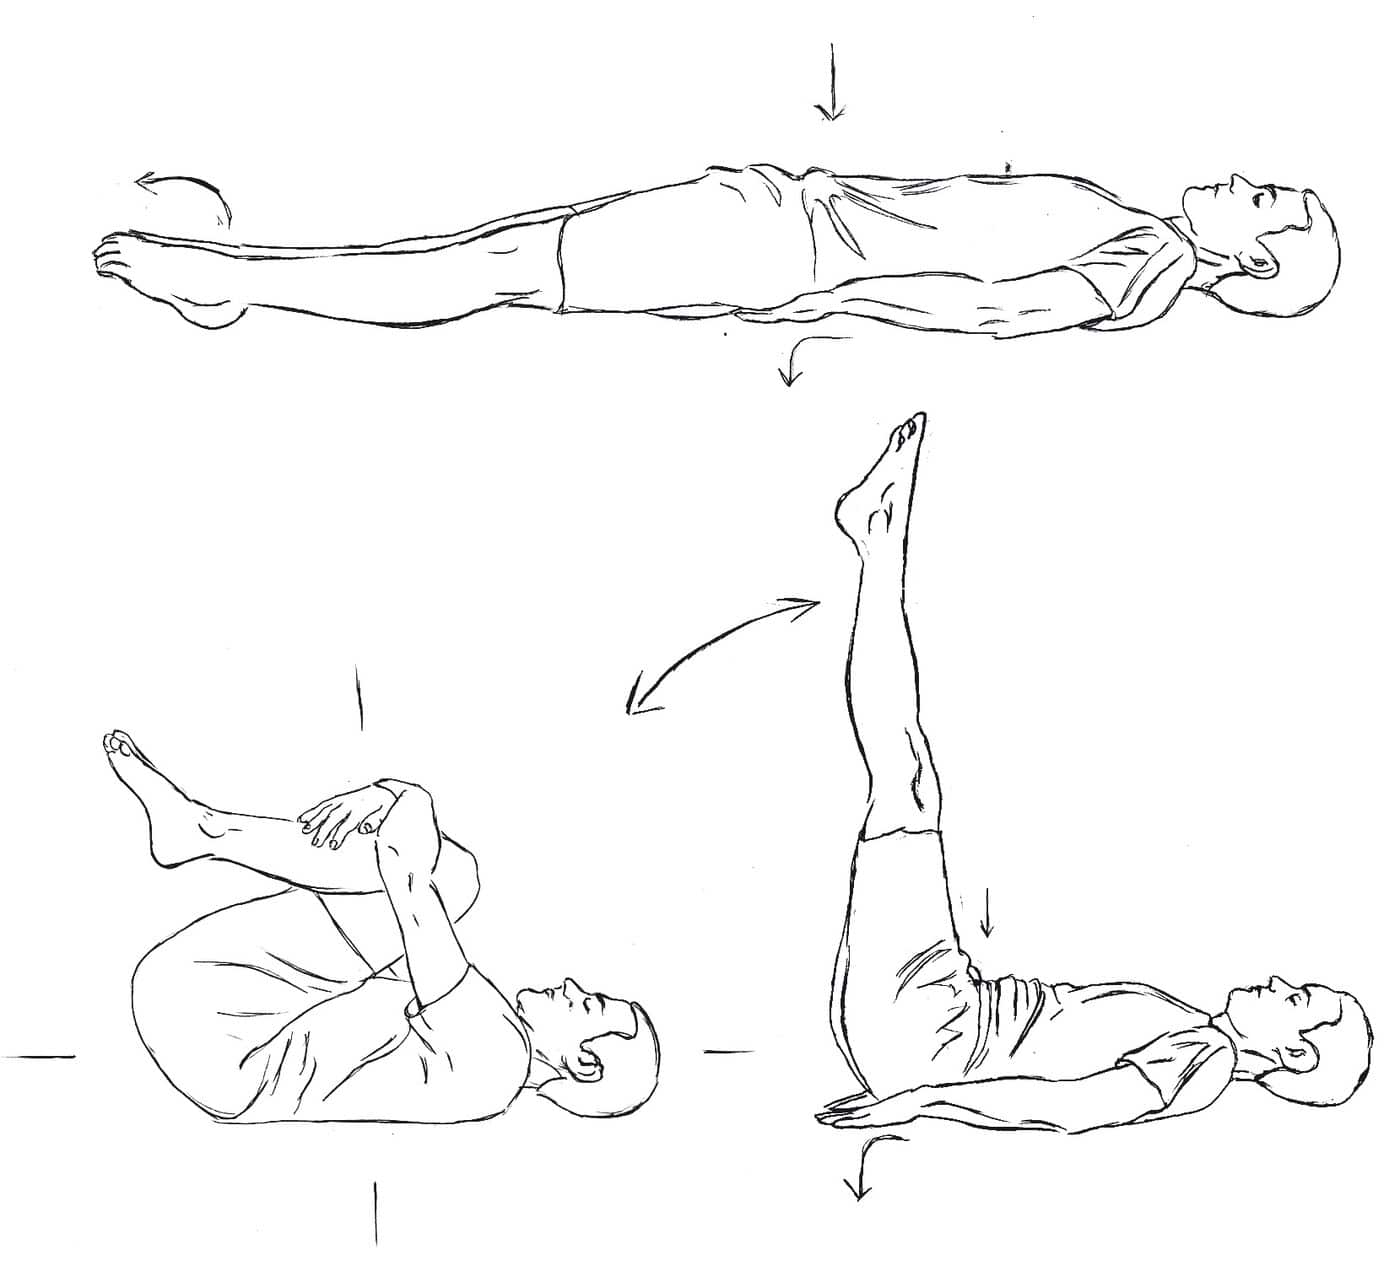
Even more inspiration for you

If you'd like to explore this topic further, feel free to check out our downloads section.
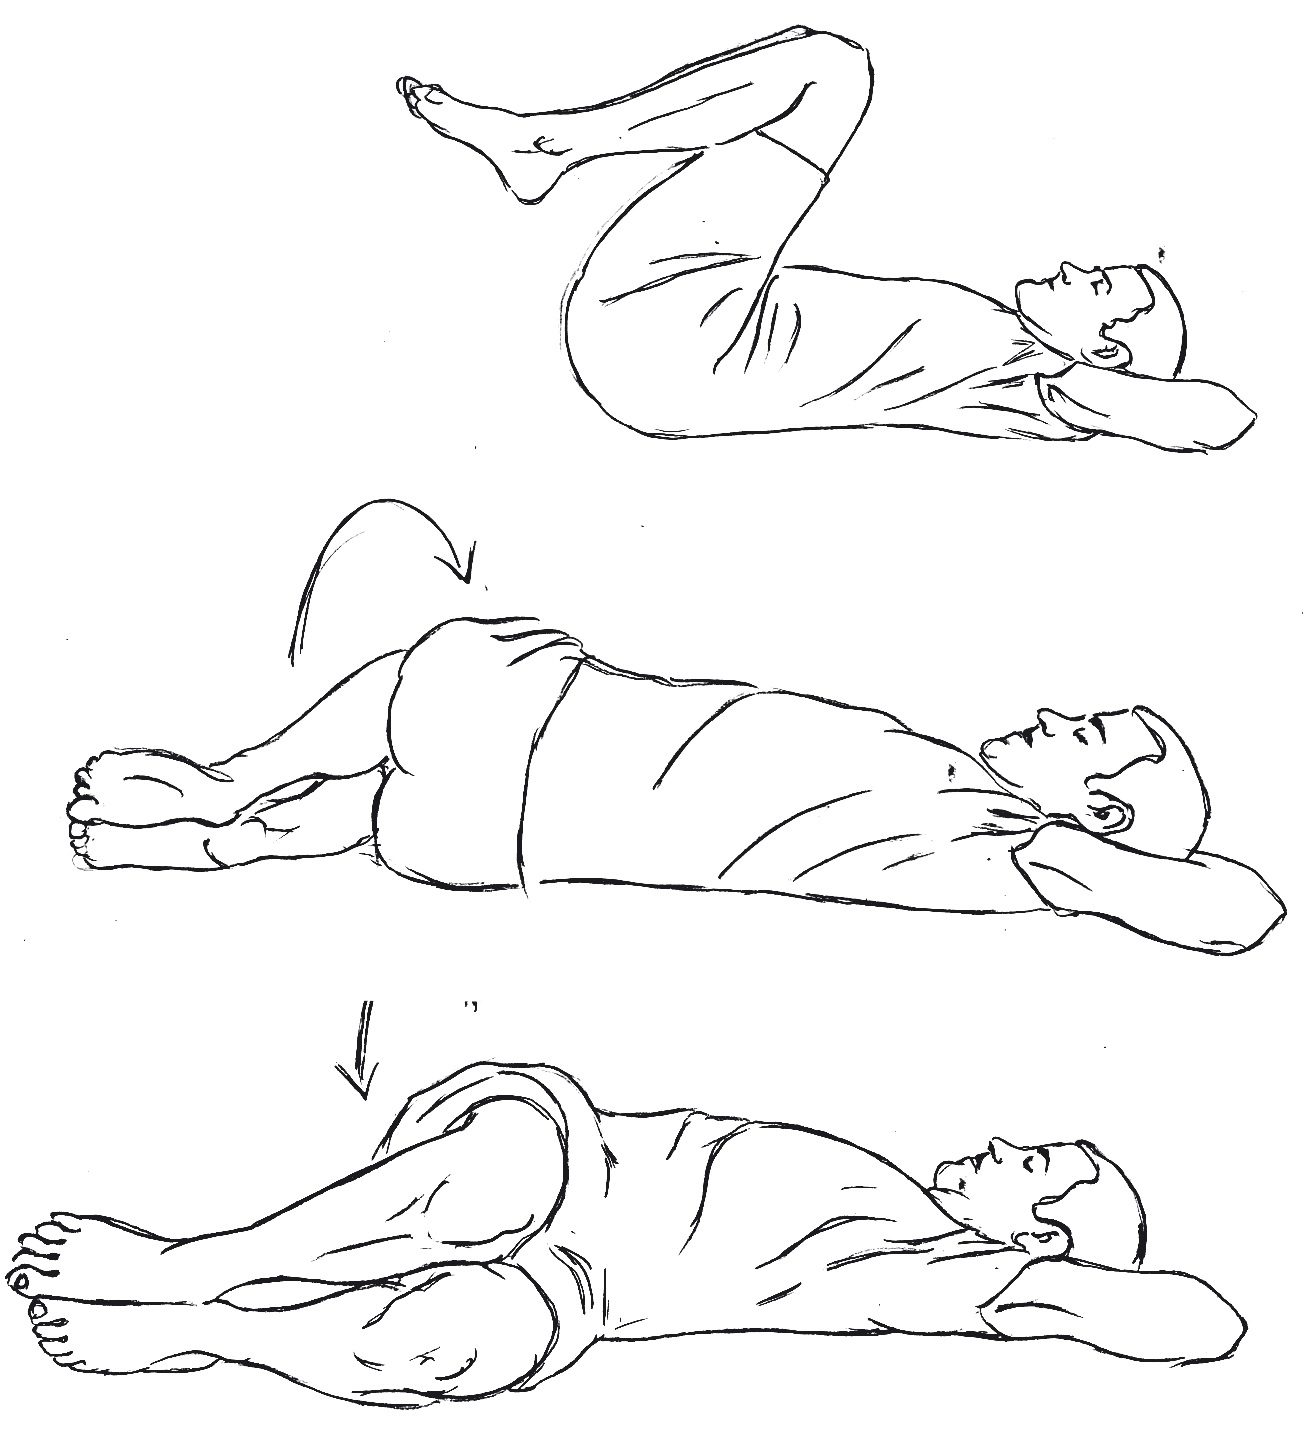
There you'll find a carefully curated selection of Kundalini yoga kriyas, mantras, and other wonderful ideas that I've put together for you.

And if you'd like to know who's behind this school: Who We Are. You can find our books here —such as the book on the chakras in yoga, from which this series is also based.

Bija Nyasa Meditation Lotus Mandala, Matsya Kundalini Yoga Academy Vienna

Download the illustrated sequence

The complete Pavanmuktāsana Joint Series as a hand-illustrated PDF, free to print and practise with: Download the Joint Series (PDF). More sequences are in our download library.